- Author admin
- Creation date
How To Install Send Mail With Delay Add-on
https://store.ecarter.co/blogs/how-to-install-addon/
Configuration:
Let's Check How the Addon Settings Works:
- Go to the general tab.
- Items for menu: You can directly access the Email delay log page in the marketing menu through this link.

- Switch on the settings tab.
- Enable Delay: This Setting enables email messages to be sent with a delay.
- Enable Admin Panel Delay: This setting enables delaying sent emails related to events in the admin panel.
- Admin Panel Events: Here you can select the specific events in the admin panel for which you want to email notifications. The listed events include Profile Create/Update and Order Status Change.
- Enable Customer panel Delay: This setting enables delaying sent emails related to events in the customer panel.
- Customer panel Events: Here you can select the specific events in the customer panel for which you want to email notifications. The listed events include Order Create, and Profile Create/Update.
- Number of days to clear the log: Specifies the number of days after which log entries should be cleared.

- Emails to send per cron command: Enter the number of emails to be sent per cron command execution.
- Cron Password: Enter the cron password.
- The Cron Link to send emails and delete sent email logs: provides the cron command/link for sending and deleting sent email logs.

How to Work this Addon on the Admin Panel:
- Select admin panel events in settings.

- Go to the Customers >> Customers menu.
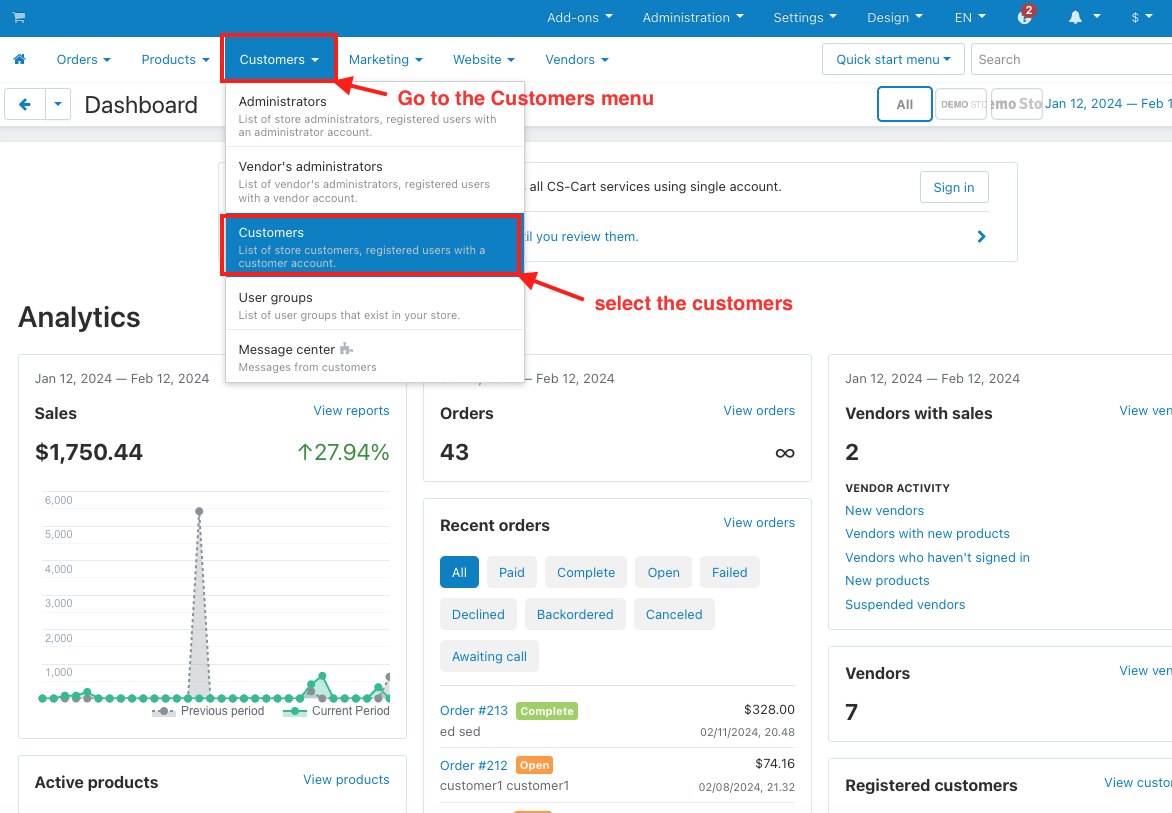
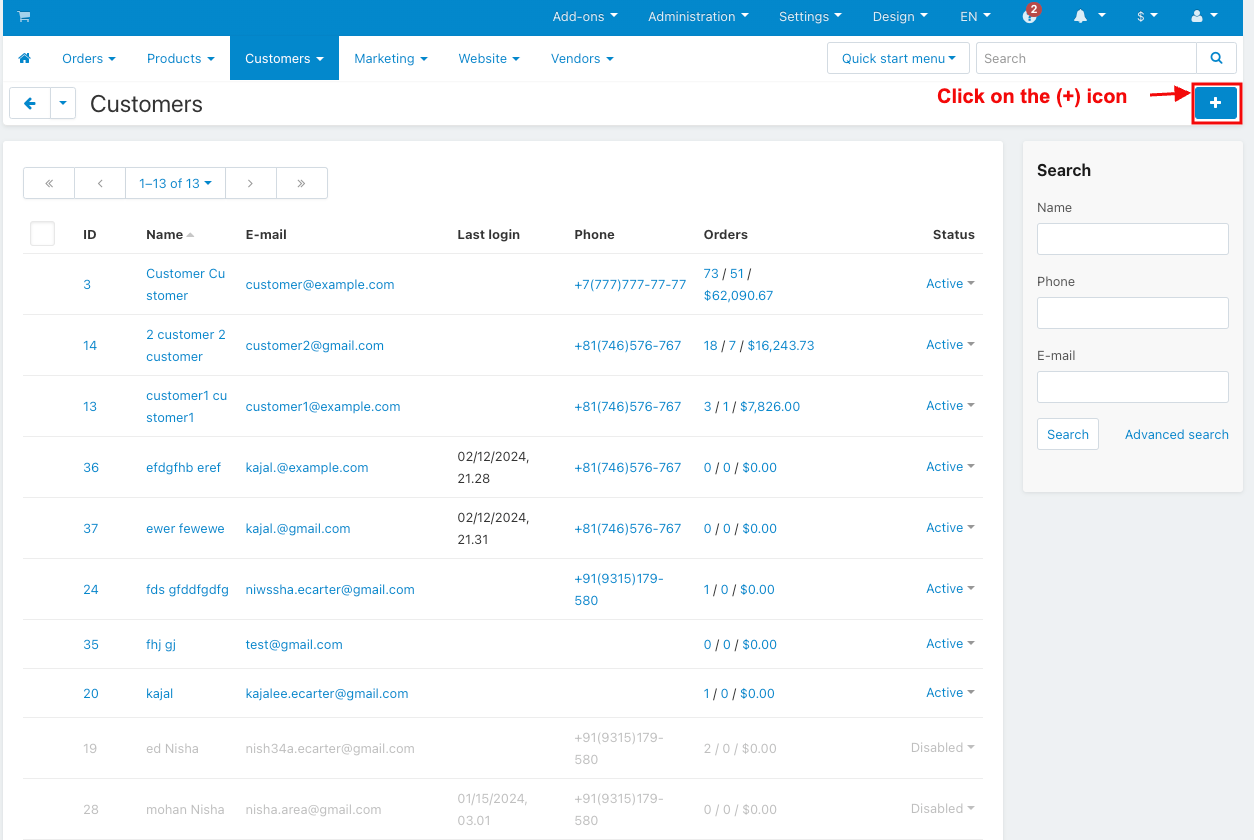
- Click on the (+) icon in the top right corner to create the new profile.
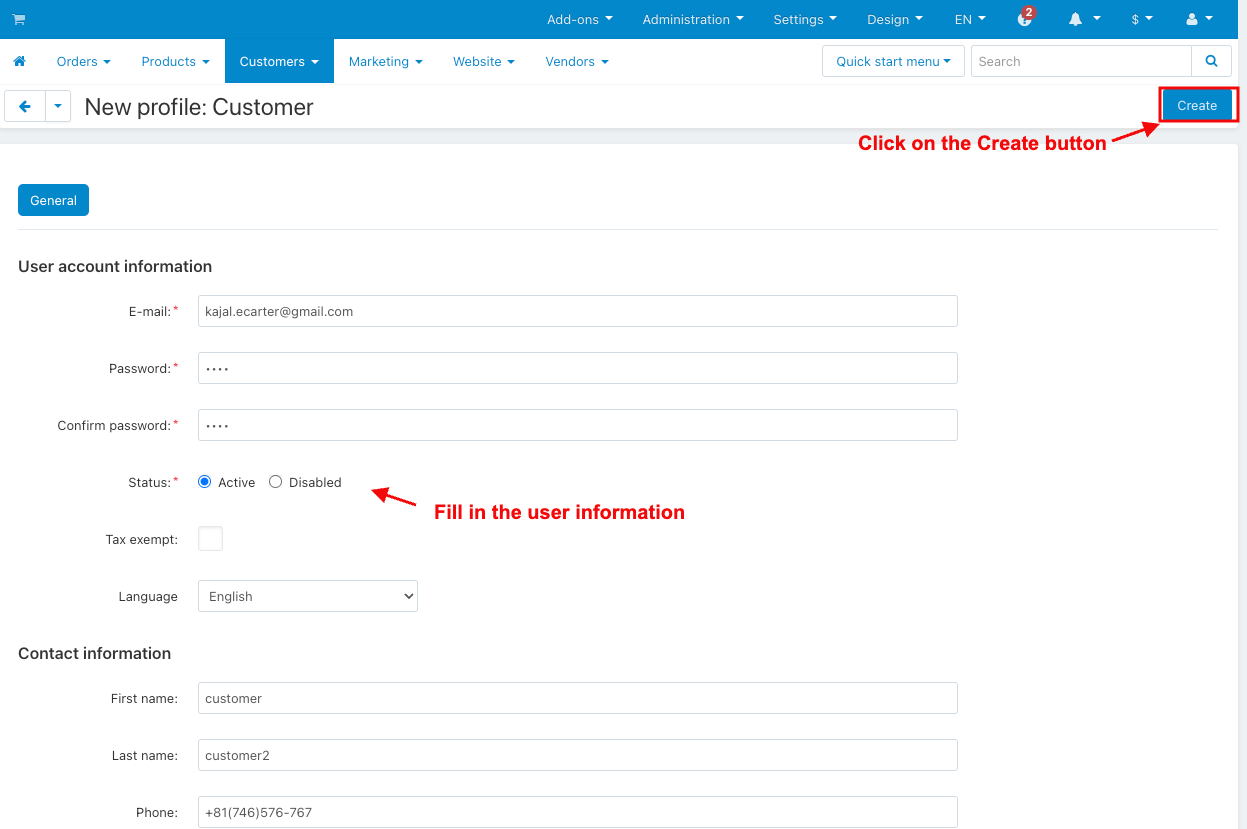
- Fill in the user information.
- Click on the Create button.
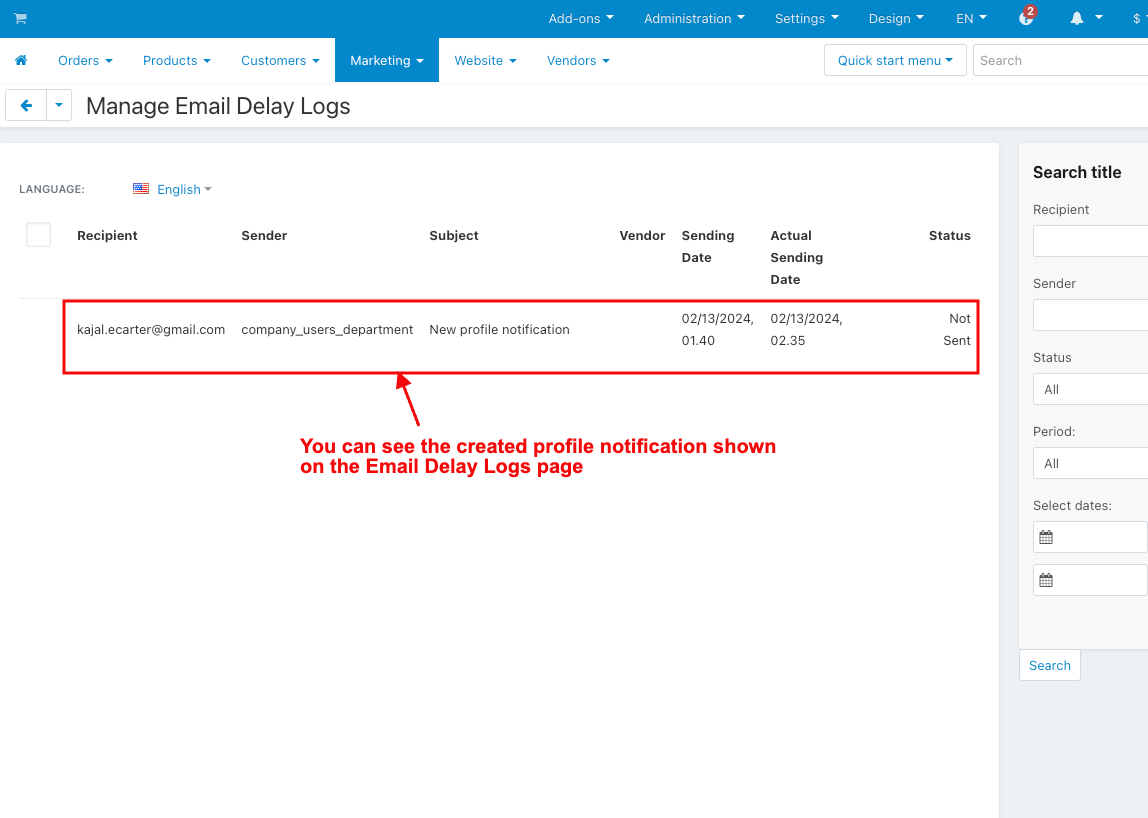
- You can see the created profile notification shown on the Email Delay Logs page.
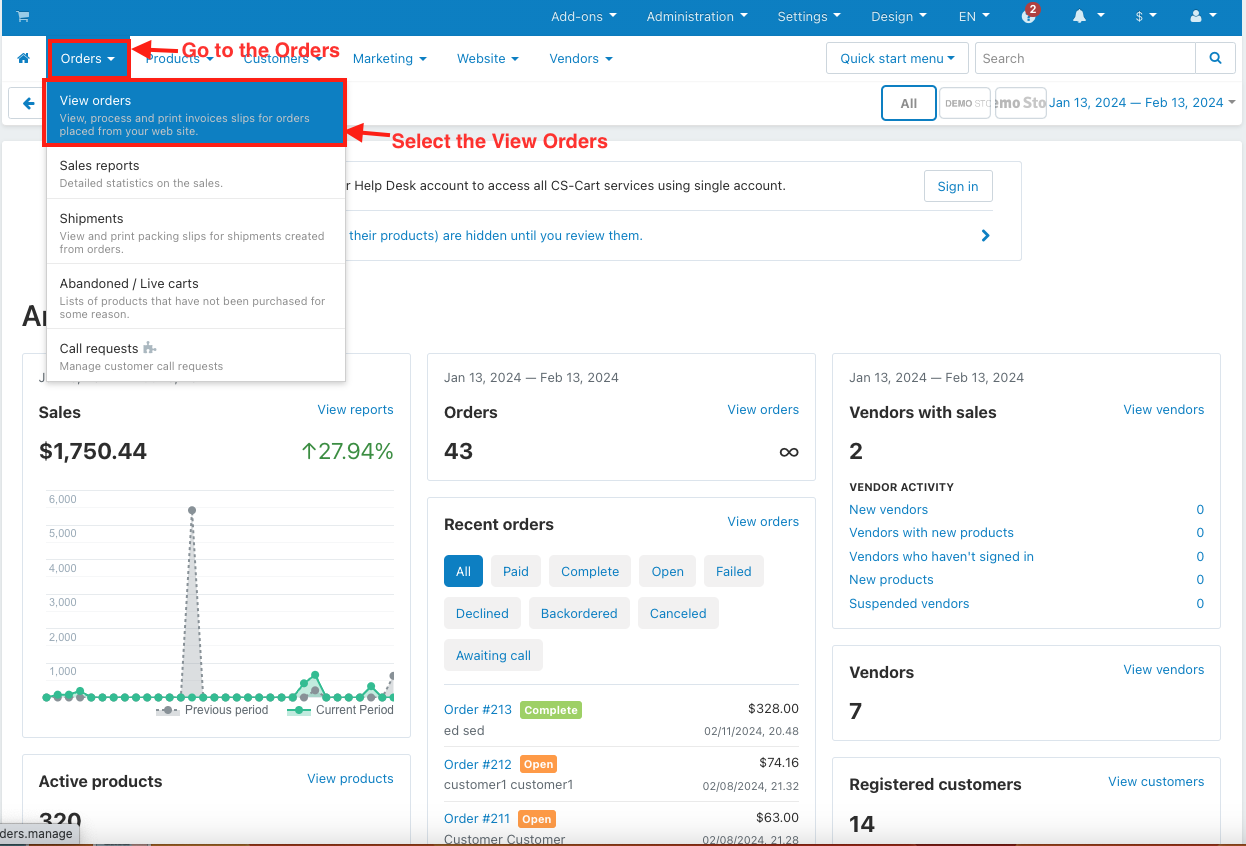
- Go to the Orders.
- Select the View Orders.
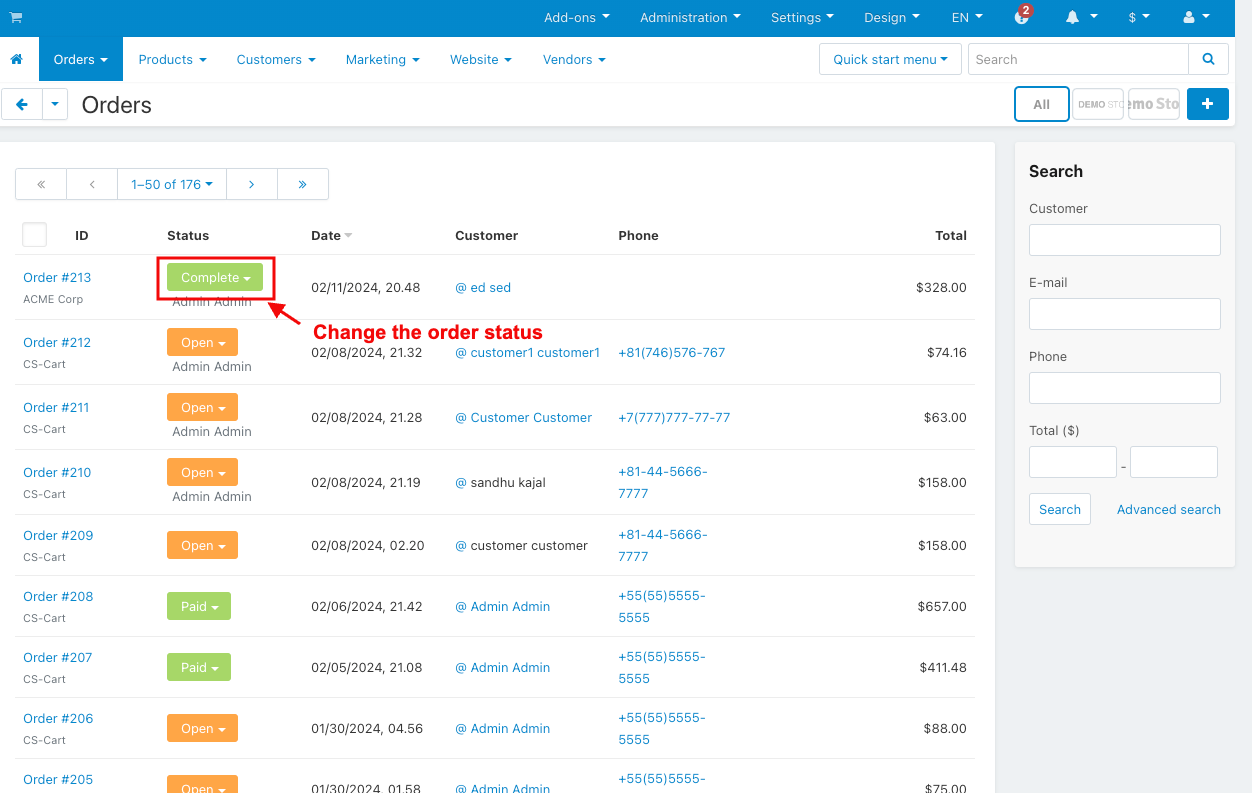
- Change the order status.
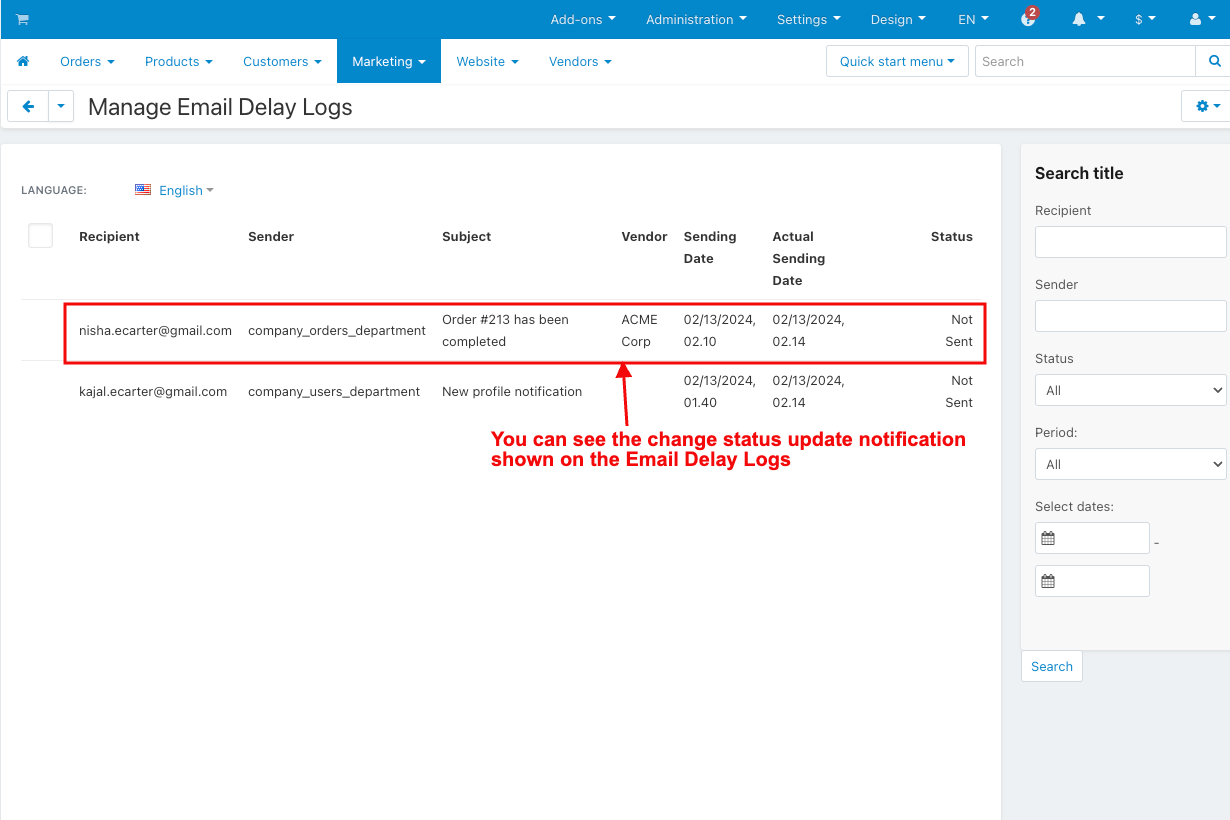
- You can see the change status update notification shown on the Email Delay Logs.
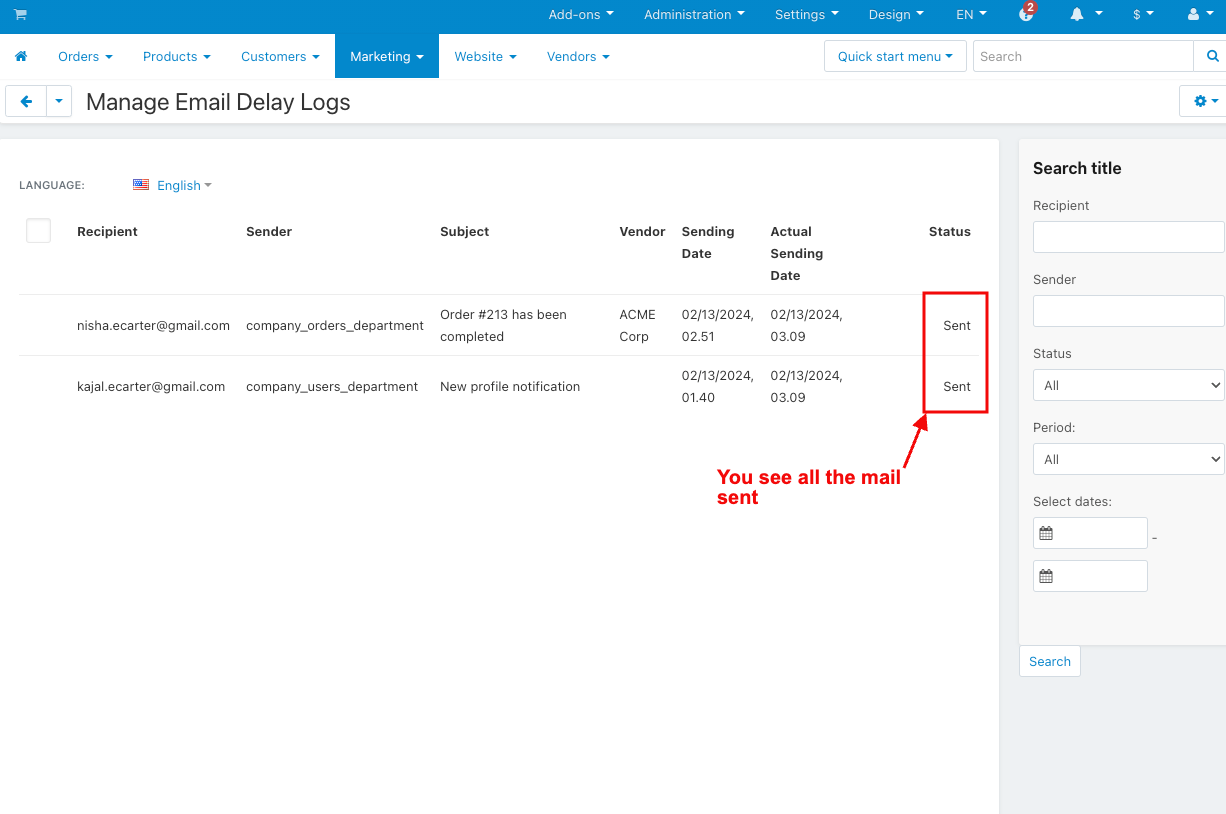
- Hit the cron URL for the sent email.

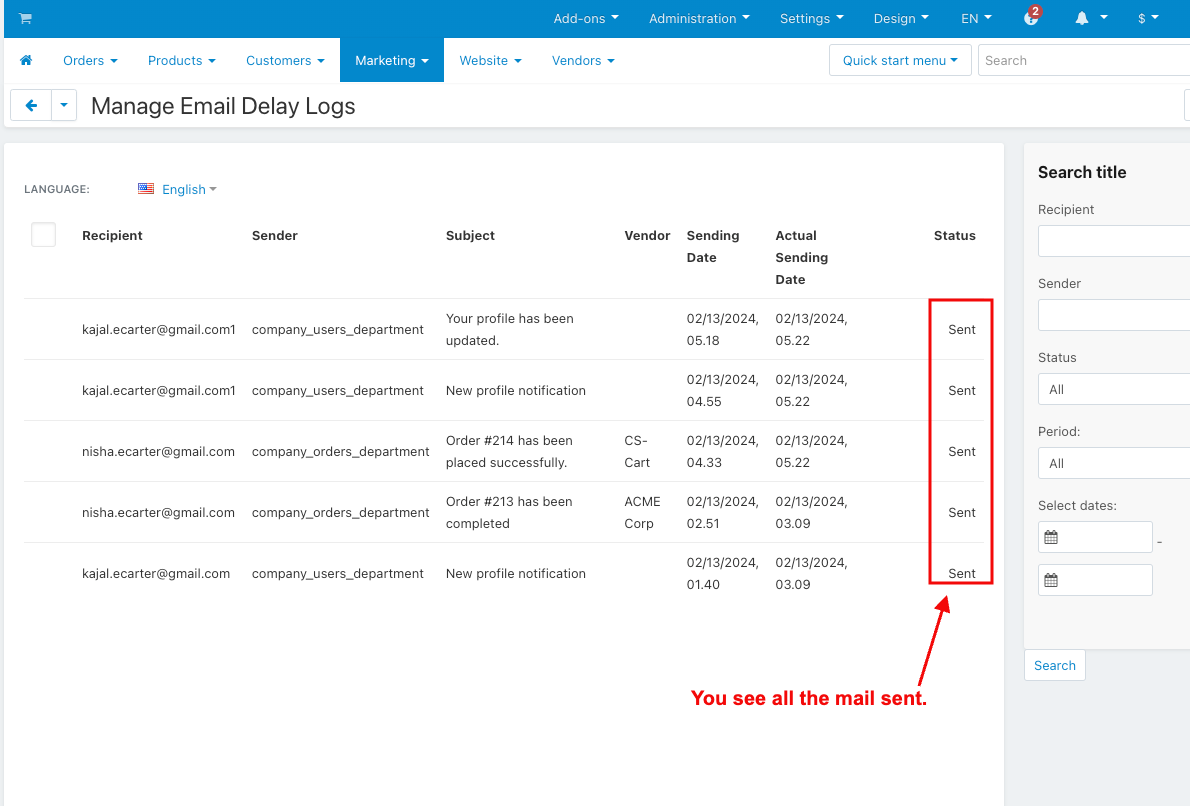
- You see all the mail sent.
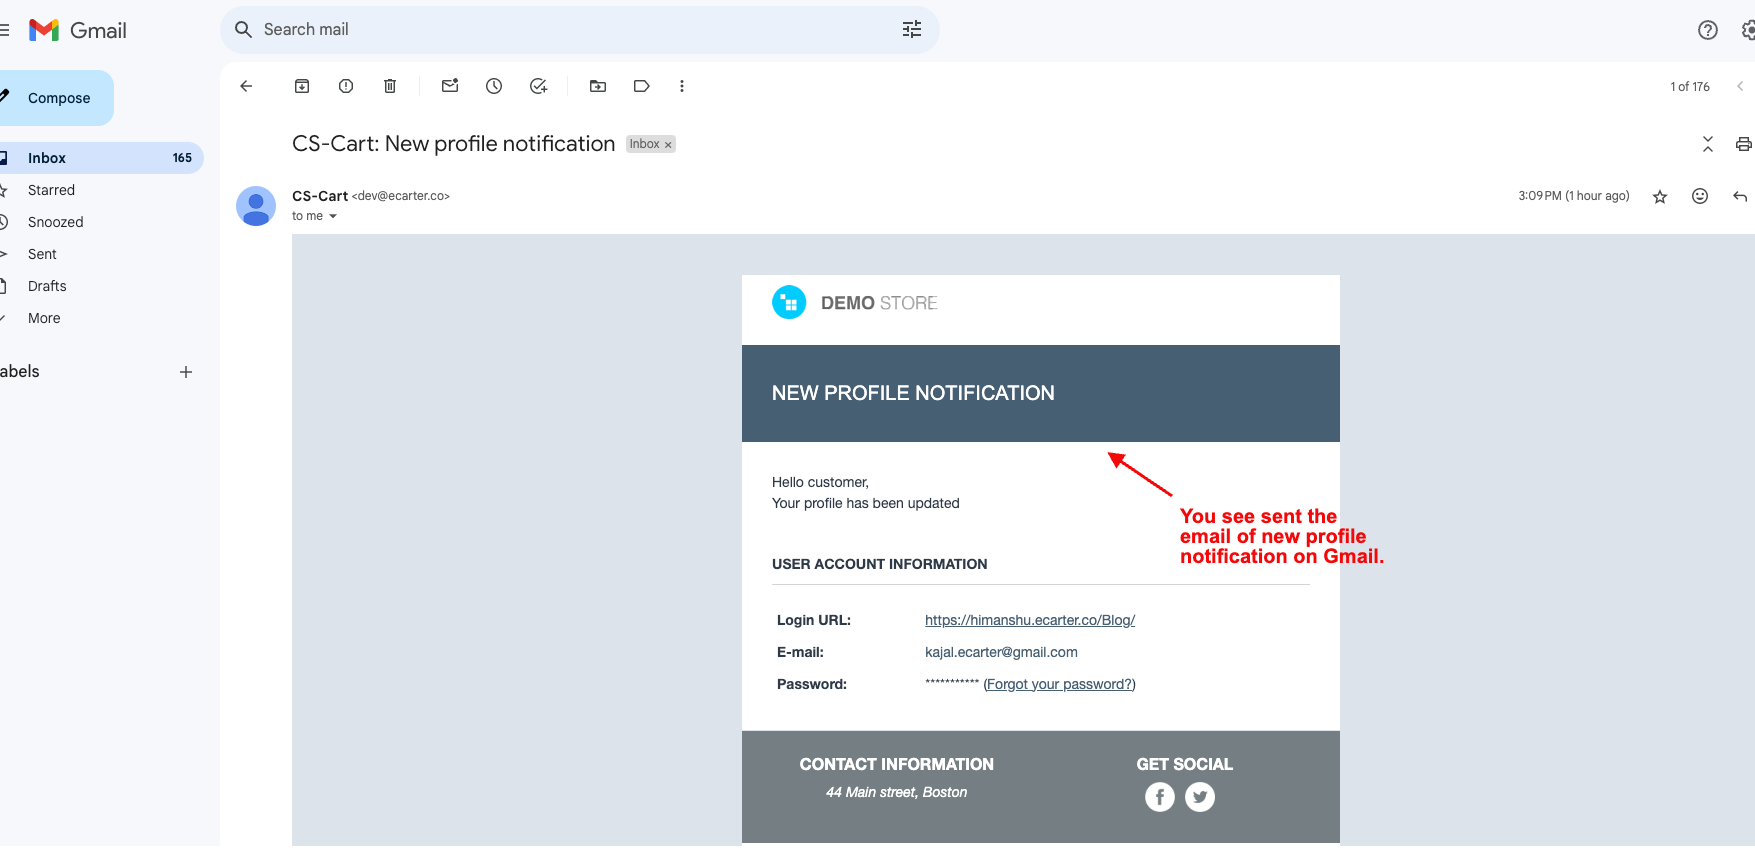
- You see the sent email of the new profile notification on Gmail.
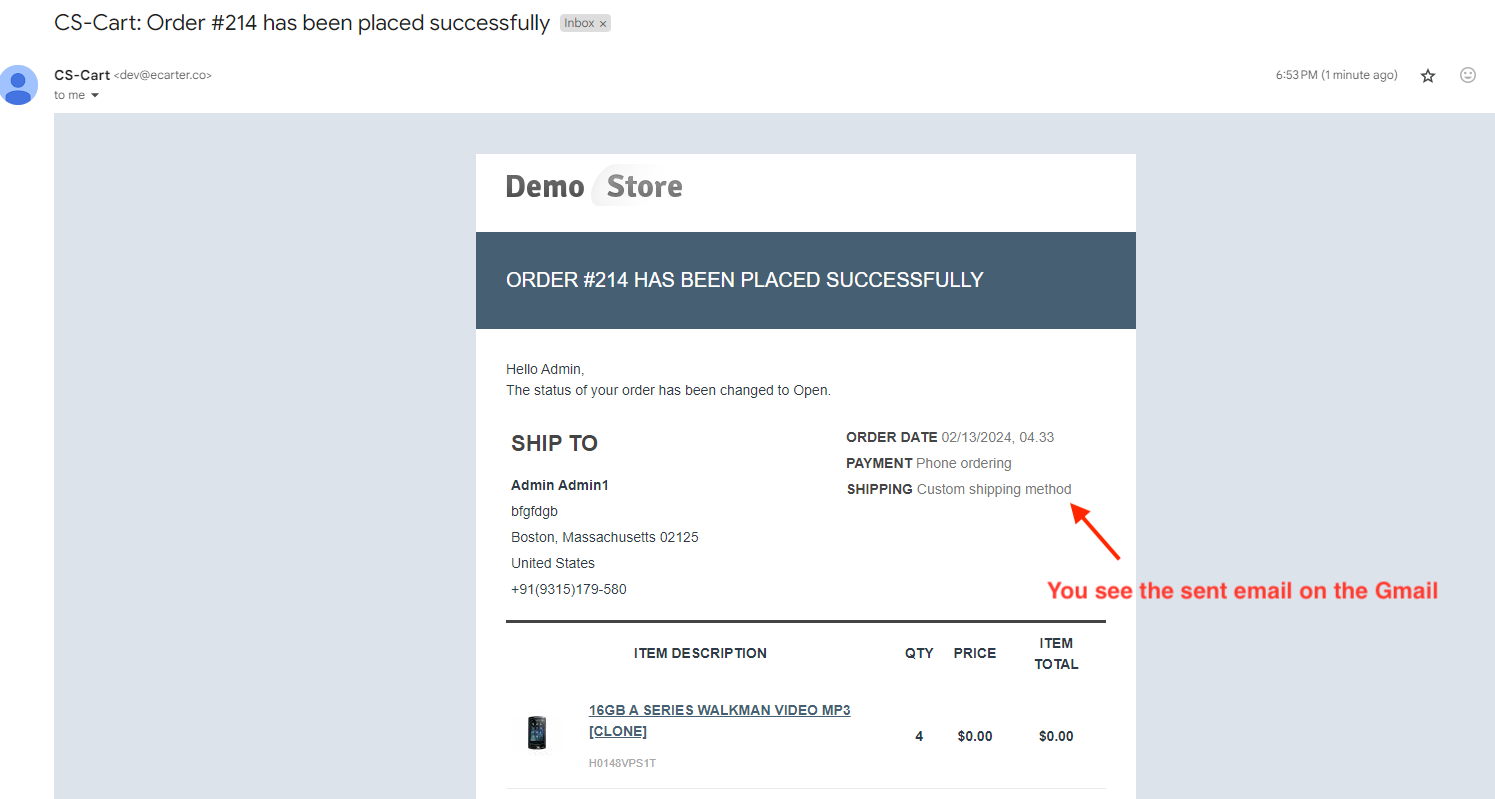
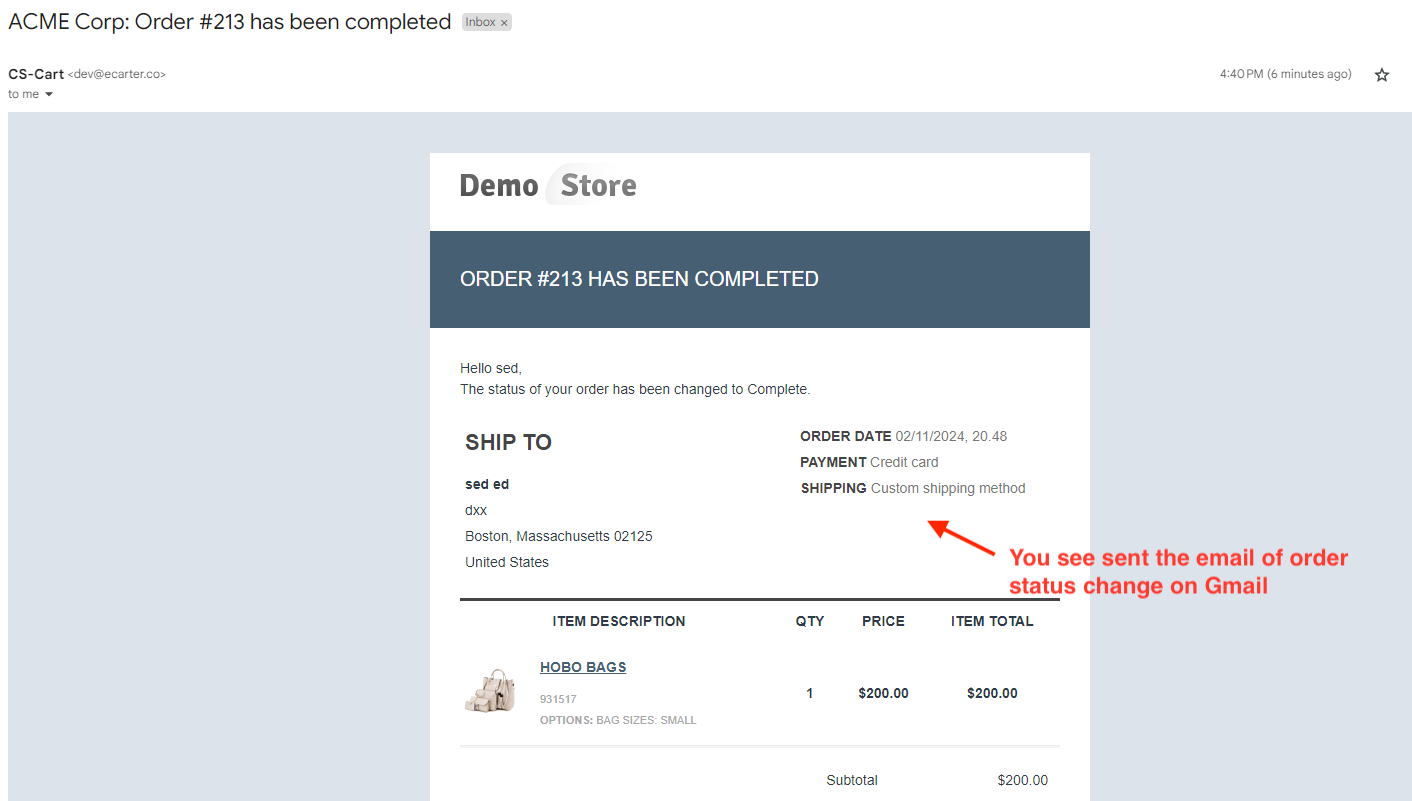
- You see the sent email of the order status change on Gmail.
How to Work this Addon on the Customer Panel:
- Select customer panel events in settings.

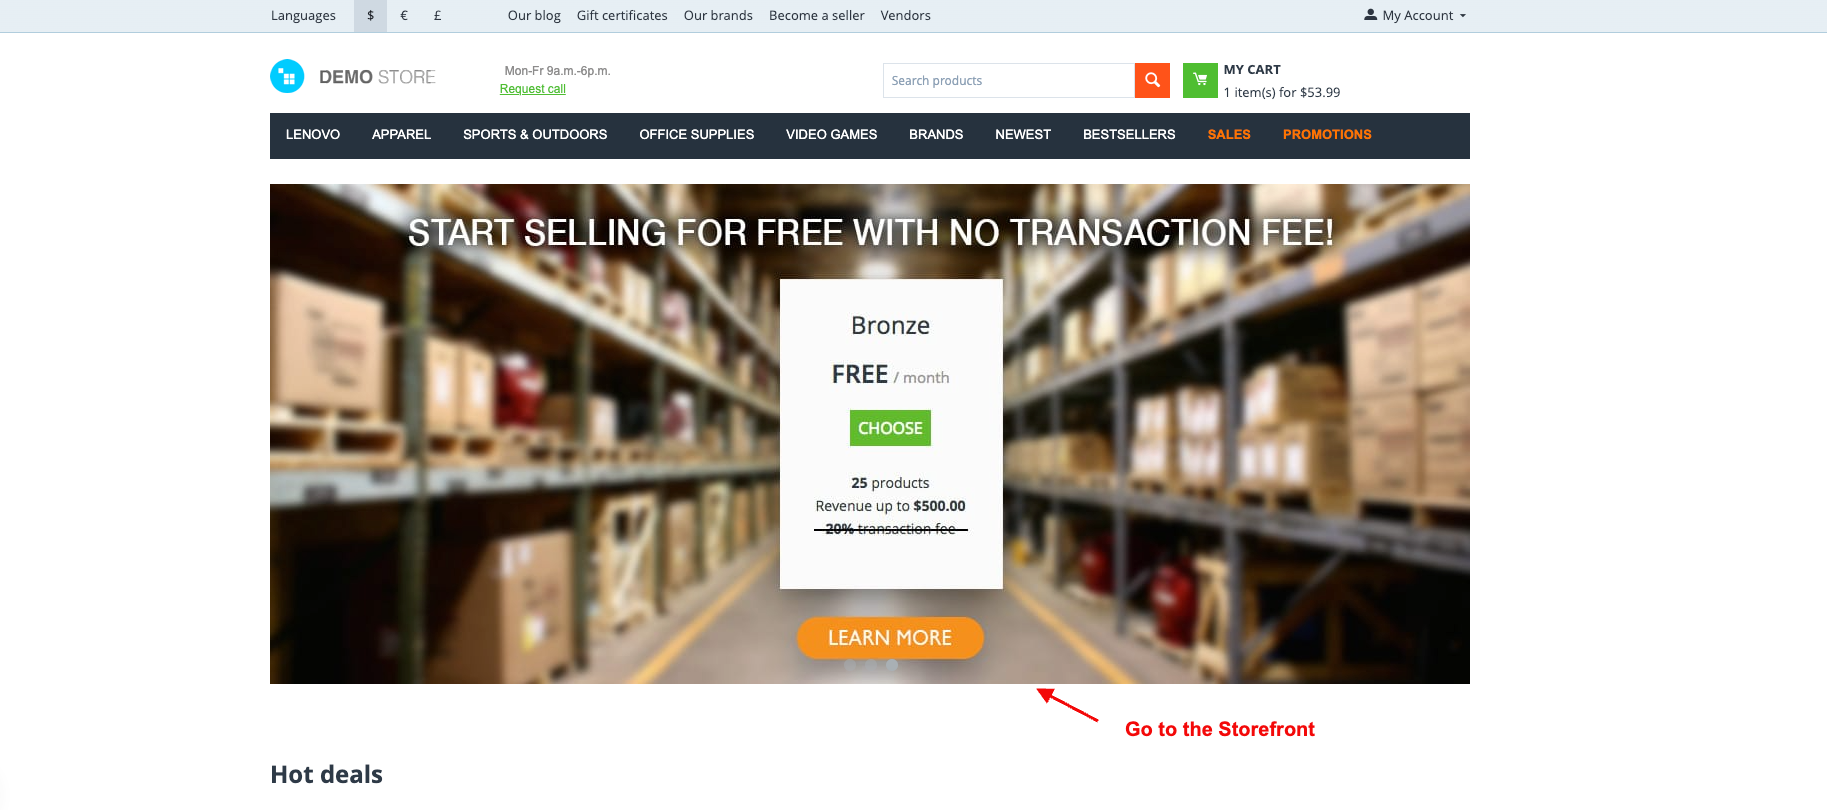
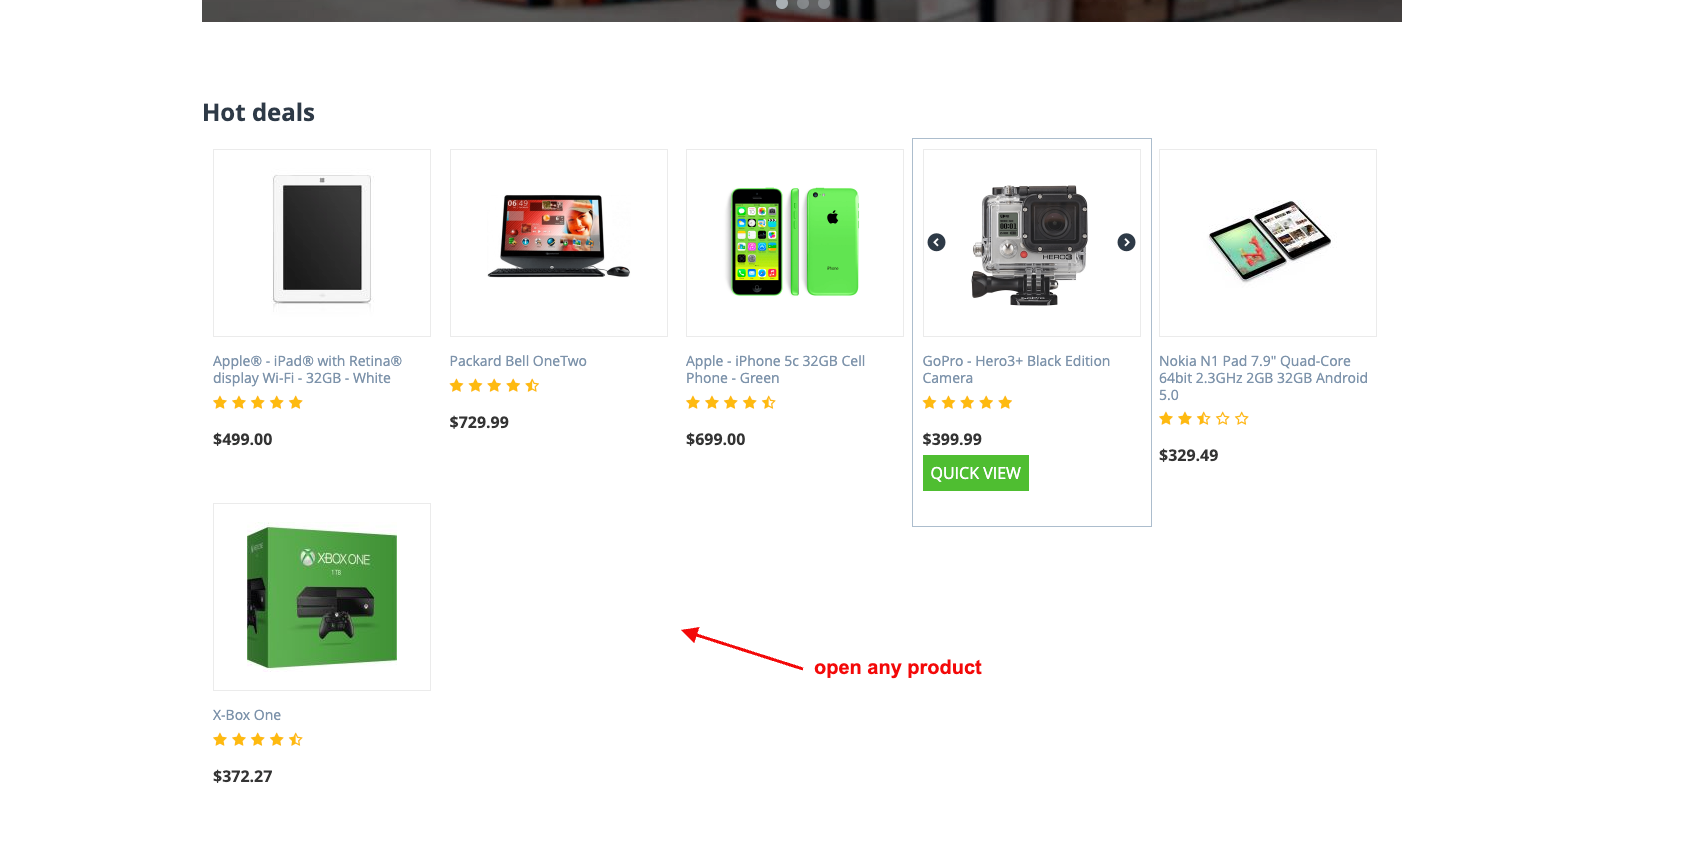
- Go to the Storefront.
- Open any product.
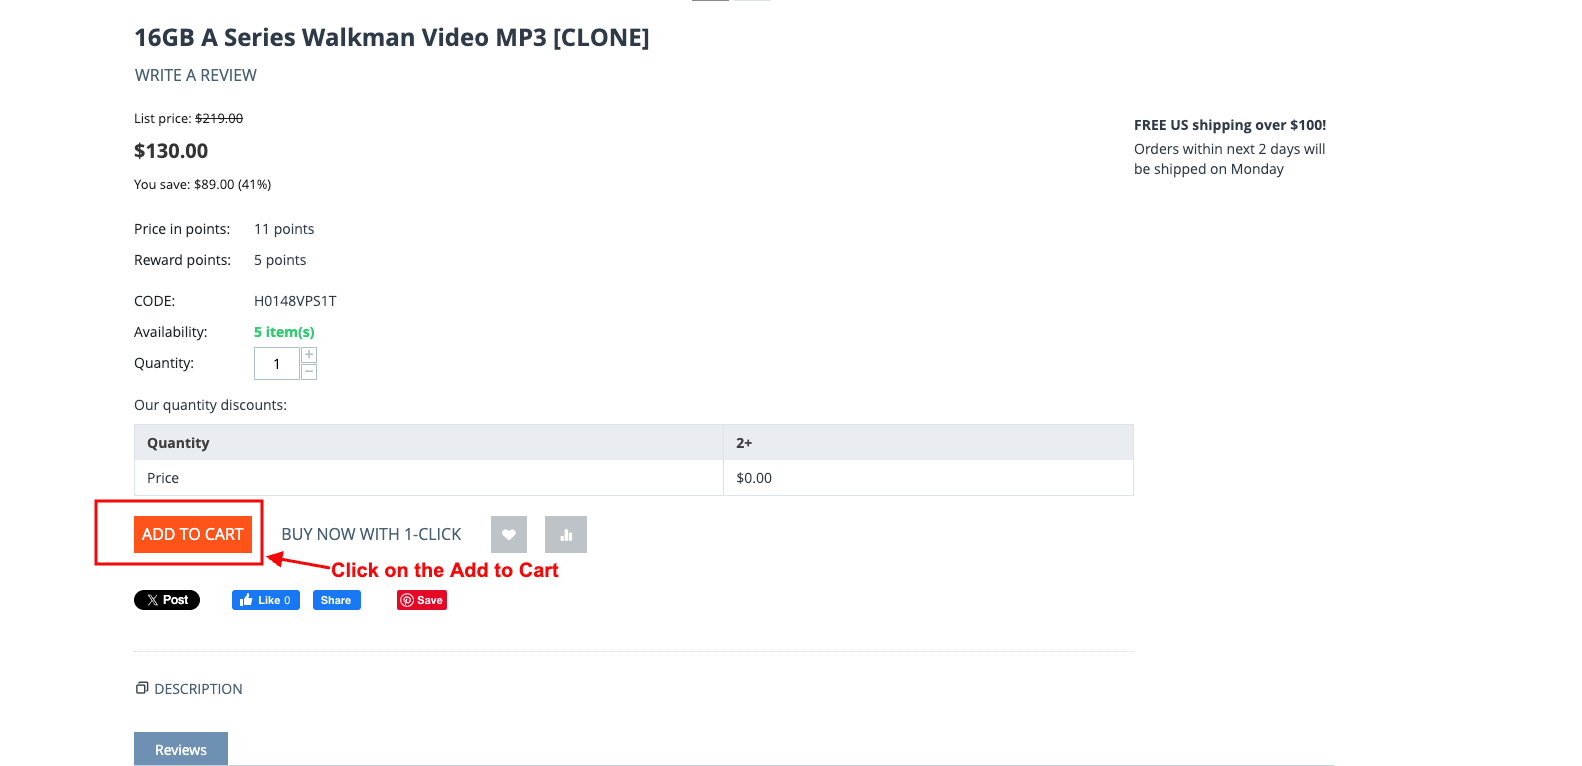
- Click on the Add to Cart.
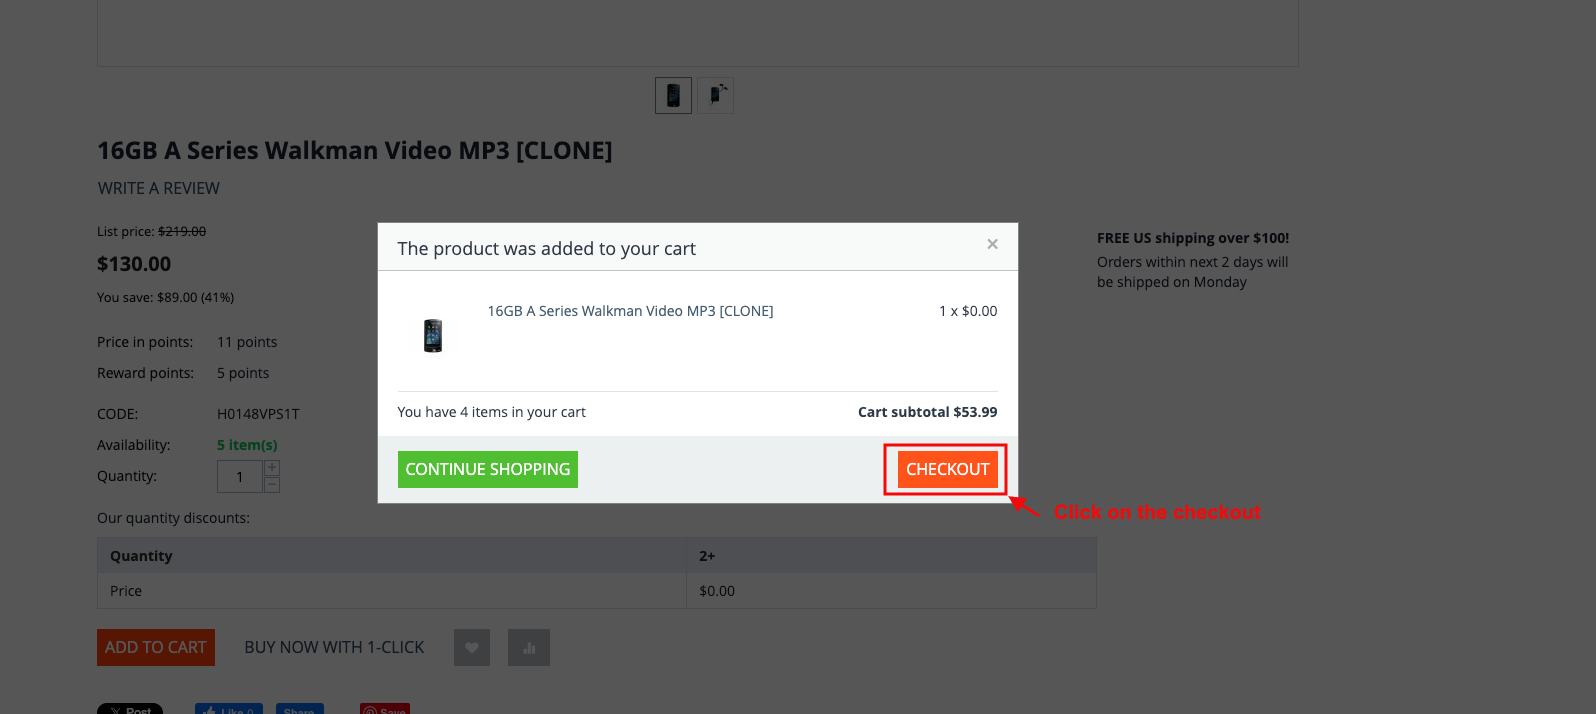
- Click on the checkout.
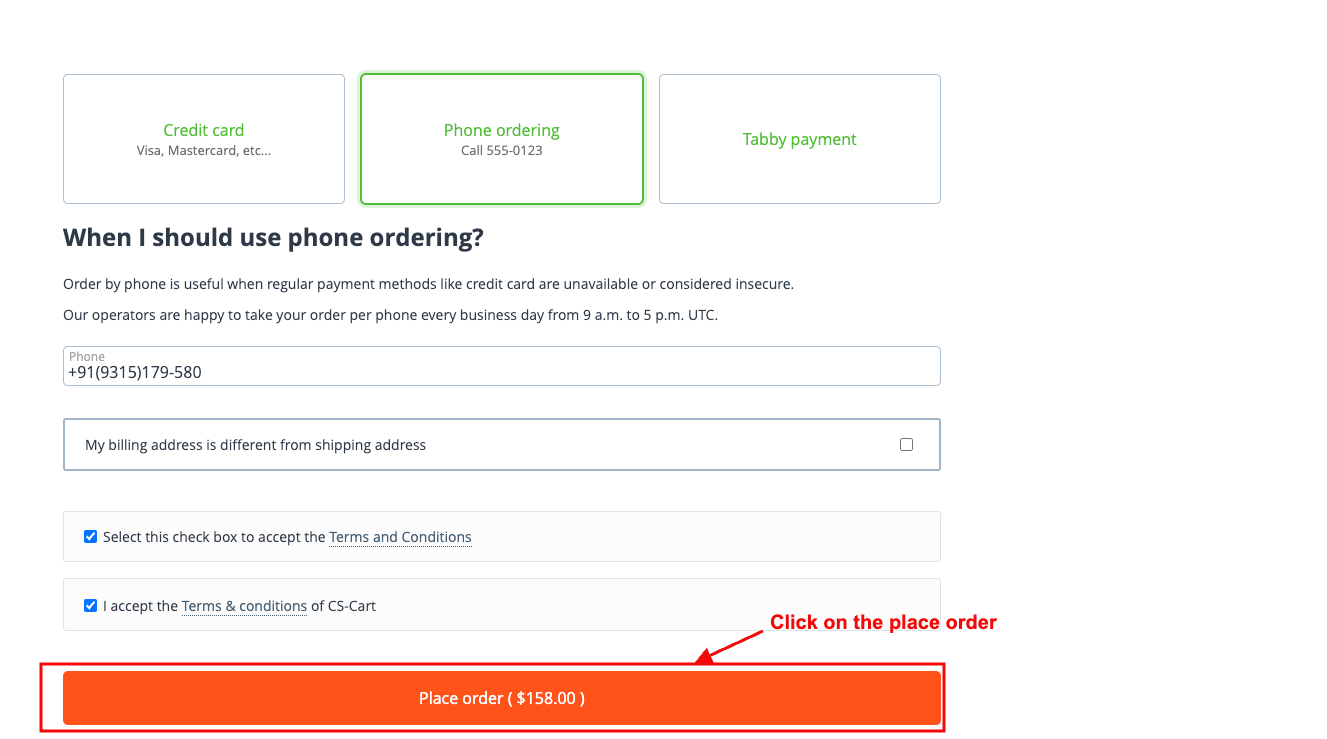
- Click on the place order.
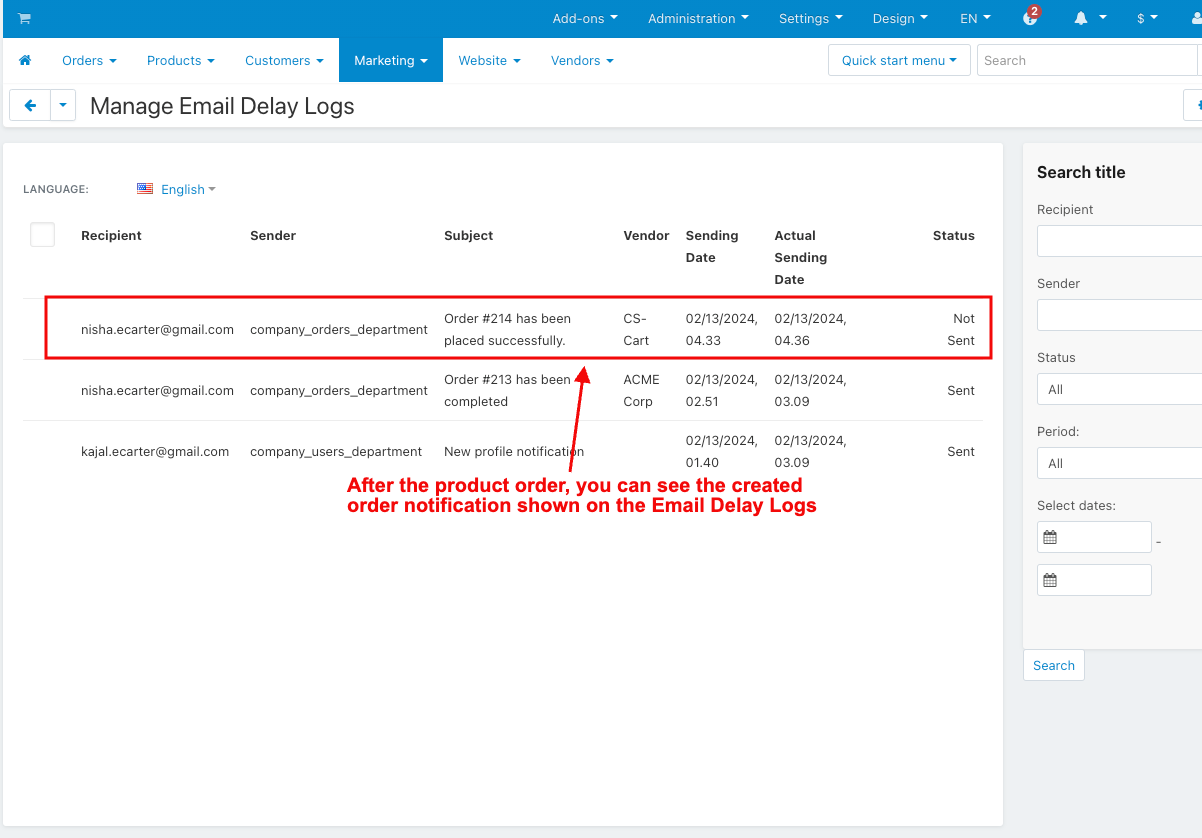
- After the product order, you can see the created order notification shown on the Email Delay Logs.
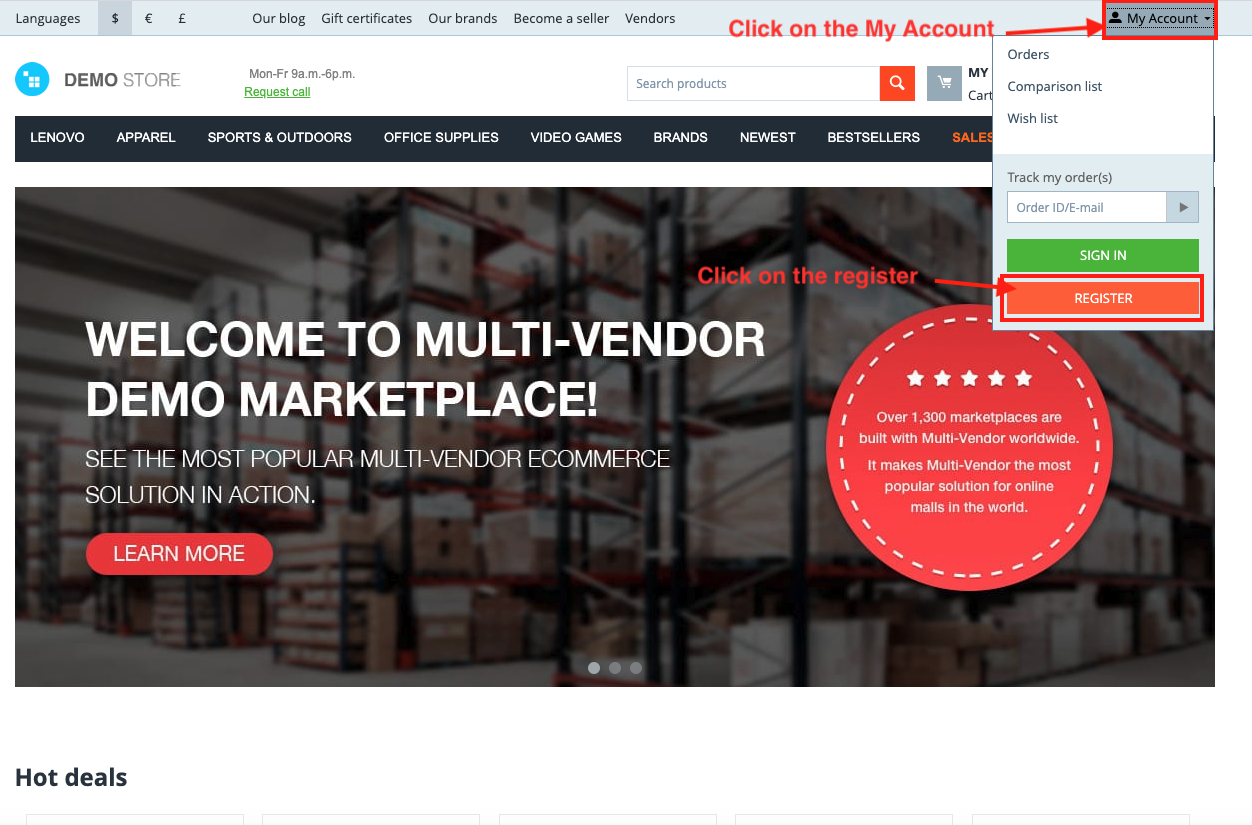
- Click on the My Account to create an account.
- Click on the register.
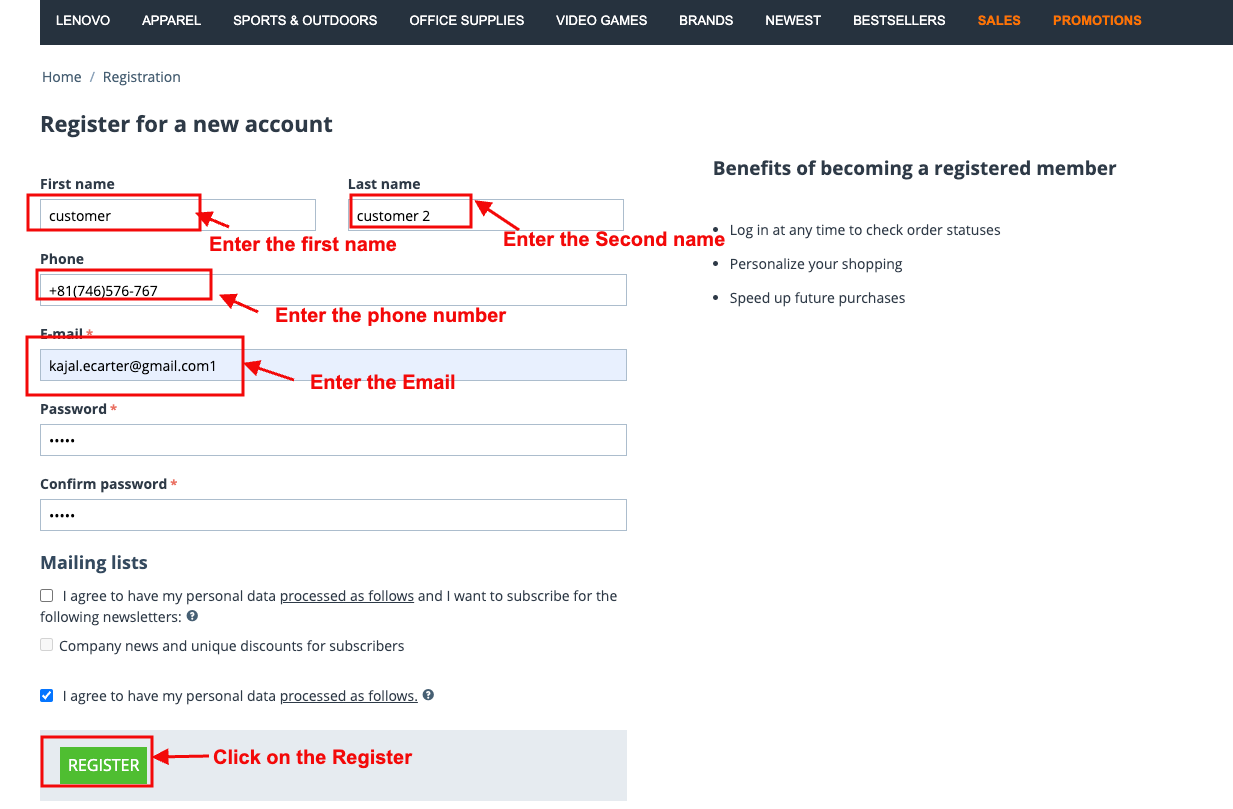
- Enter the first name.
- Enter the second name.
- Enter the phone number.
- Enter the email.
- Click on the Register button.
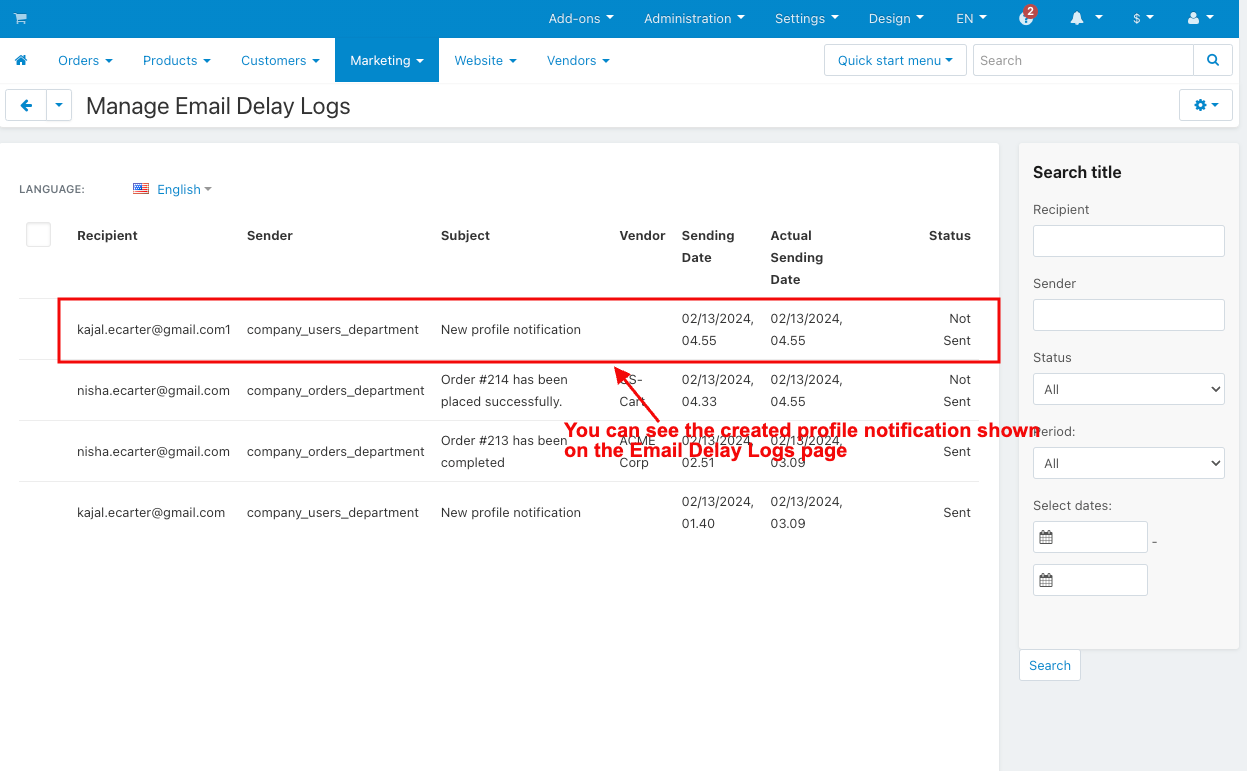
- You can see the created profile notification shown on the Email Delay Logs page.
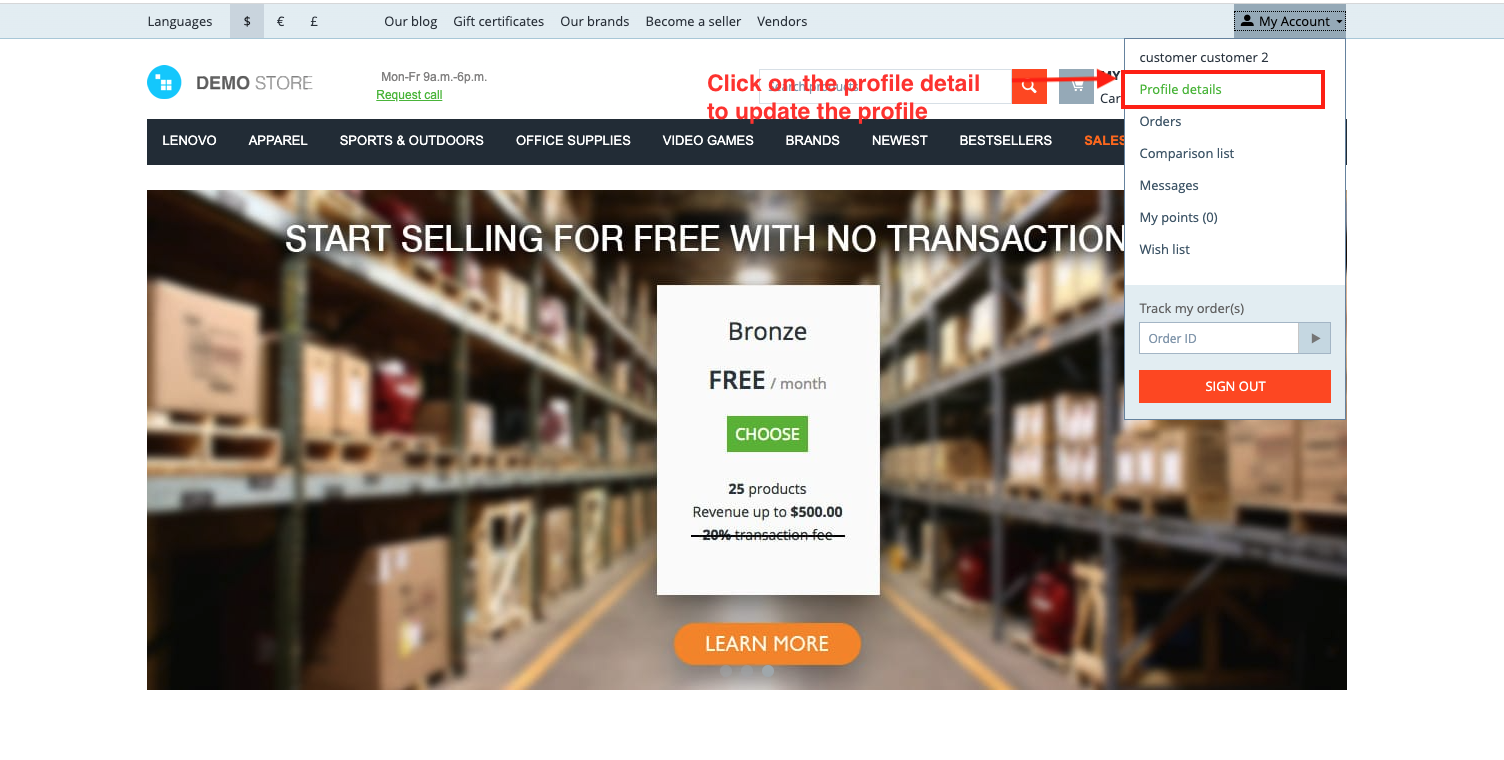
- Click on the profile detail to update the profile.
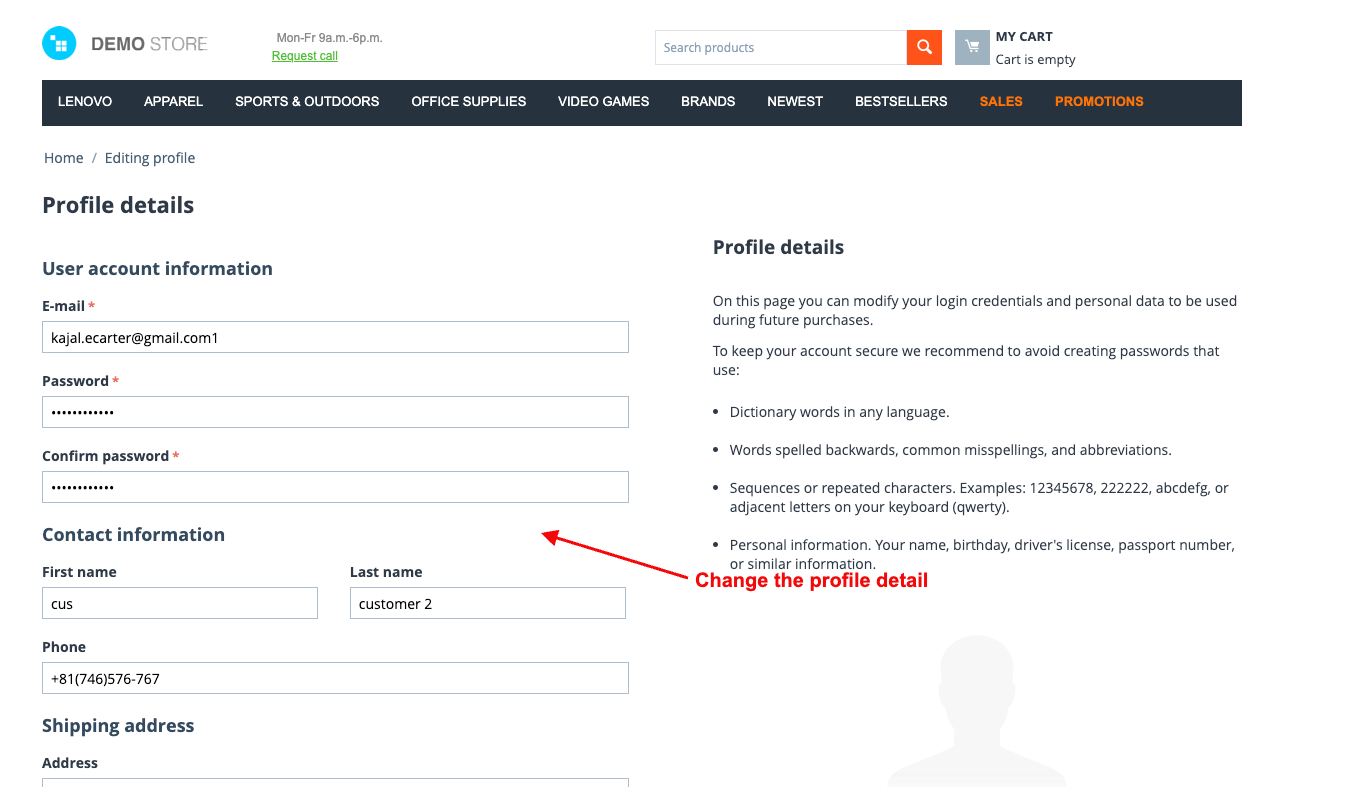
- Change the profile detail.
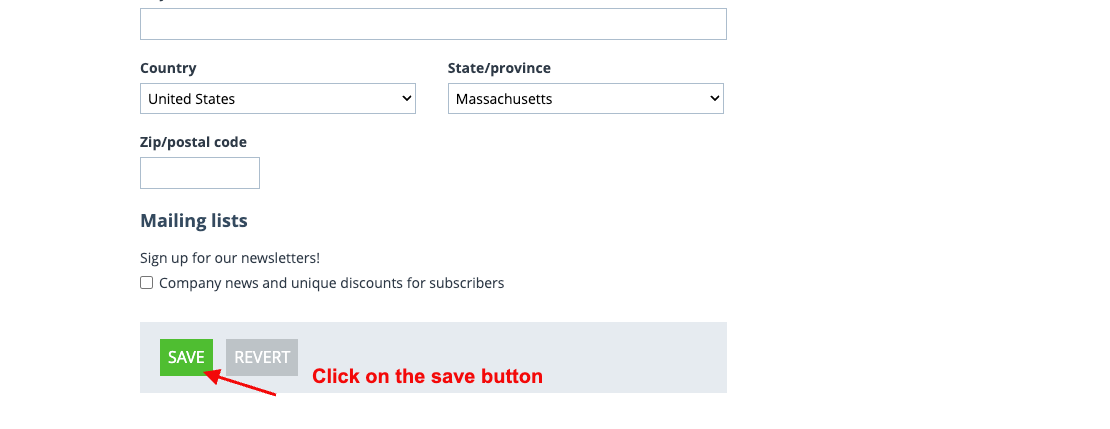
- Click on the save button.
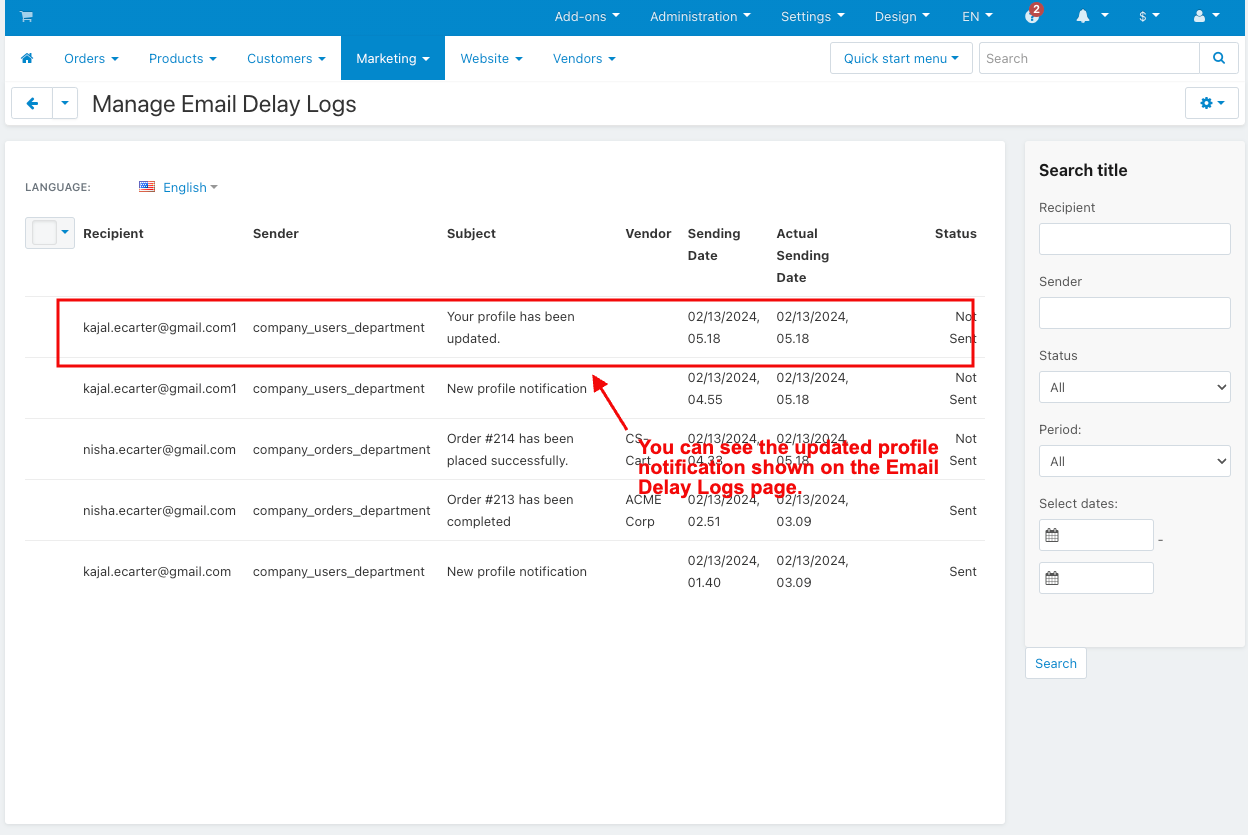
- You can see the updated profile notification shown on the Email Delay Logs page.
- Hit the cron URL for the sent email.
- You see all the mail sent.
- You see the sent email on Gmail.
