- Author admin
- Creation date
-
Note
Starting May 2025, free add-ons will only be available to those who have purchased the Alexbranding add-on package, Or purchased more than 5 add-ons (+50$) from other developers, or uploaded at least 2 paid add-ons that are not published on the forum.
You can Get Full access & download all Cs-cart addons & Themes With Premium Upgrades HERE
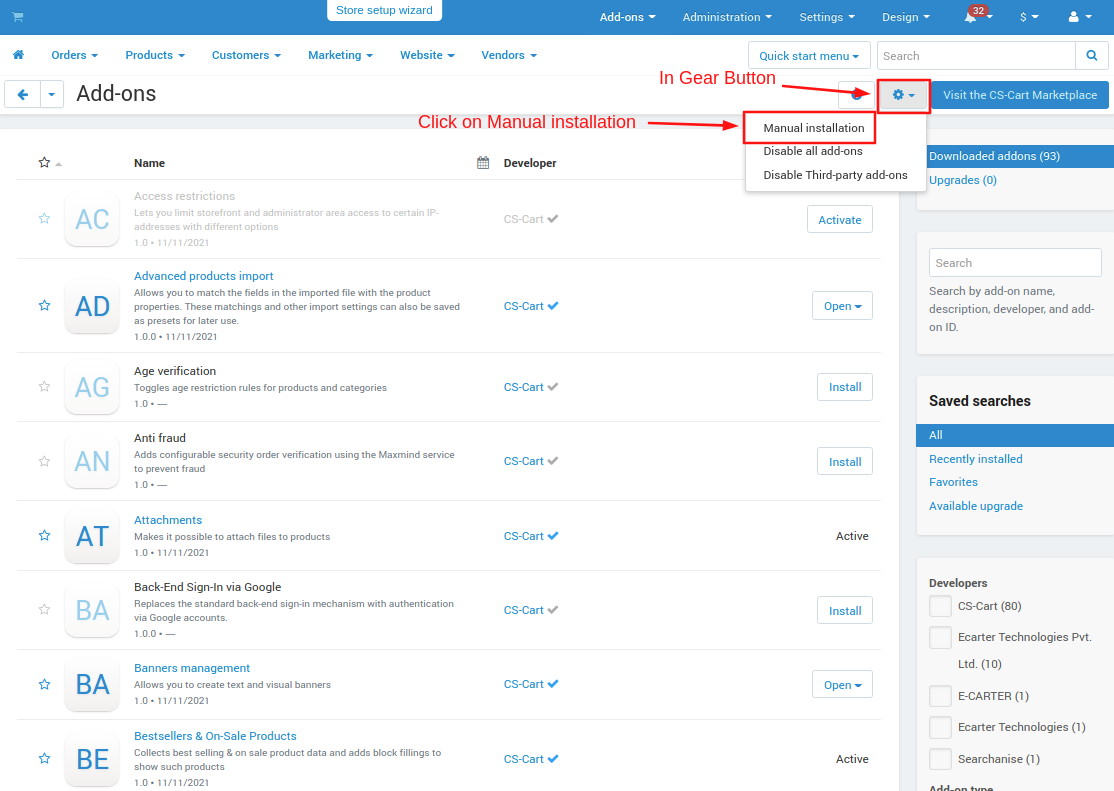
Addon-Installation: For the installation process you need to go to Add-ons > Manage add-ons > then click on the gear button and choose manual installation then there is a pop-up of manual installation that is open and you can choose an option to upload addon zip and install the addon.

How to Upload Zip file
1. Click on setting>Manual installation a pop window will be displayed.
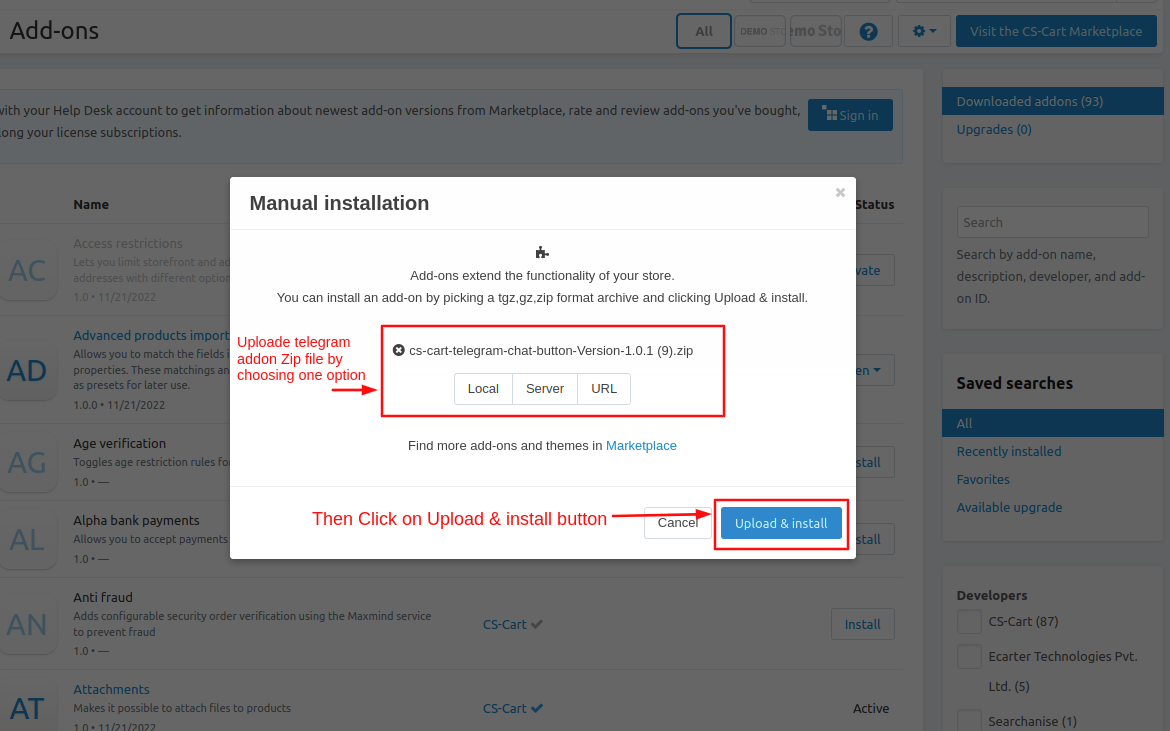
you can install an add-on by picking a tgz,gz, or zip format archive and clicking Upload & install.
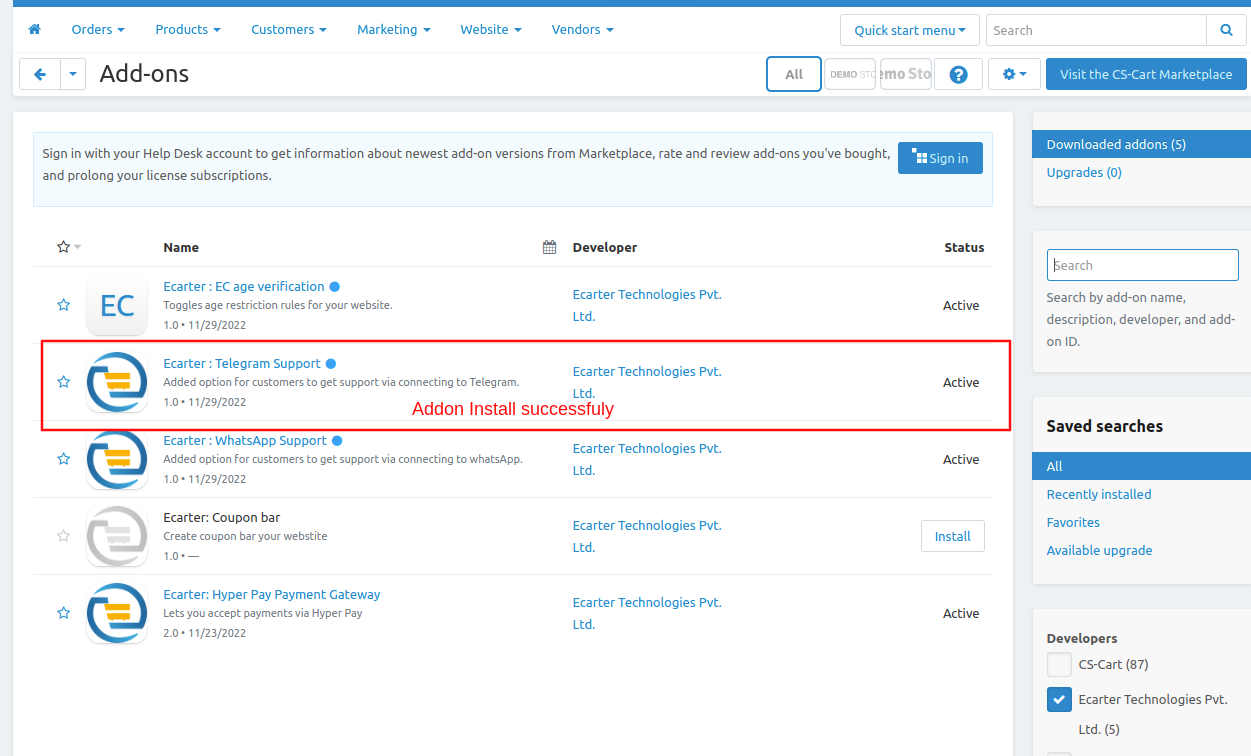
2. Add-on installed.
After Successful installation, the add-on Goto >Add-on on administration panel Add-on>Manage Add-on>Ecarter Technology Pvt. lmt. you see no. of installed add-ons or newly installed add-on and add-on must be Active/On status if the addon is Off it is not working.
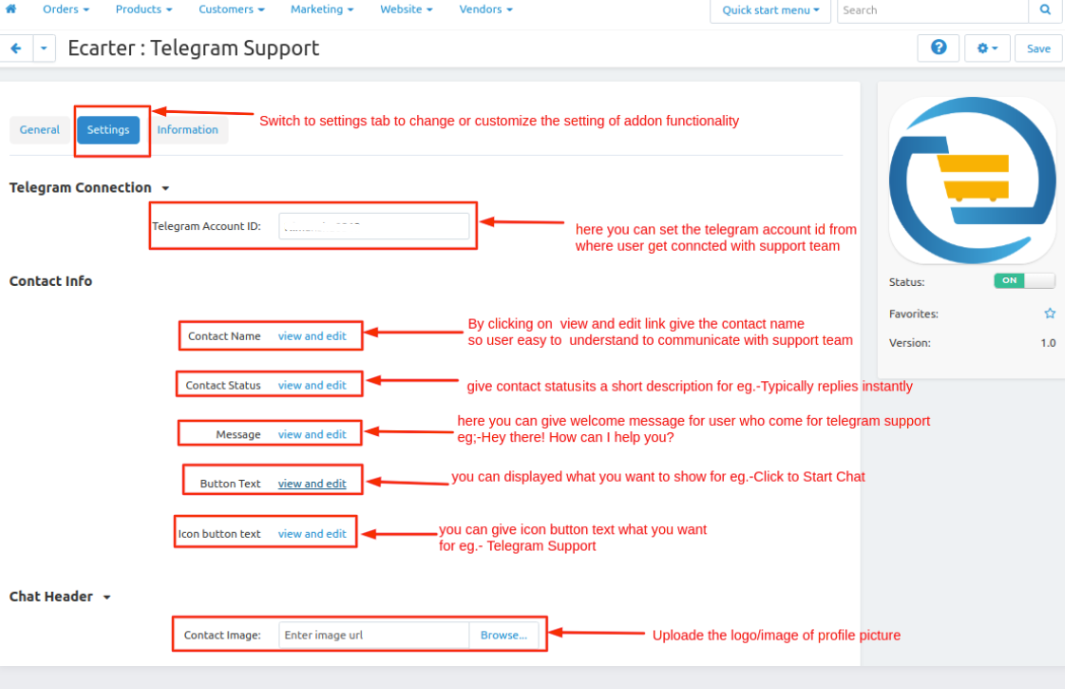
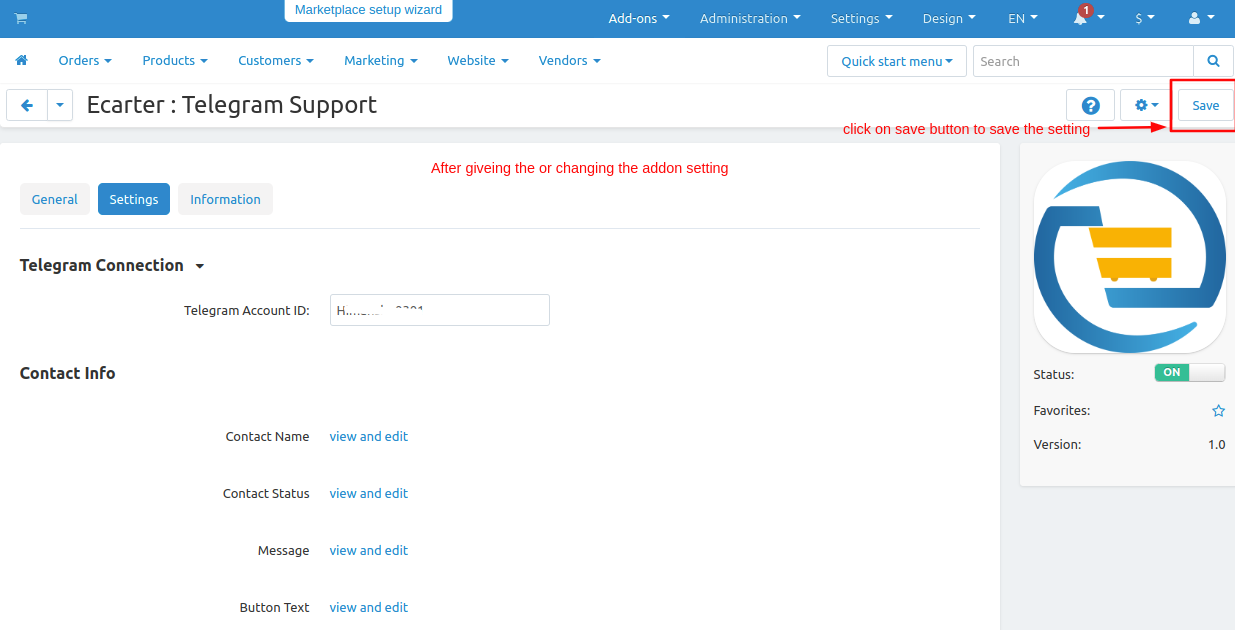
Addon Settings:
Addon properties
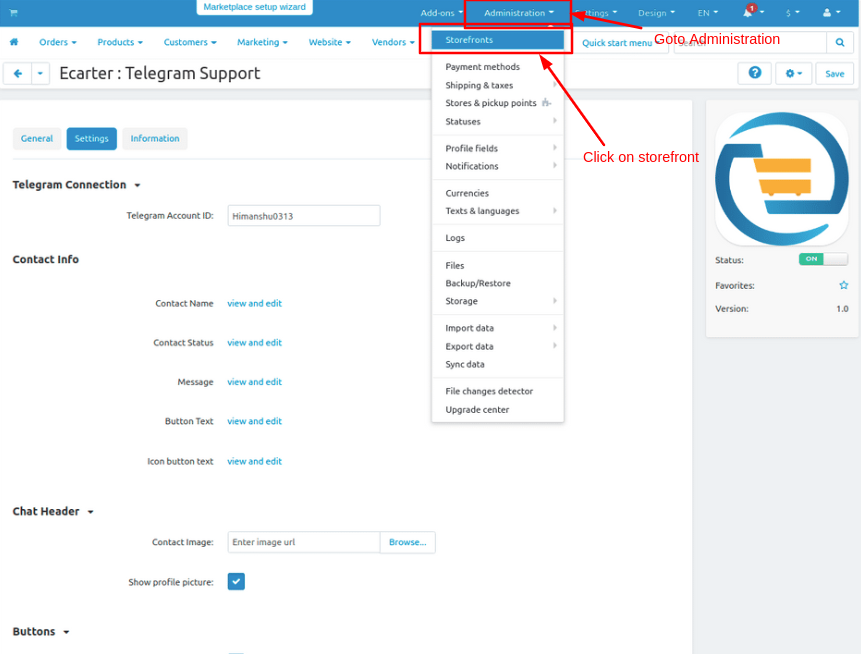
Telegram Connection.

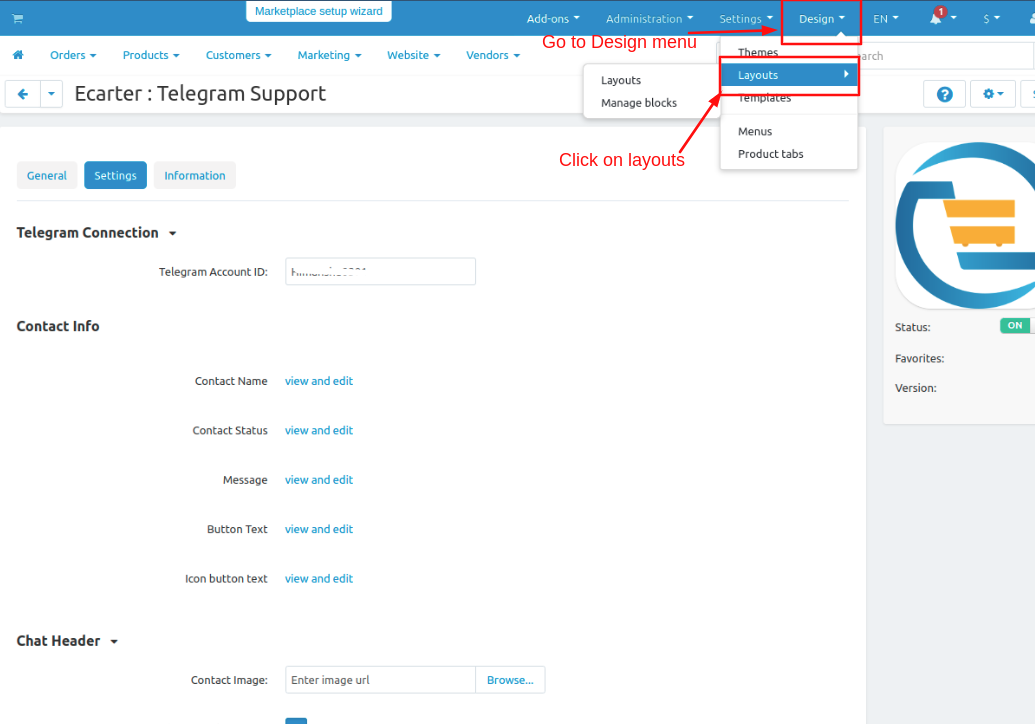
Go to >> Design Penal and click on >> Layouts.


Here you see telegram block is added
Here you see the Telegram support chat button
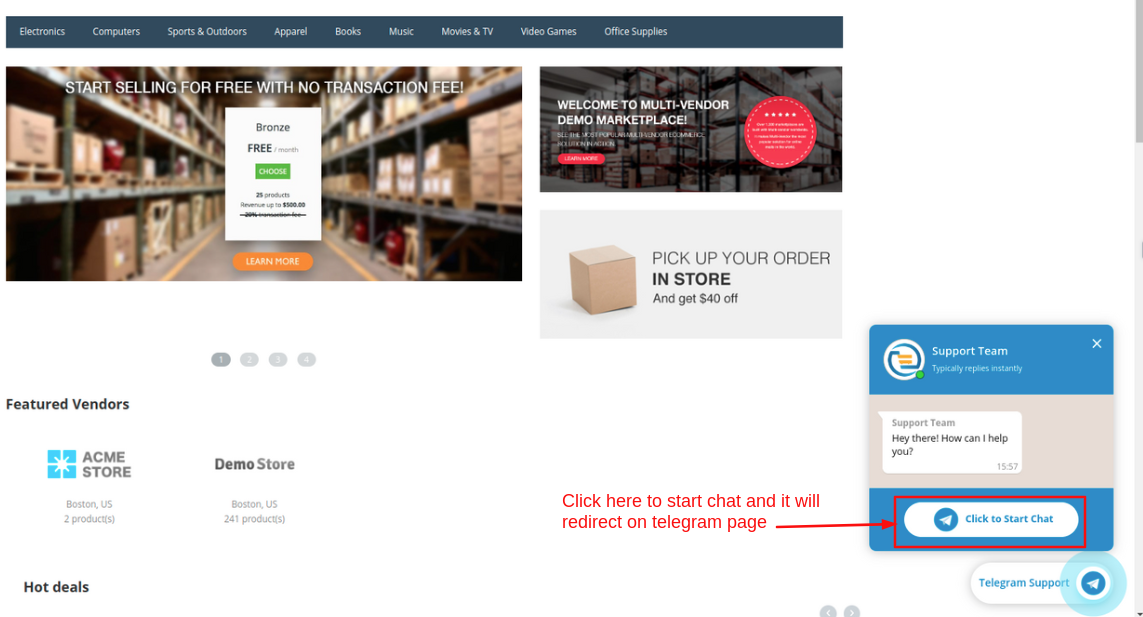
Click on the >> store links available here


Here you see telegram block is added


How to Upload Zip file
1. Click on setting>Manual installation a pop window will be displayed.
you can install an add-on by picking a tgz,gz, or zip format archive and clicking Upload & install.
2. Add-on installed.
After Successful installation, the add-on Goto >Add-on on administration panel Add-on>Manage Add-on>Ecarter Technology Pvt. lmt. you see no. of installed add-ons or newly installed add-on and add-on must be Active/On status if the addon is Off it is not working.
Addon Settings:
Addon properties
Telegram Connection.
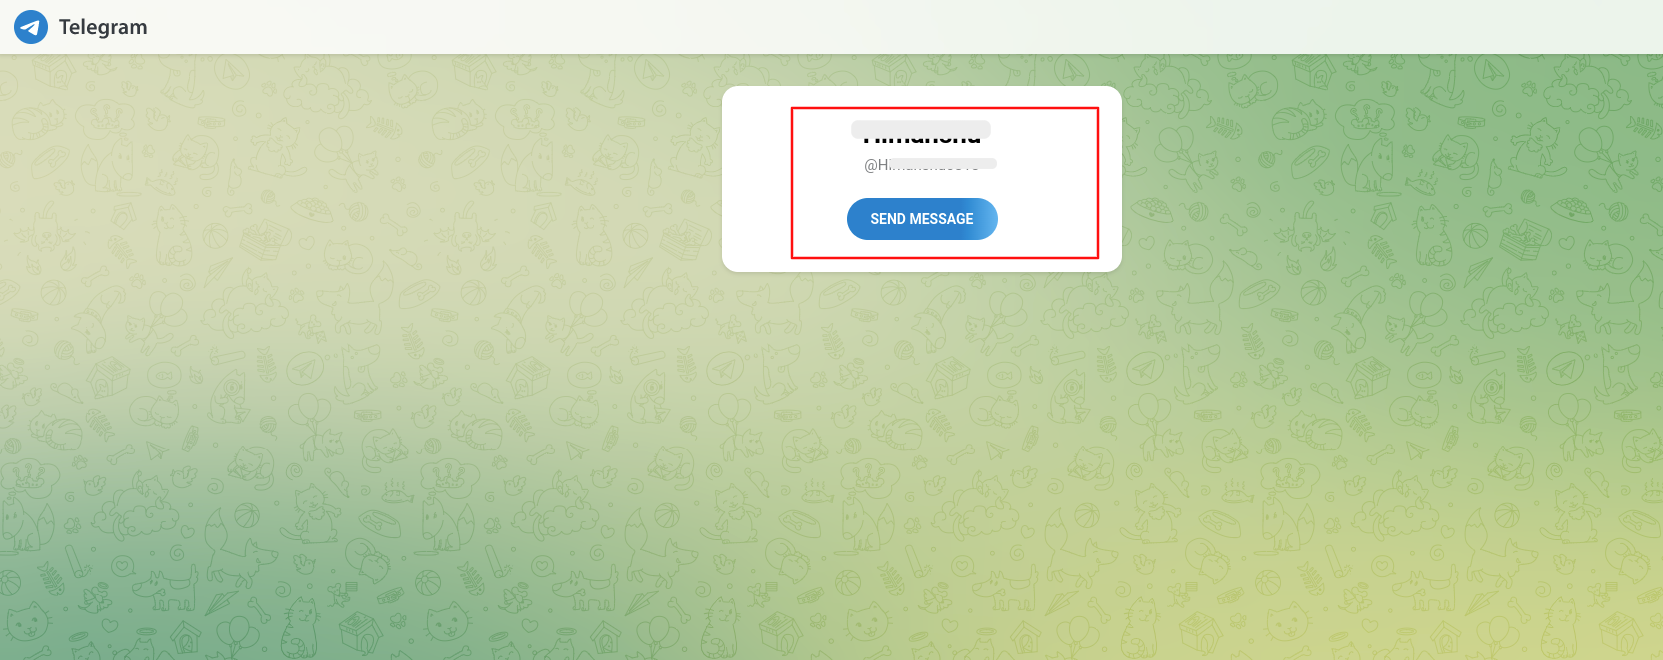
- Telegram account id:-Give the account id from where the user can communicate with the support team and ask about any services and products.
- Contact Name:- Give the contact name that displays to the user while communicating with the support team.
- Contact Status:- On contact status admin can display the status or short description like eg. typically replies team
- Message:-On the message text field you can give the welcome message to the user when he uses telegram support.
- Button Text:-give button text that displayed or easy to understand what this button functionality is like Click here to chat.
- Icon Button Text:-set the icon button text like Telegram Support.
- Contact Image:- upload the logo/image that will be visible on the telegram support icon so that user can see it.
- Show profile picture:-if you tick the checkbox then the user can see the image if uncheck not able to see
- Show the current time:-if you tick the checkbox then the user can see the current time if uncheck not able to see
- Open by default:-if you tick the checkbox then the telegram is open by default when some visit the store.
- Position:- admin can change the position of the telegram icon on the screen left or right.
- Button background color:- admin can change the icon color of the telegram
- Side label text color:-admin can change the label color of text like Telegram support or give any name.
- Background color:- admin can change the header color multiple times
- Text Color:-admin can change the text header color multiple times.
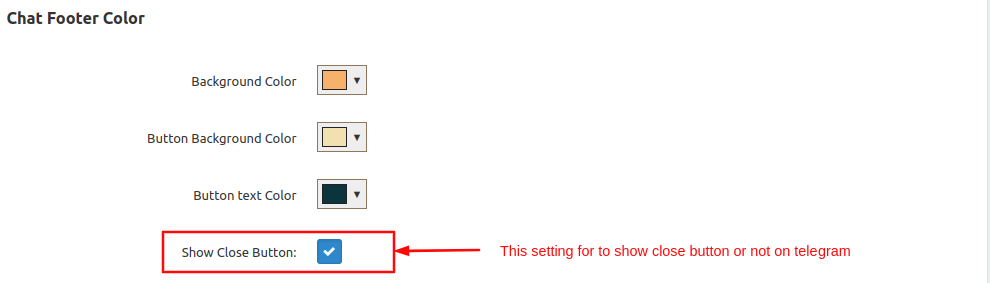
- Background color:-admin can change the footer color multiple times
- Button background color:-admin can change the send button color on the footer multiple times.
- Button text color:-admin can change the send button text color on the footer multiple times.
- Show close button:-If you tick the checkbox then the close button will be visible if untick the checkbox it will be disappear
- After giving the settings click on >> save button
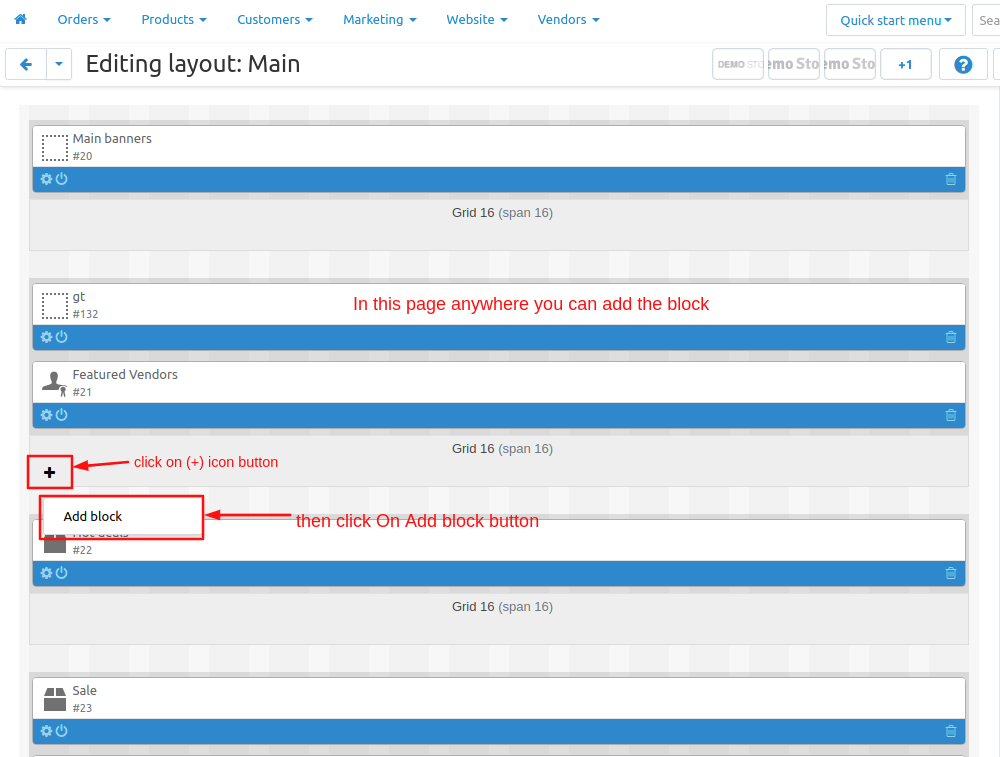
Now set up the Layout for the telegram icon
Go to >> Design Penal and click on >> Layouts.
- Switch to Homepage tab
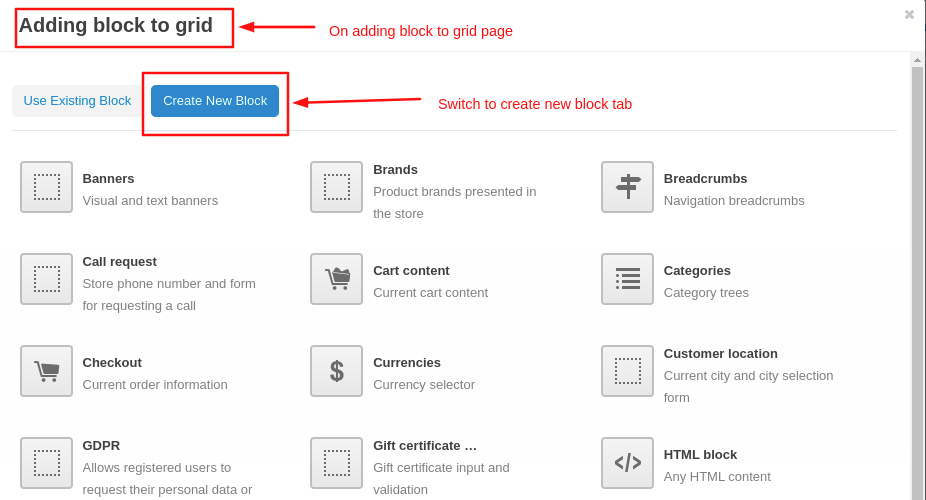
- Now add the block
- click on>> plus(+) button
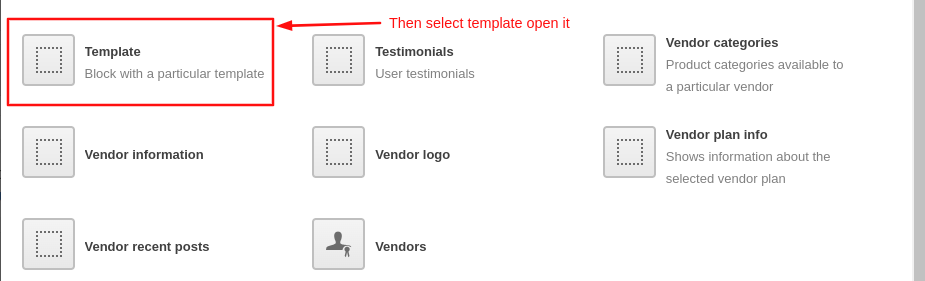
- Add block>> Switch to create new block
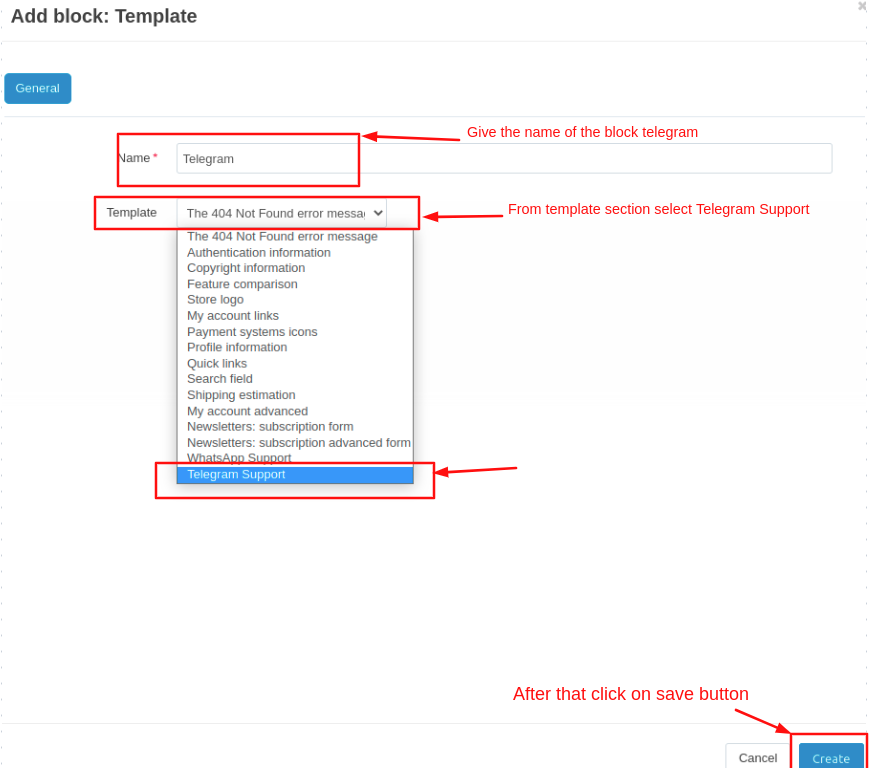
- Choose >> Template
- Give Name >> Telegram
- Select >> Telegram Support
- Click on >> Create button
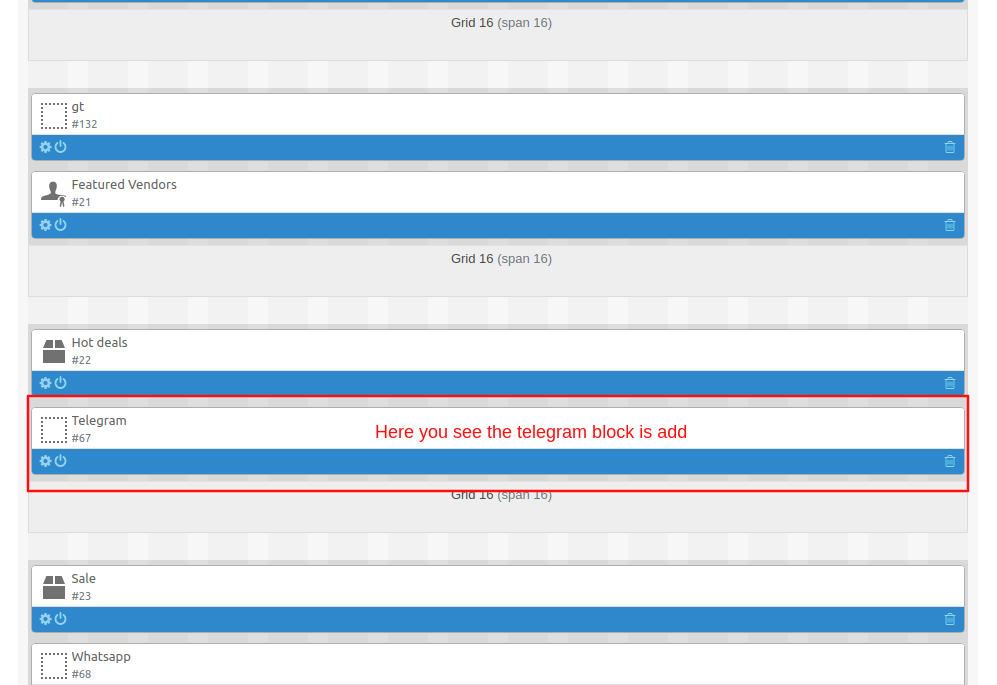
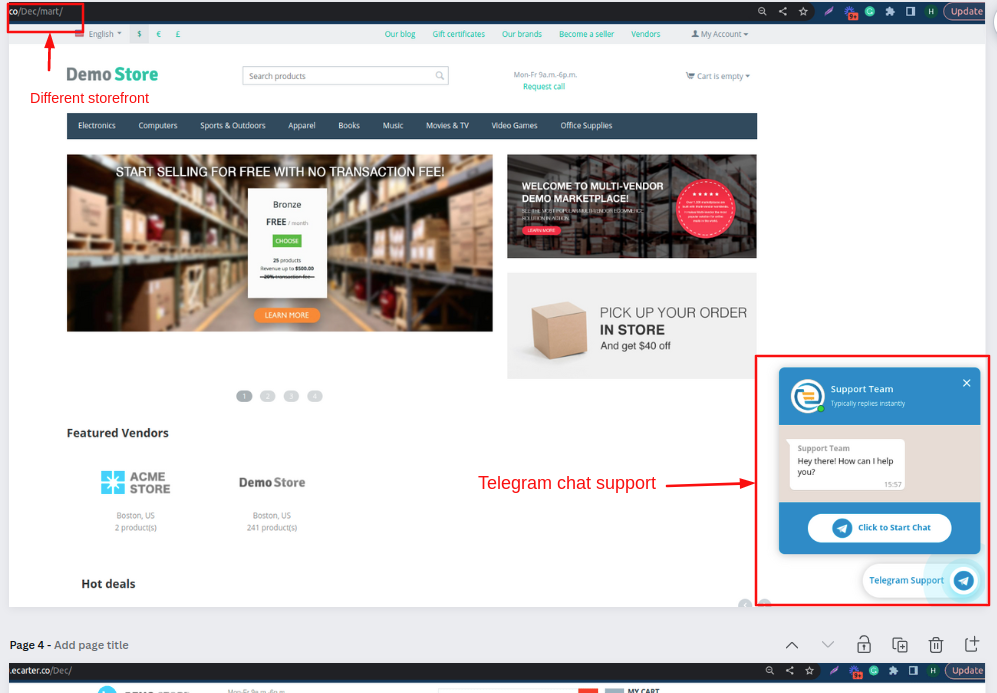
Here you see telegram block is added
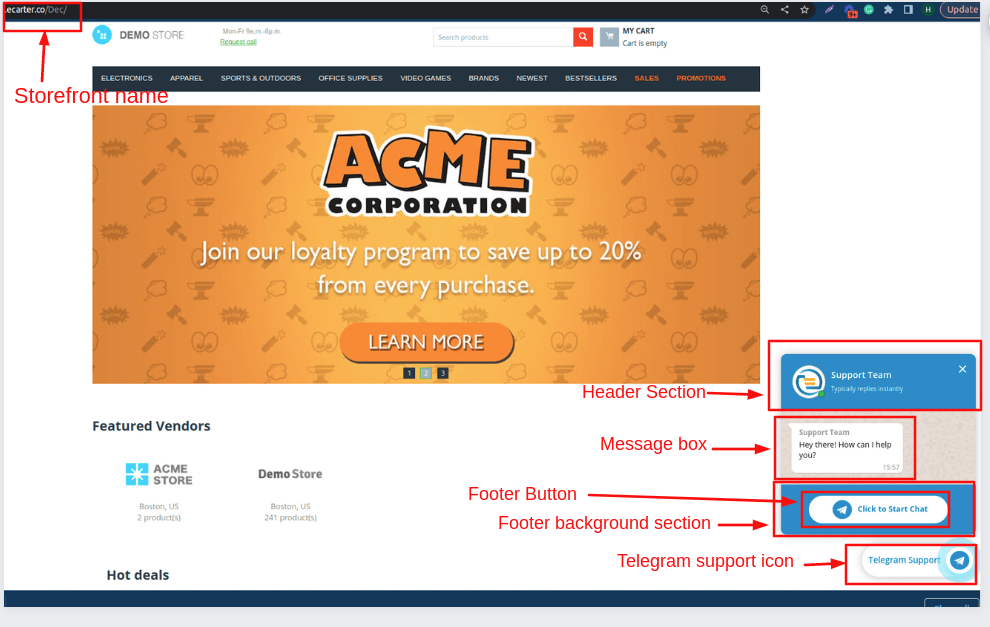
At Storefront
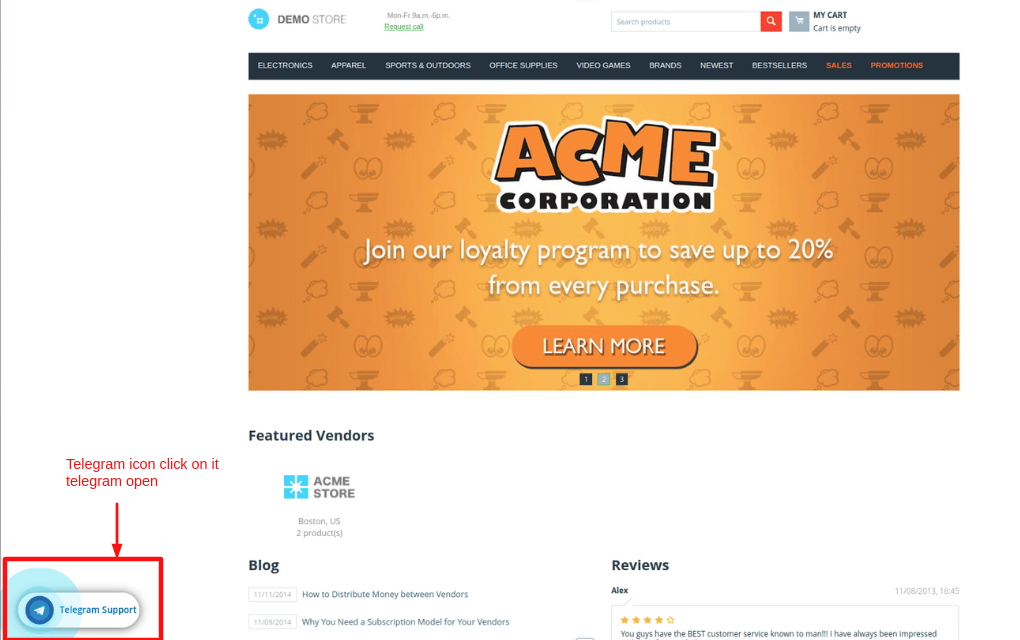
Here you see the Telegram support chat button
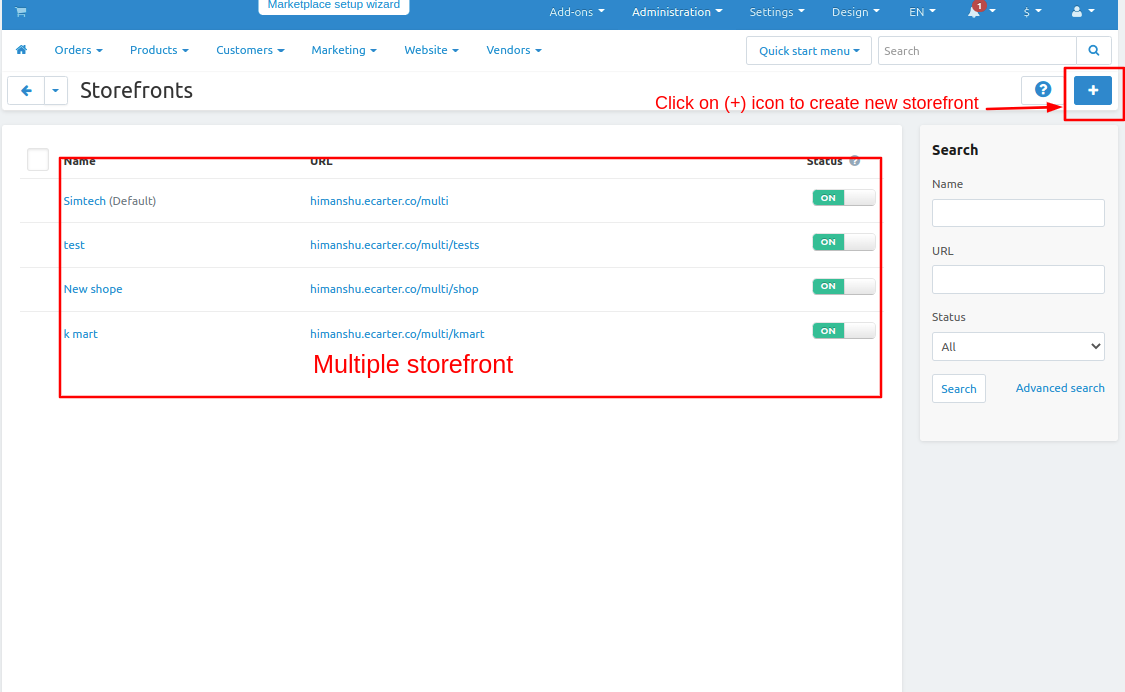
Now set up for the Multiple storefronts
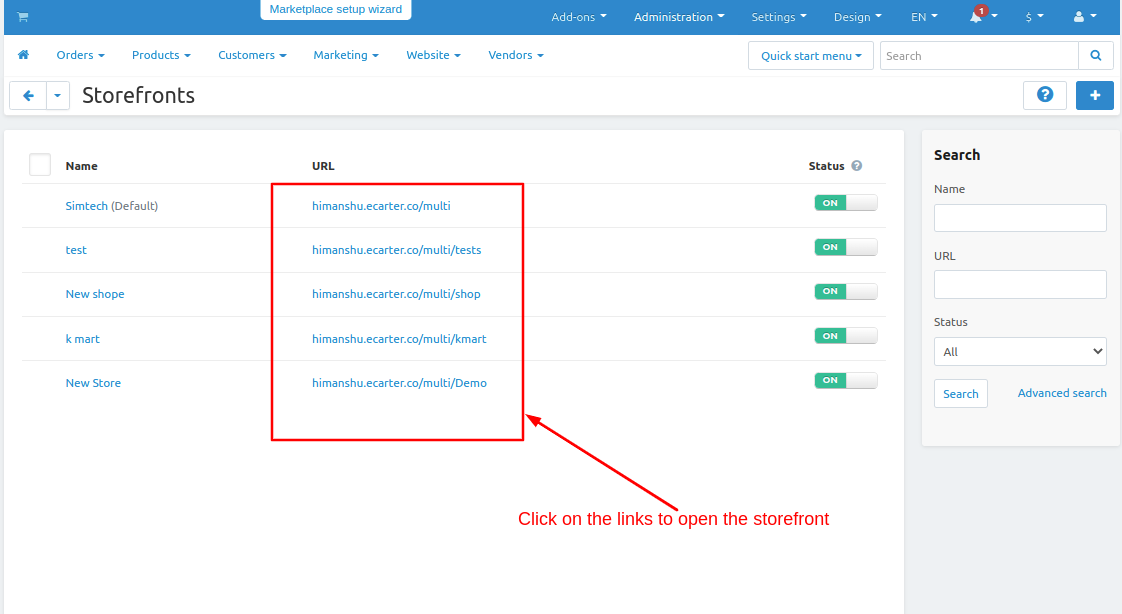
- Go to Administration penal >> click on > Storefront
- storefronts page will be open.
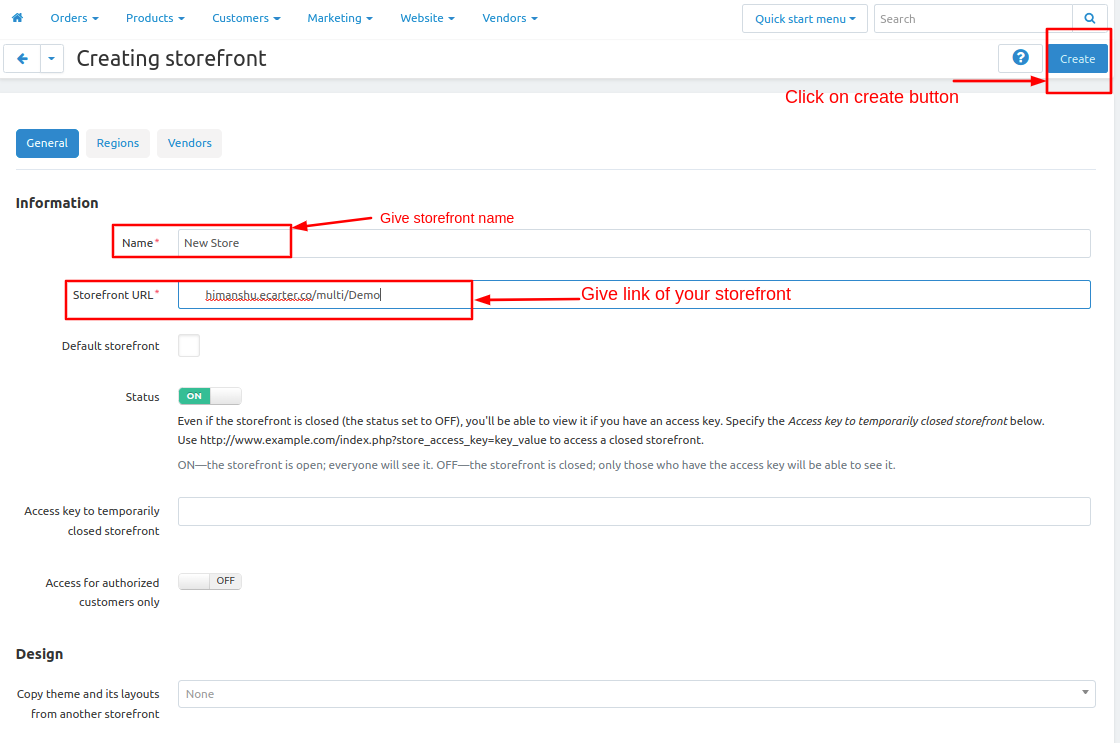
- Click on >> (+) icon to create storefront
- you see some multiple storefronts will be created already
- Creating a storefront page will be open.
- Give the store name Give the storefront URL. then click on >> create button
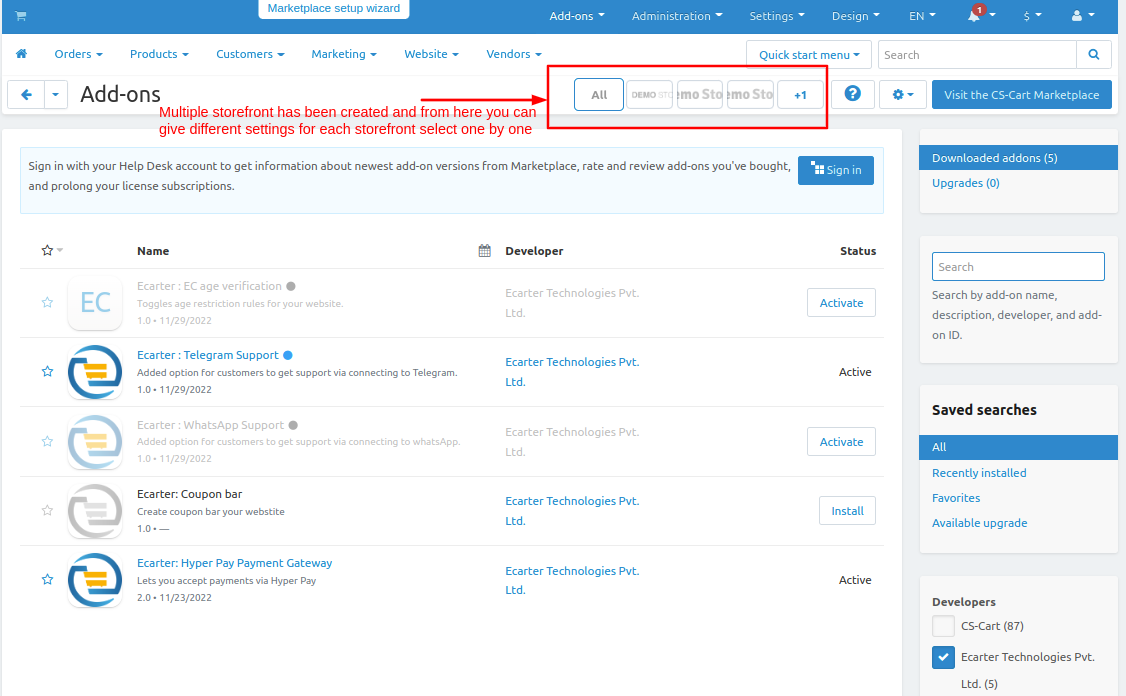
- Now on addon pages, you see multiple storefronts will be visible
- select one of them one by one and give different settings for each storefront
Click on the >> store links available here
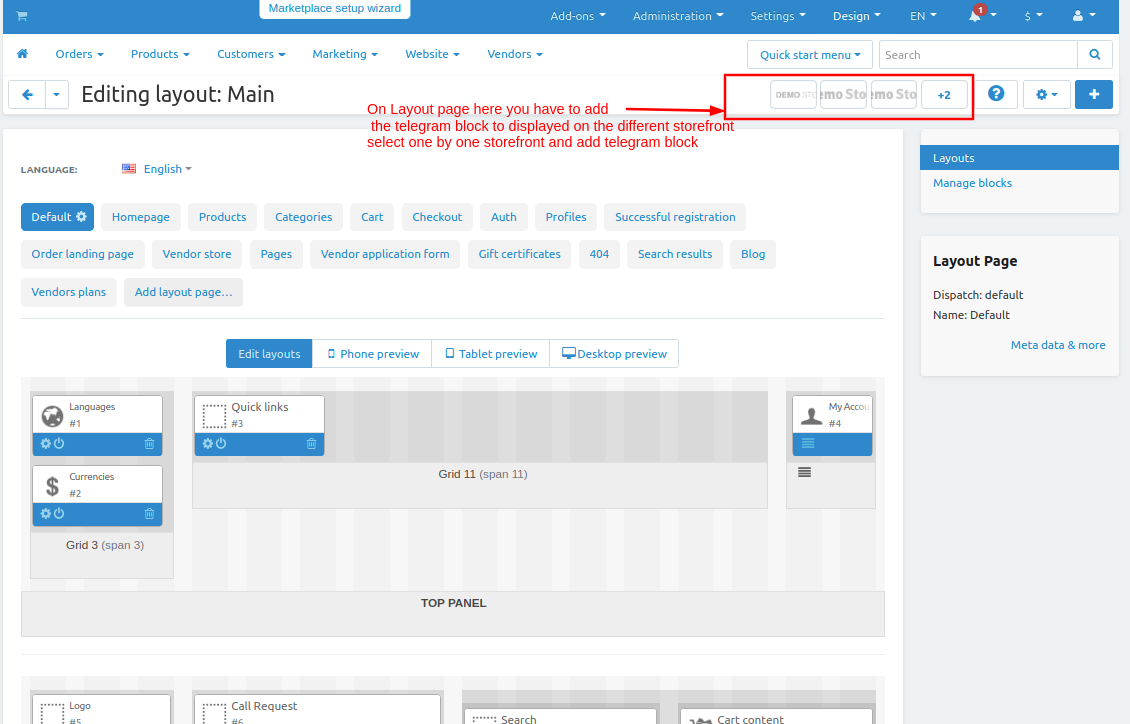
Now Setup the layout for different multiple storefront
- Select one by one storefront and repeat the same process to set up layout for all storefronts.
- Switch to Homepage tab
- Now add the block
- click on>> plus(+) button
- Add block>> Switch to create new block
- Choose >> Template
- Give Name >> Telegram
- Select >> Telegram Support
- Click on >> Create button
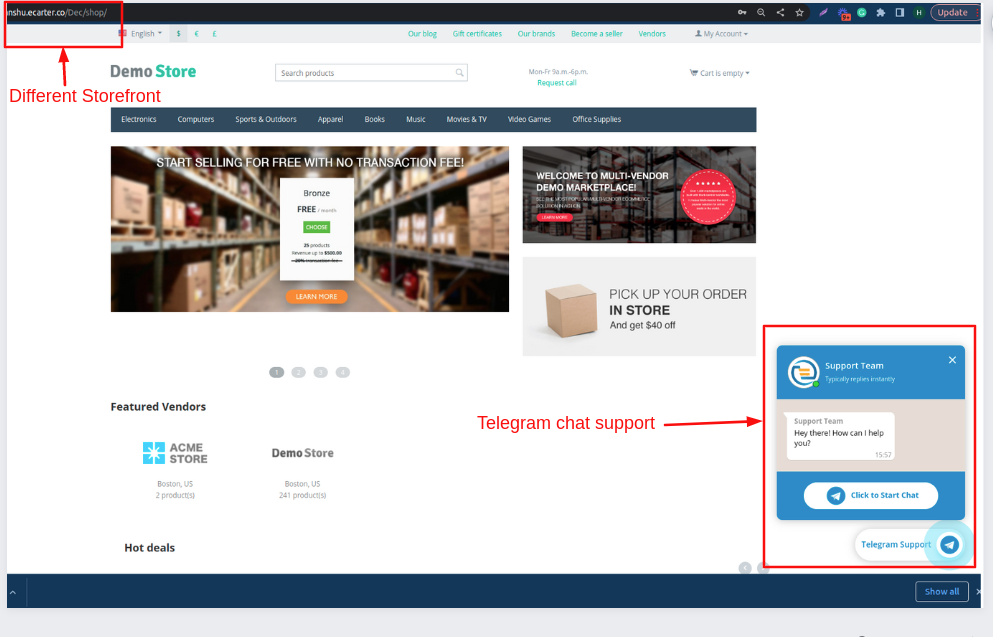
Here you see telegram block is added
Here you see the storefront name is Demo