- Author admin
- Creation date
-

📢 TRY before BUY
This forum provides digital resources for trial purposes only, helping those with limited funds make informed choices before purchasing. We encourage users to support developers by buying the original versions for ongoing updates and support. Let's build a community that shares resources responsibly and respects creators.
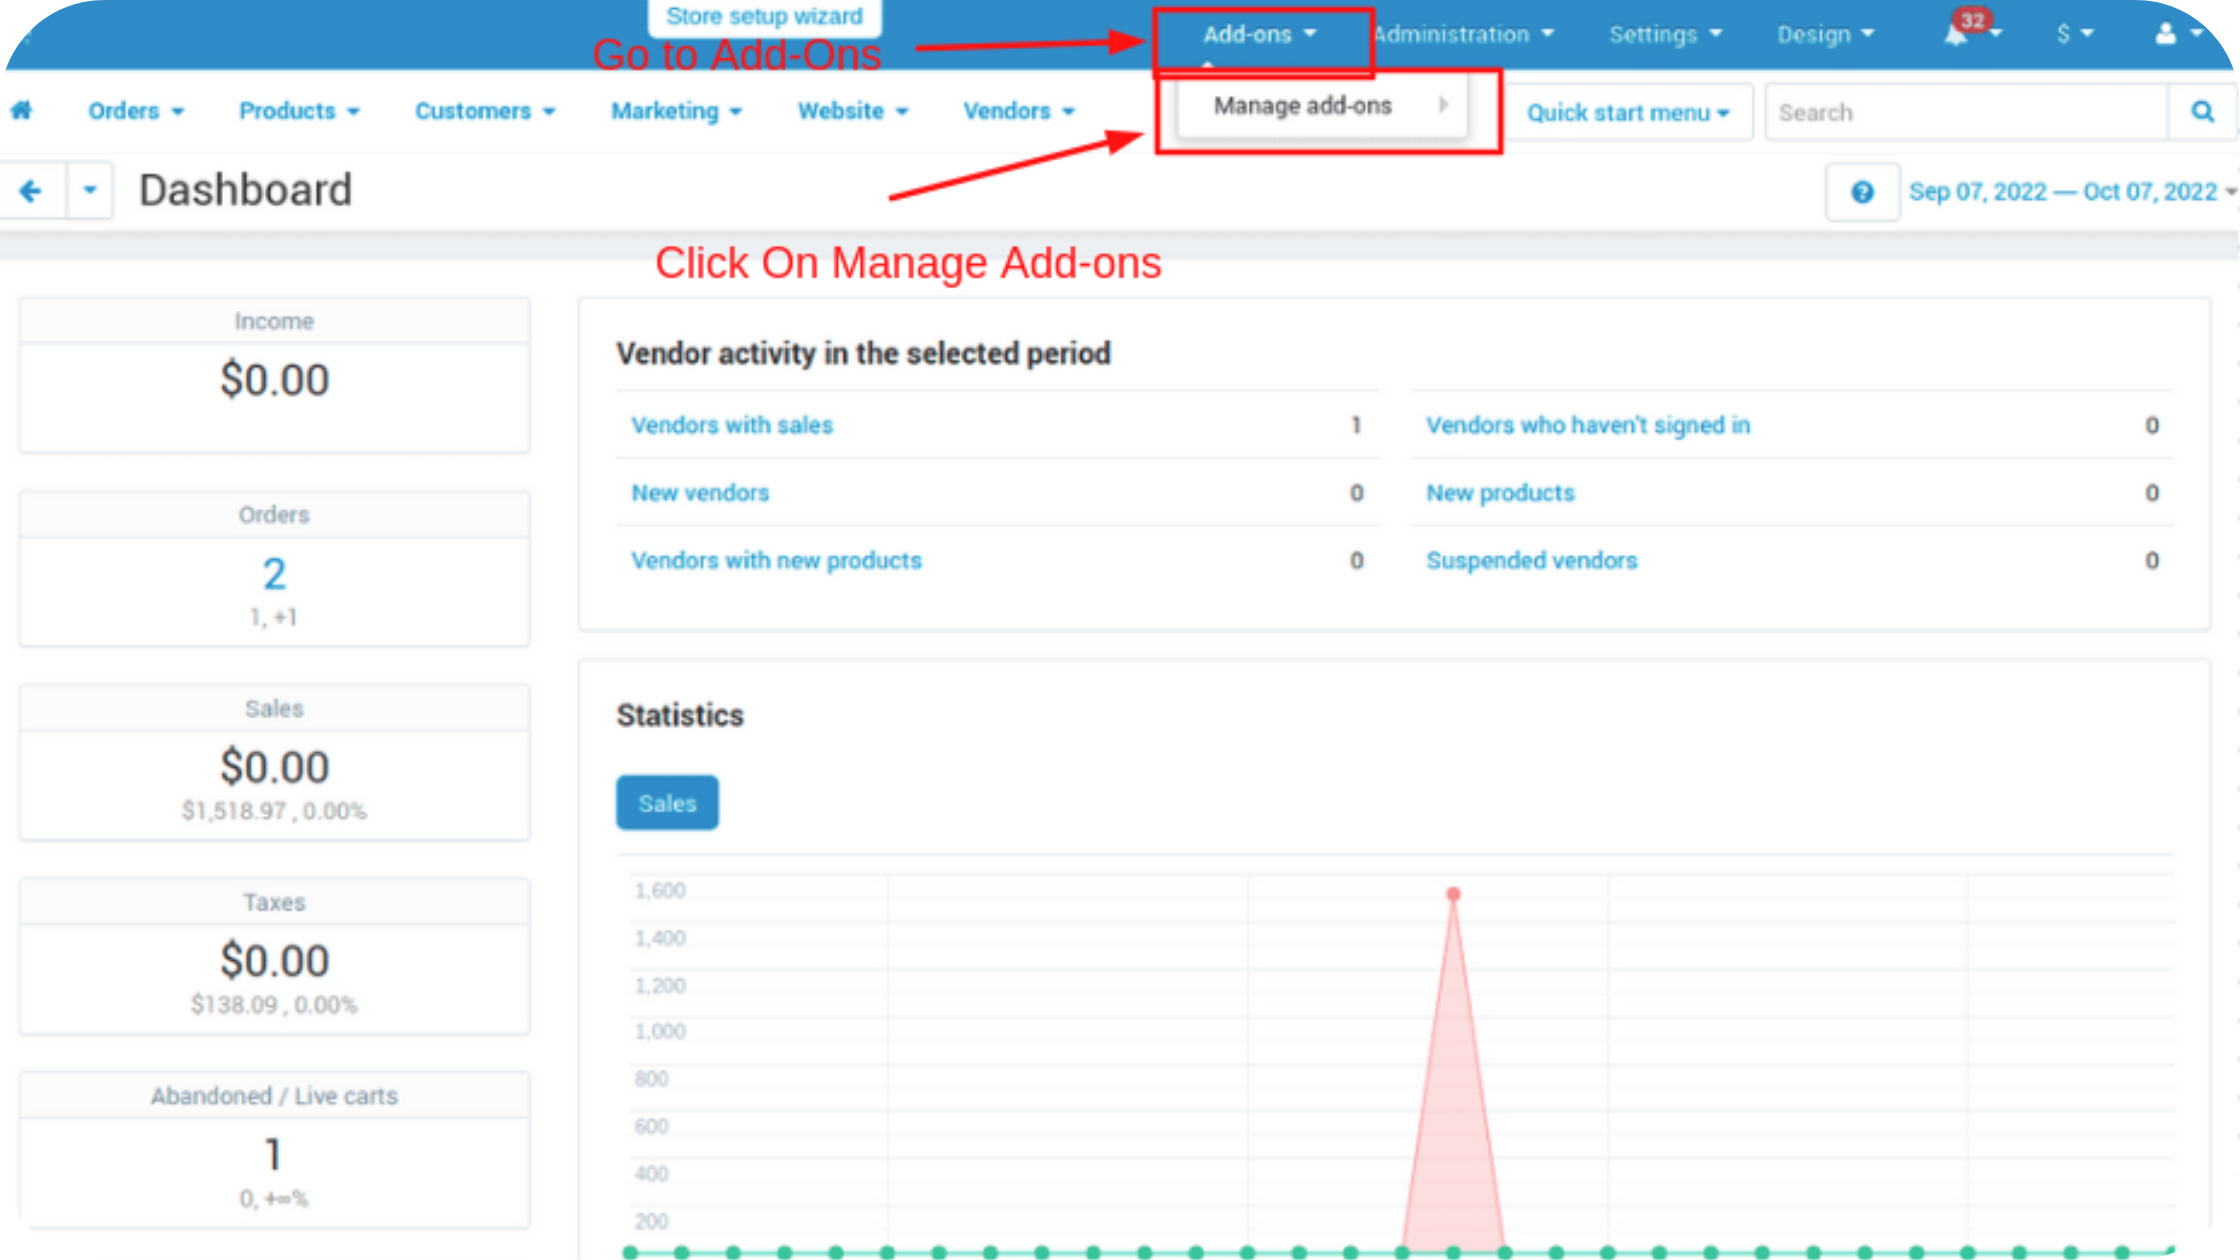
Addon-Installation: For the installation process you need to go Add-ons > Manage add-ons > then click on the gear button and choose manual installation then there is a pop-up of manual installation that is open and you can choose an option to upload addon zip and install the addon.
How to Upload Zip file
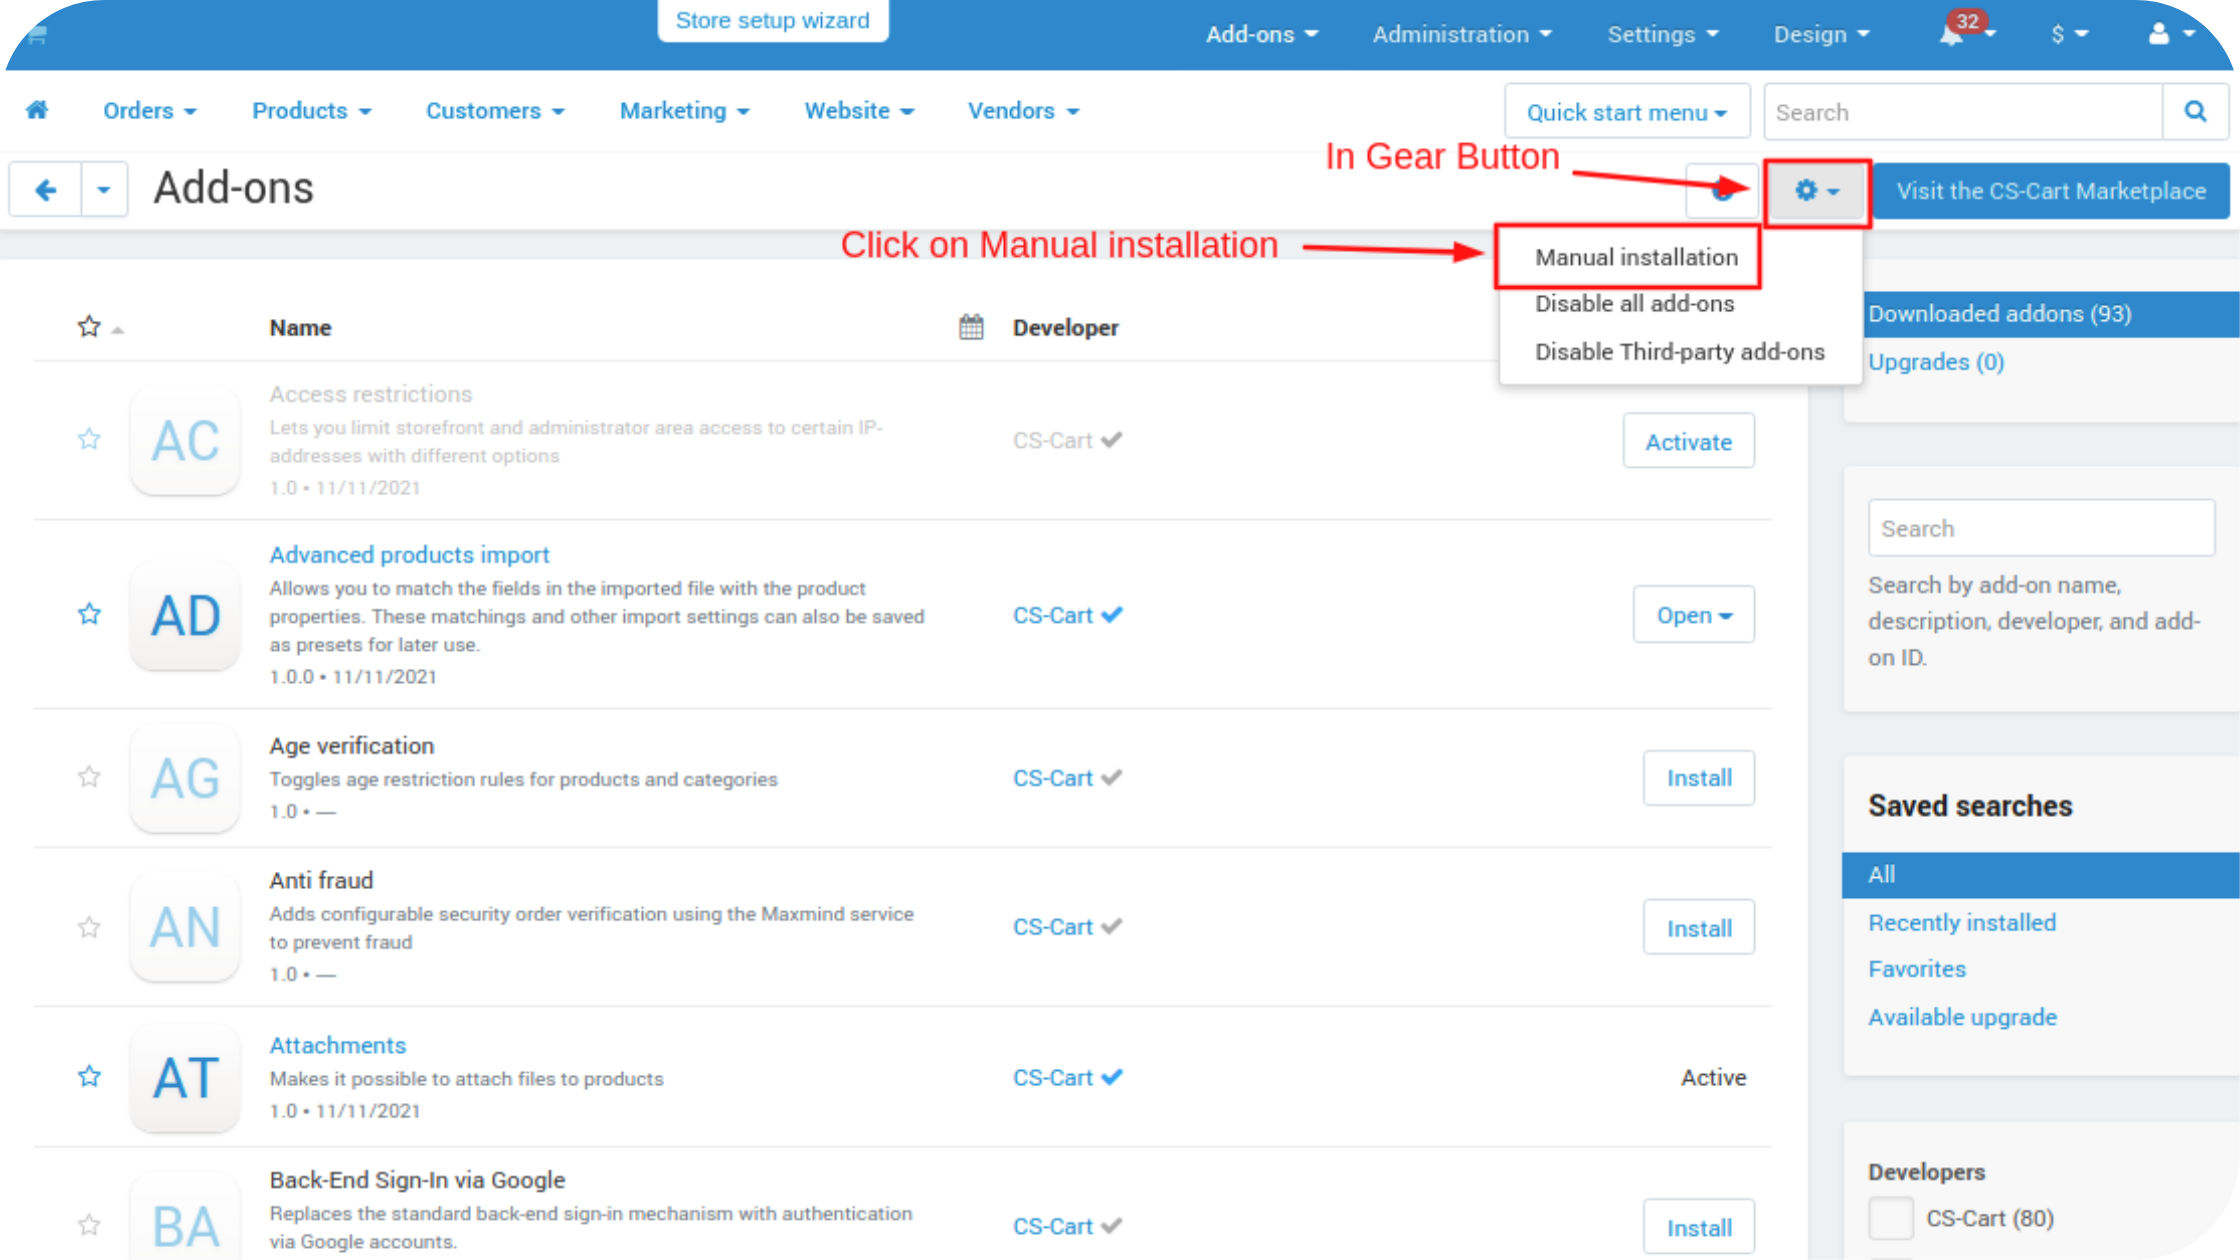
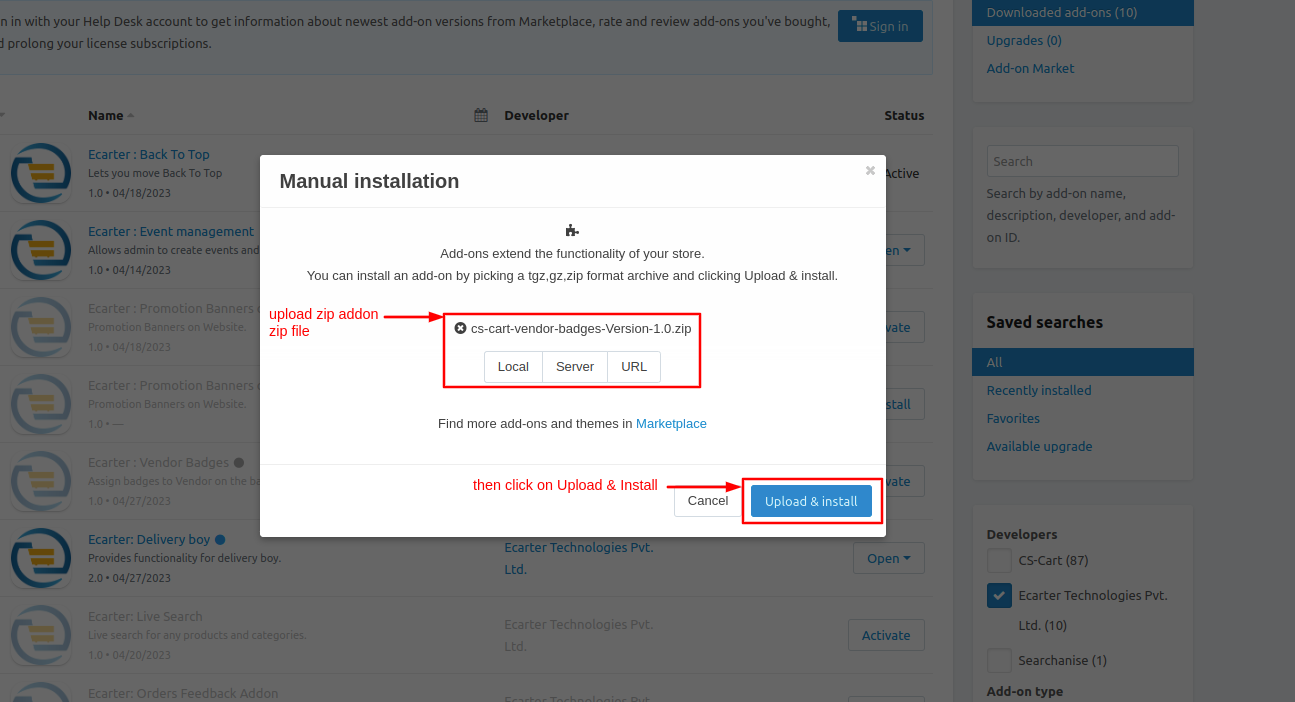
1.Click on setting>Manual installation a pop window will be displayed .
you can install an add-on by picking a tgz,gz,zip format archive and clicking Upload & install.
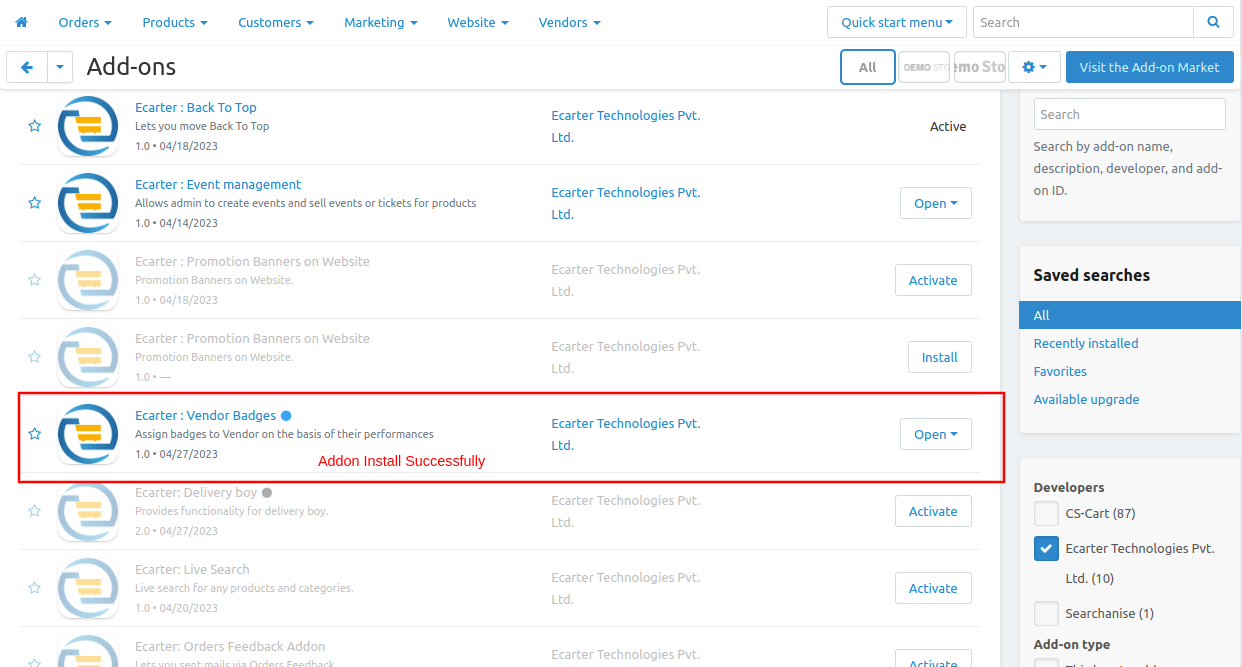
2. Add-on installed.
After Successfully installation the add-on Goto >Add-on on administration panel Add-on>Manage Add-on>Ecarter Techonology Pvt. lmt. you see no. of installed add-on's or newly installed add-on and add-on must be Active/On status if the addon is Off it is not working.
To access the addon setting directly click on the item for the menu link vendor badge.
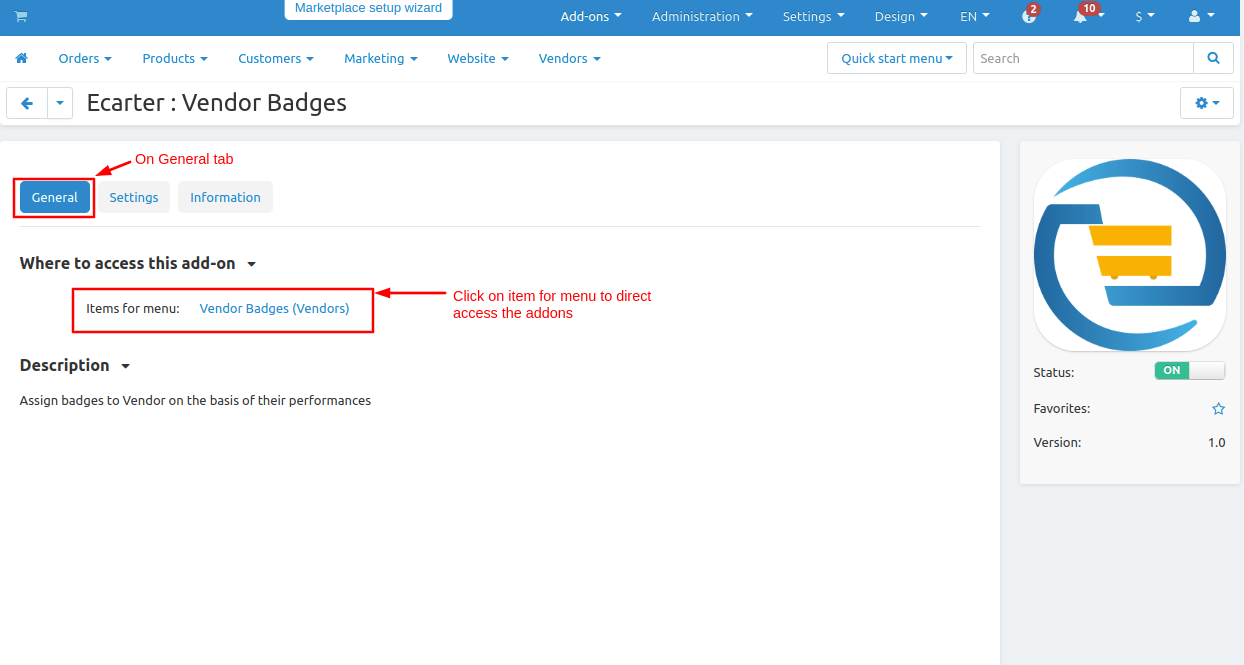
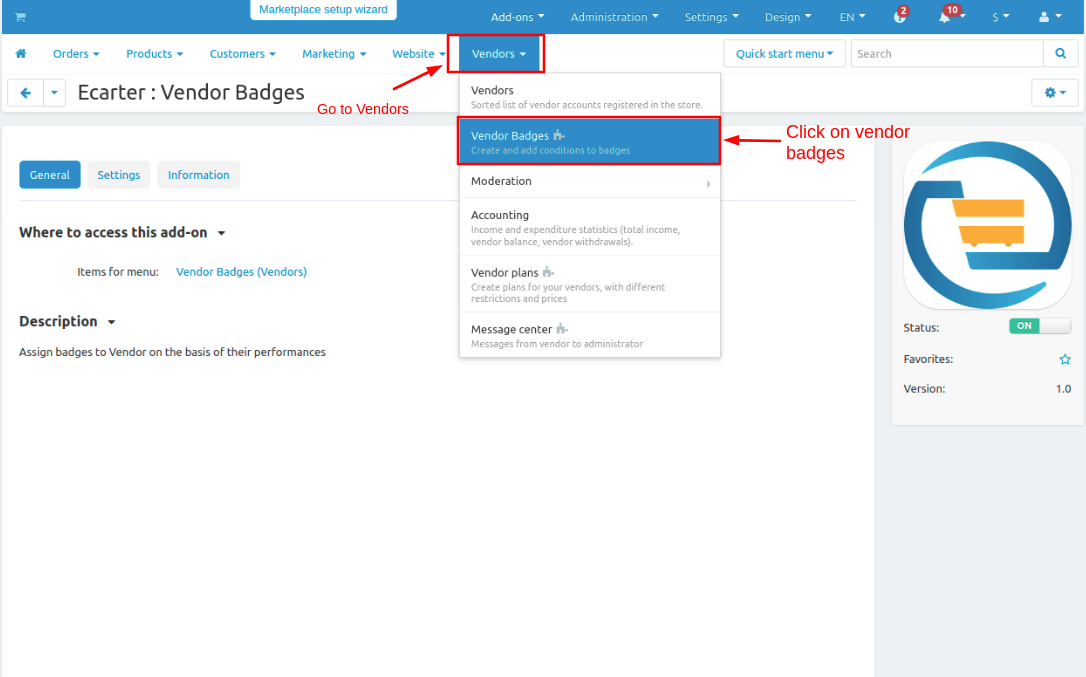
Now Go to vendor drop down click on >> vendor badges.
How to Upload Zip file
1.Click on setting>Manual installation a pop window will be displayed .
you can install an add-on by picking a tgz,gz,zip format archive and clicking Upload & install.
2. Add-on installed.
After Successfully installation the add-on Goto >Add-on on administration panel Add-on>Manage Add-on>Ecarter Techonology Pvt. lmt. you see no. of installed add-on's or newly installed add-on and add-on must be Active/On status if the addon is Off it is not working.
Open the addon
Let's check how the addon works
To access the addon setting directly click on the item for the menu link vendor badge.
Now Go to vendor drop down click on >> vendor badges.
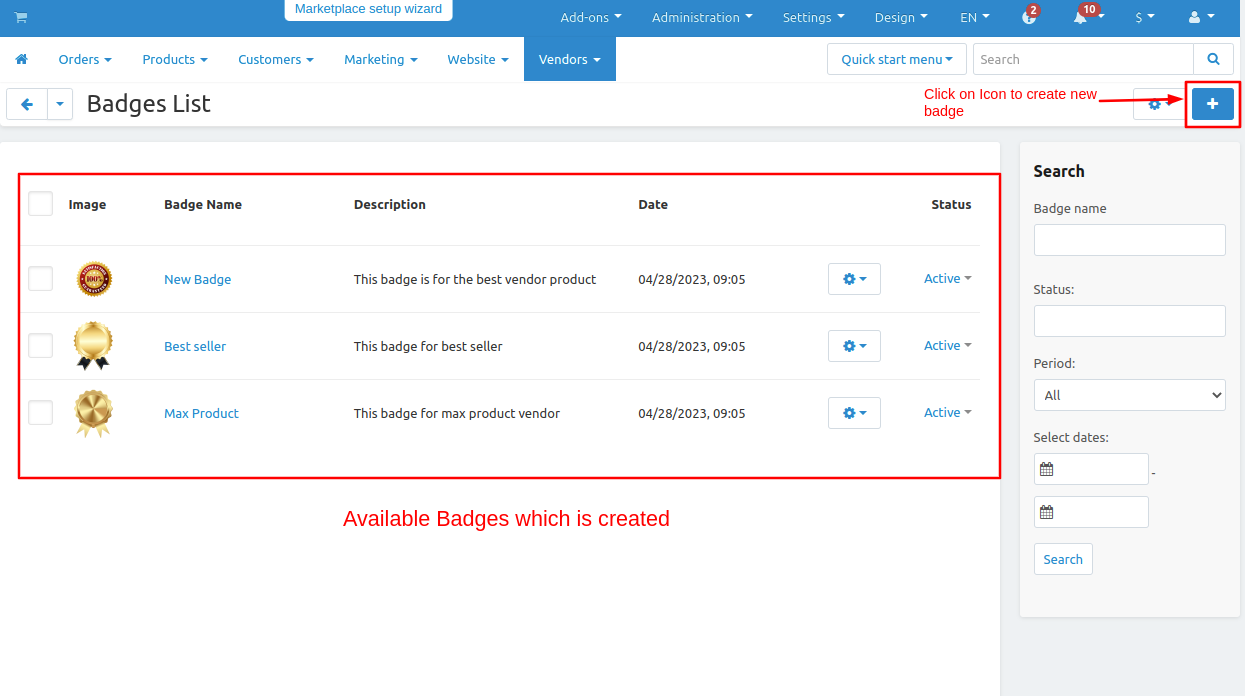
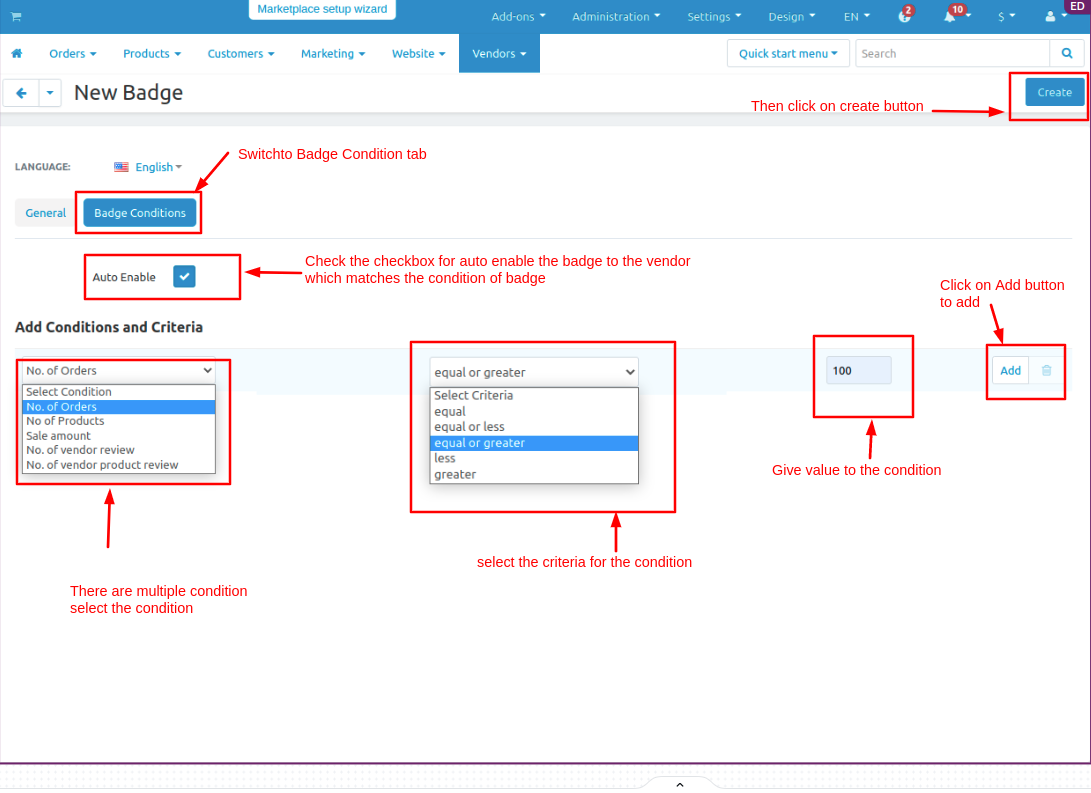
There are some badges now see how to create a badge.
- Click on >> (+) icon.
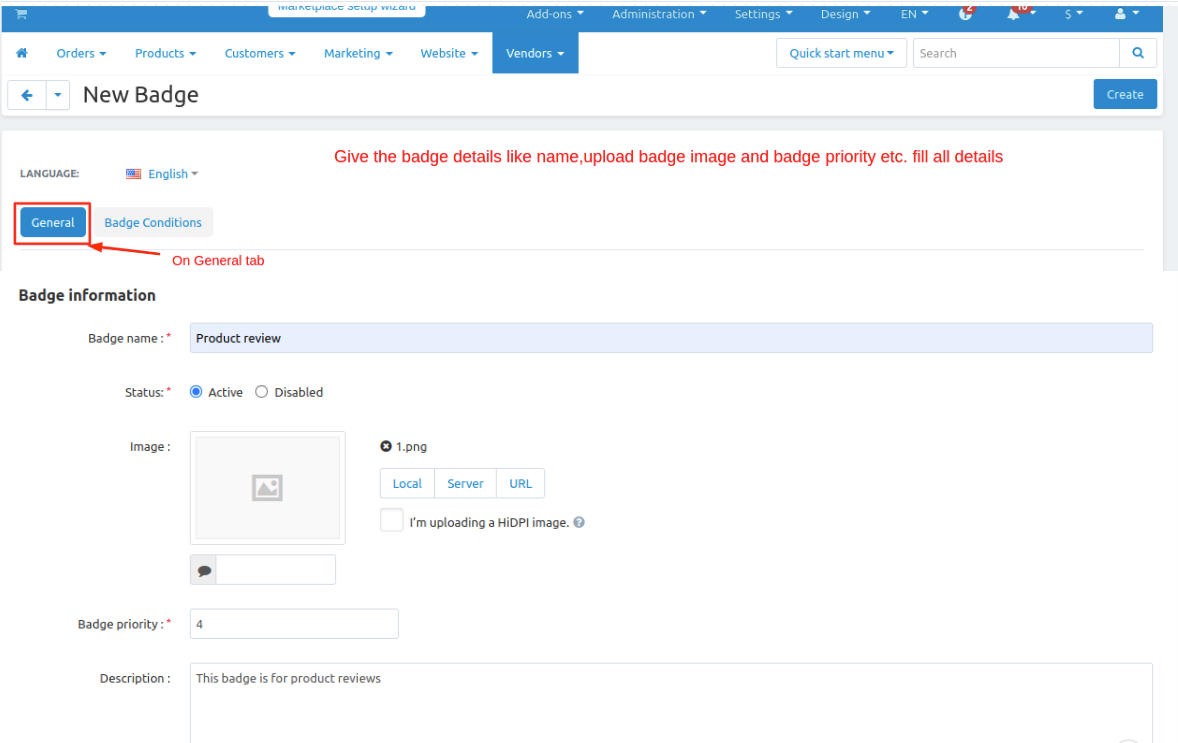
- On the General tab fill the badge information.
- Like Badge name, upload badge image, set priority and write description.
- Then switch to Badge Condition tab.
- Tick the checkbox of auto enable so the badge is assign to vendor automatically.
- Now add conditions for the badge.
- Admin can set multiple conditions there are few conditions and criteria according to conditions.
- After that set the value for a condition then click on >> Add button.
- Now Click on >>Create button.
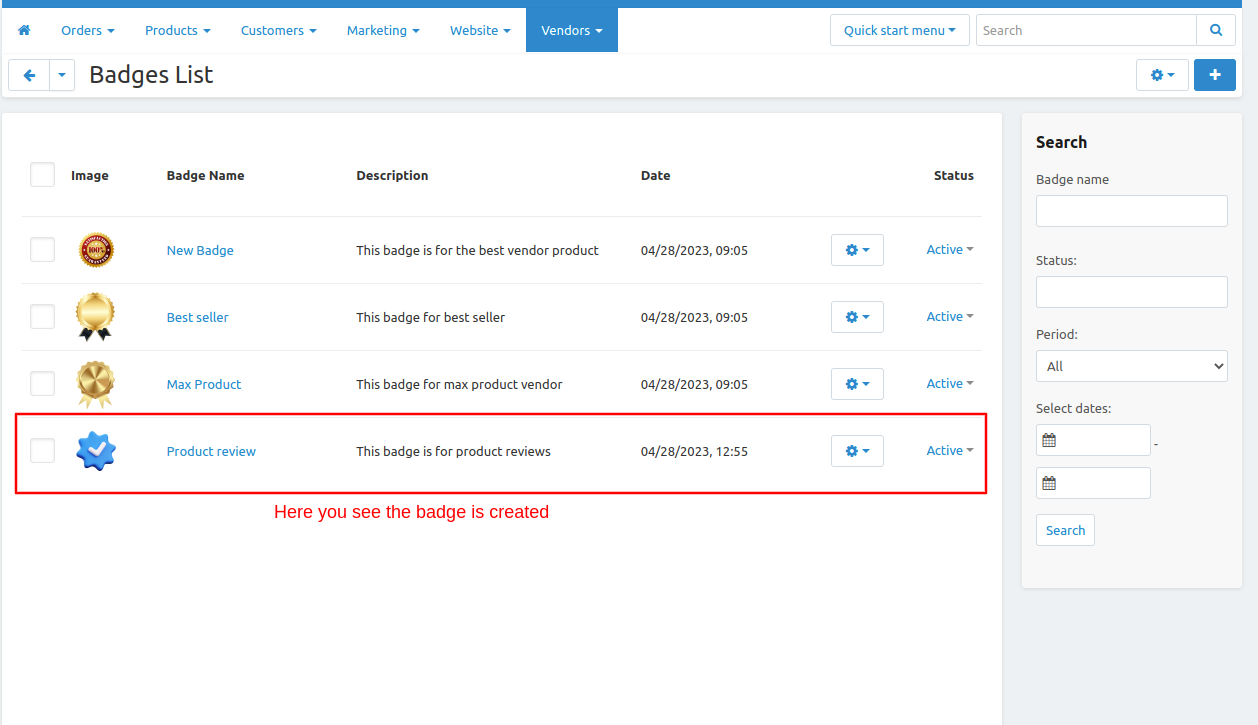
- The badge is created.
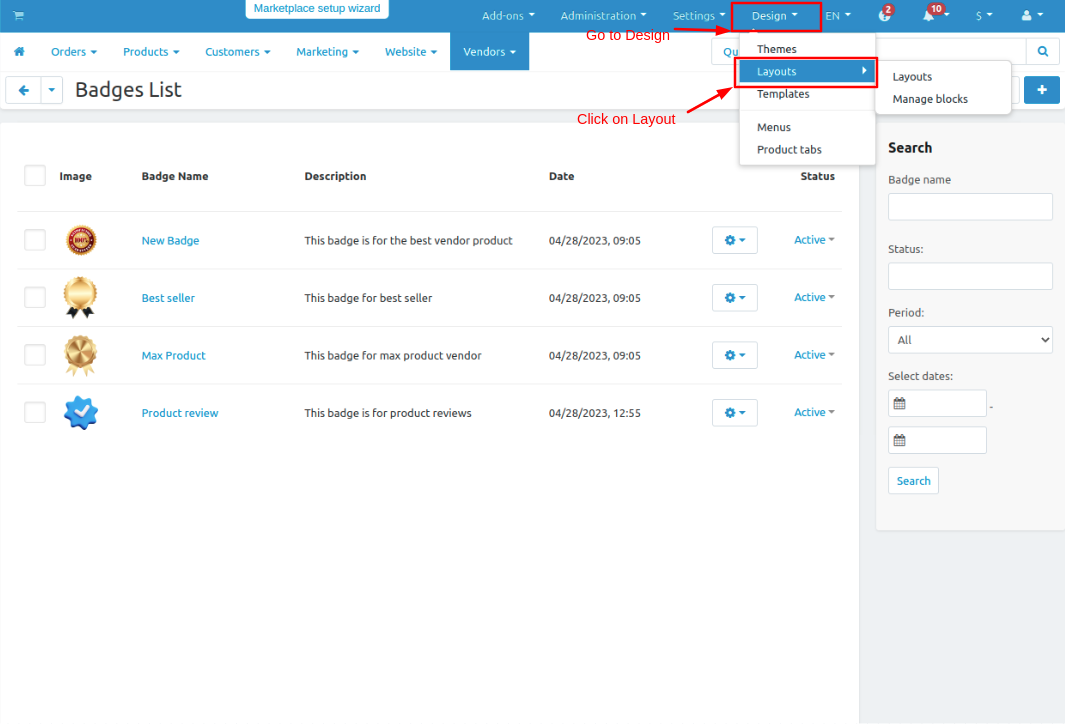
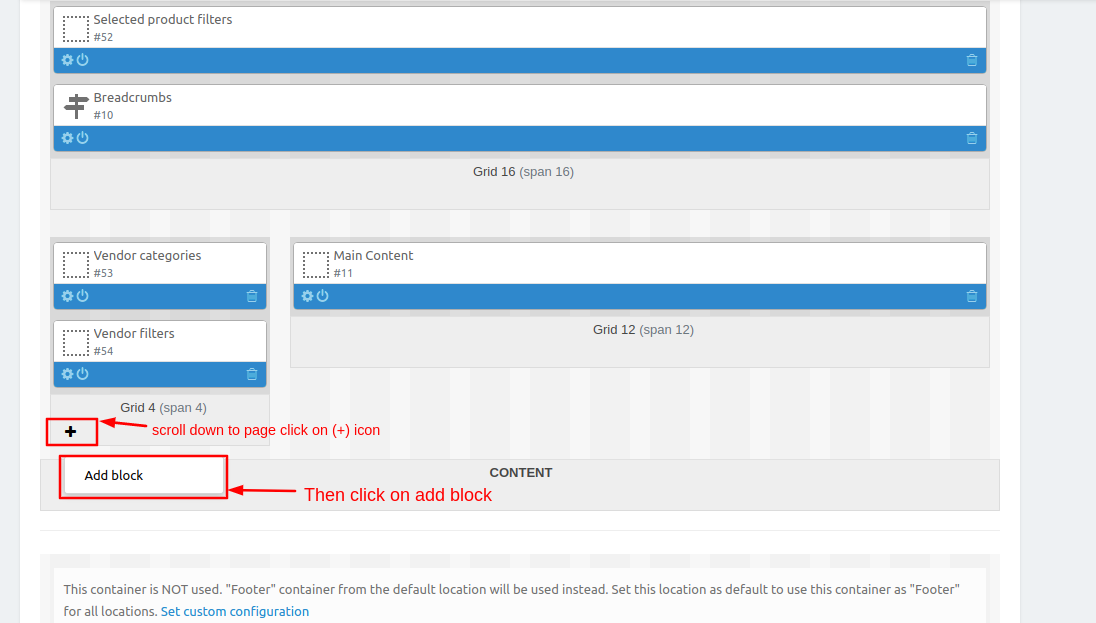
Now Set the block of the vendor badge so it will appear on the storefront.
- Go to design drop down click on >> Layouts.
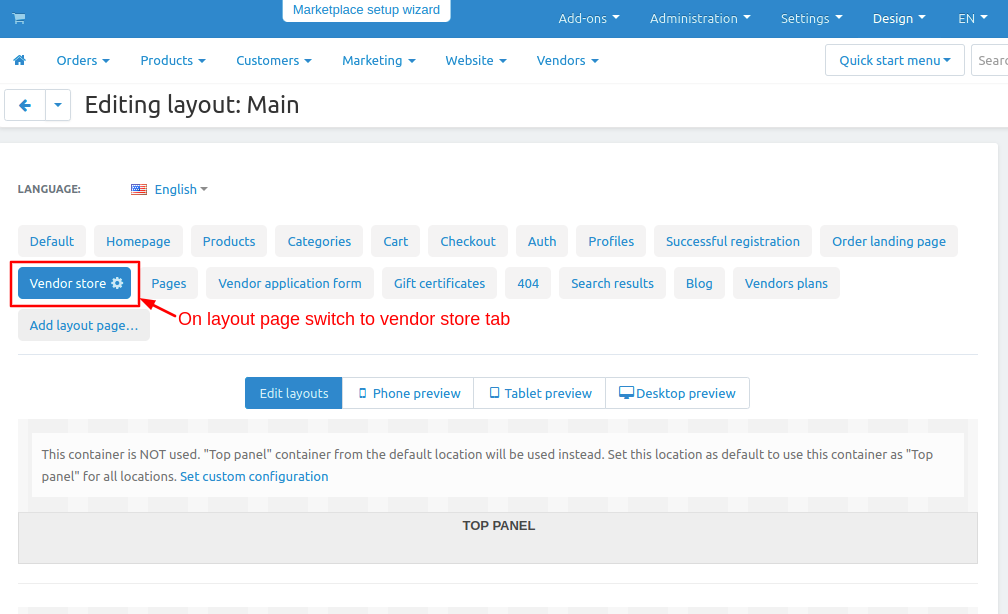
- Switch to vendor store tab on edit layout page.
- Scroll down to the page click on >> (+) icon then click on >> Add block.
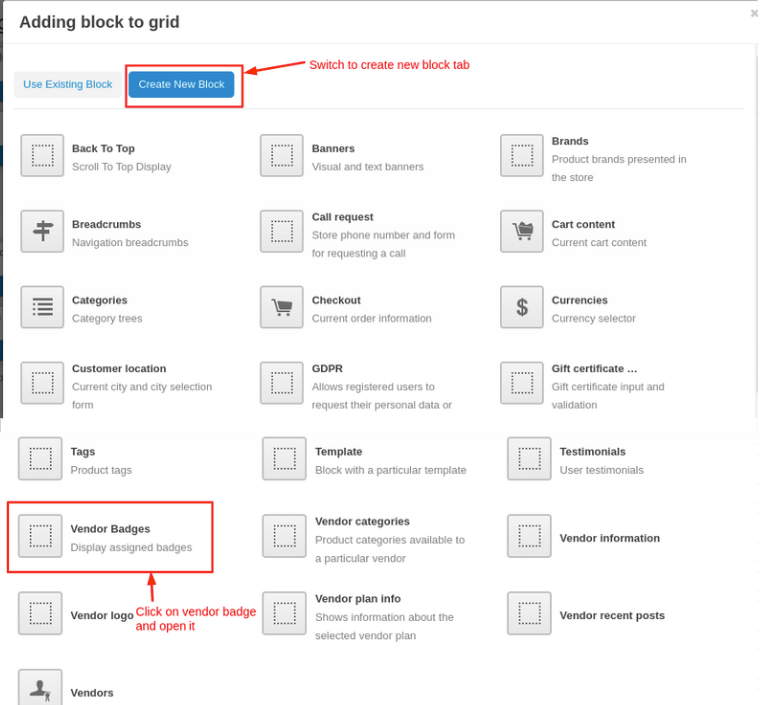
- Now switch to create new block tab.
- Then click on >> Vendor badge and open it.
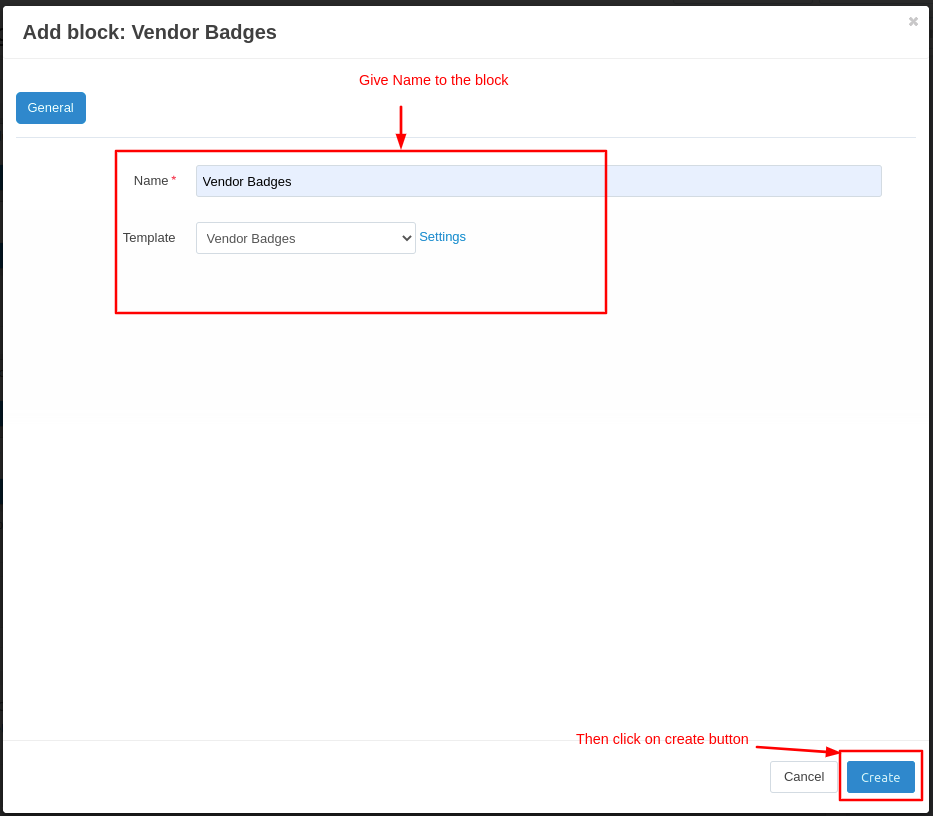
- Give the Name of the block and then click on >> create button.
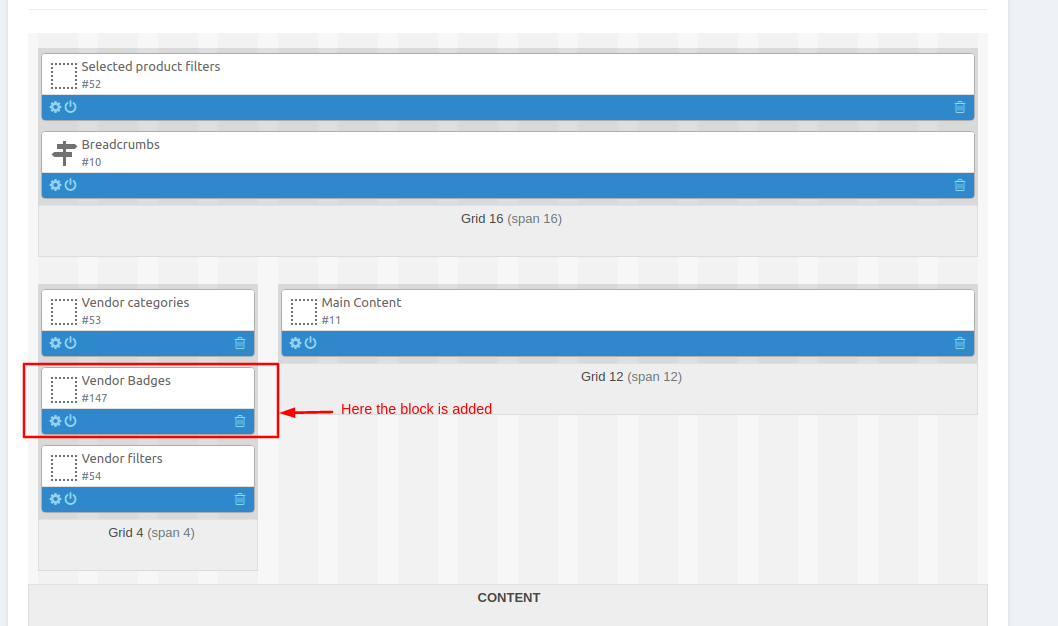
- Here you see the block is added.
Now we have to assign the badge to the vendor store.
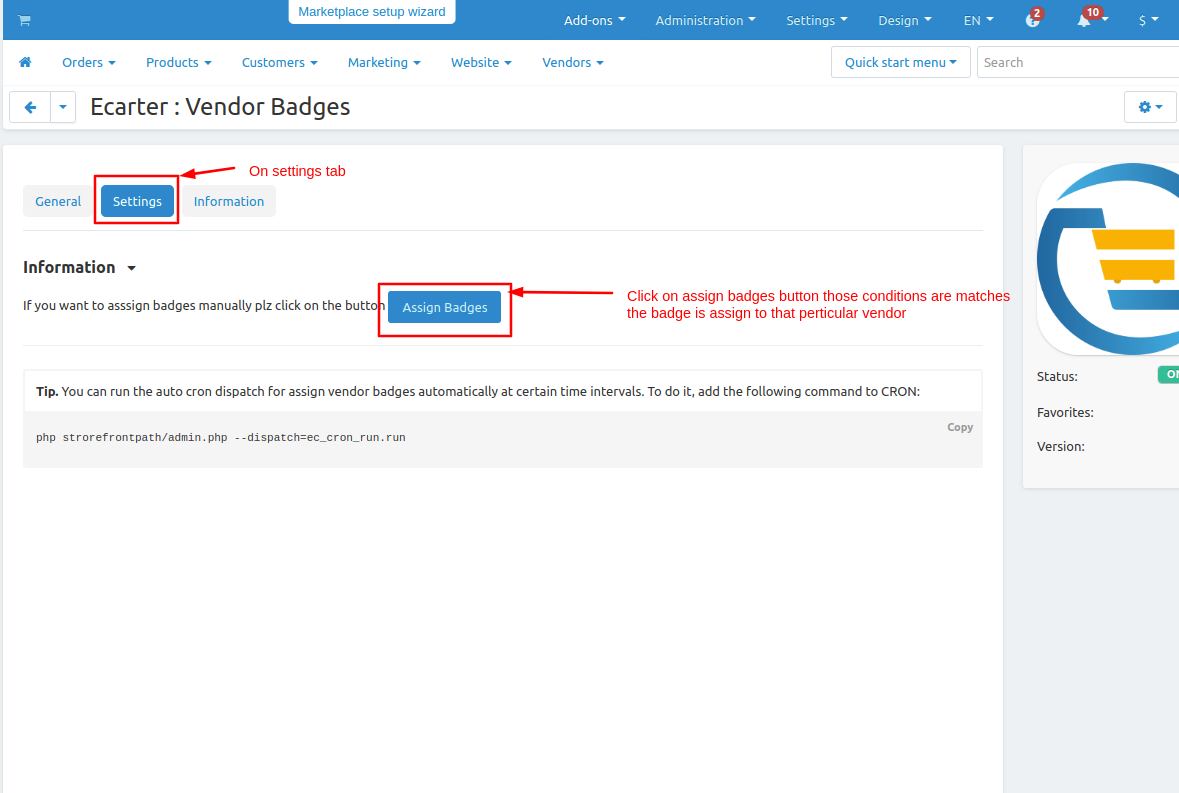
- Go to addons and open the addon.
- On settings tab
- Click on >> Assign Badges button so the badge is assigned to the vendor which matches the condition of the badge.
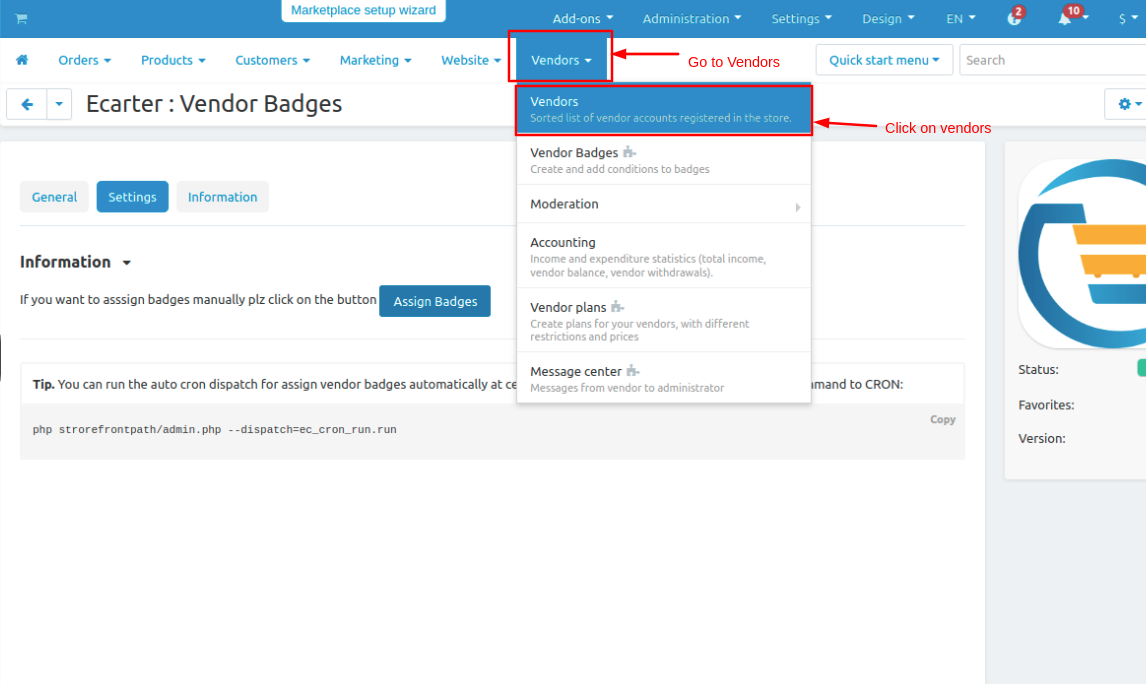
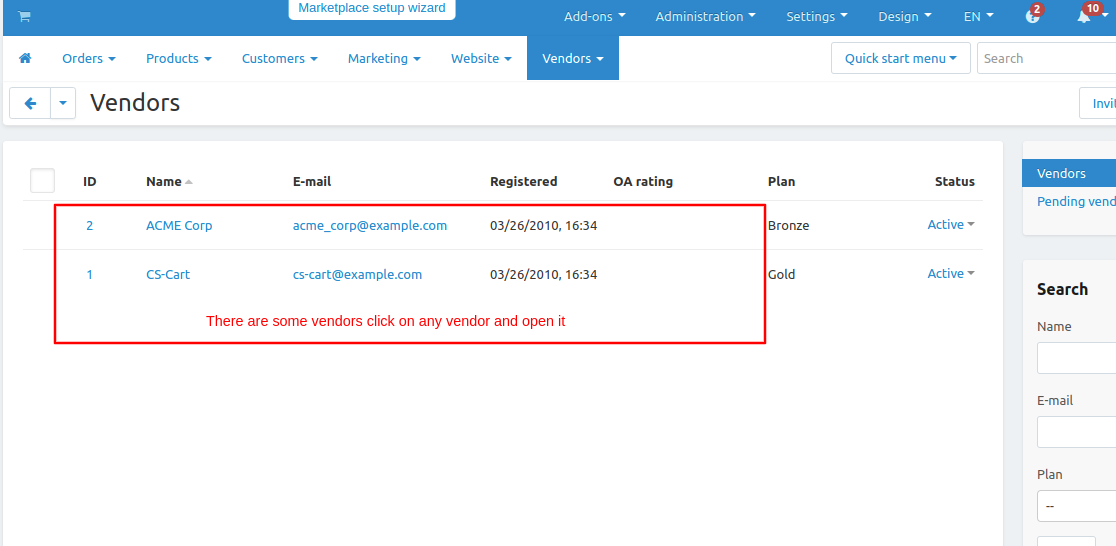
- To see which badge is assigned to the vendor go to the vendors drop-down and click on >> Vendors.
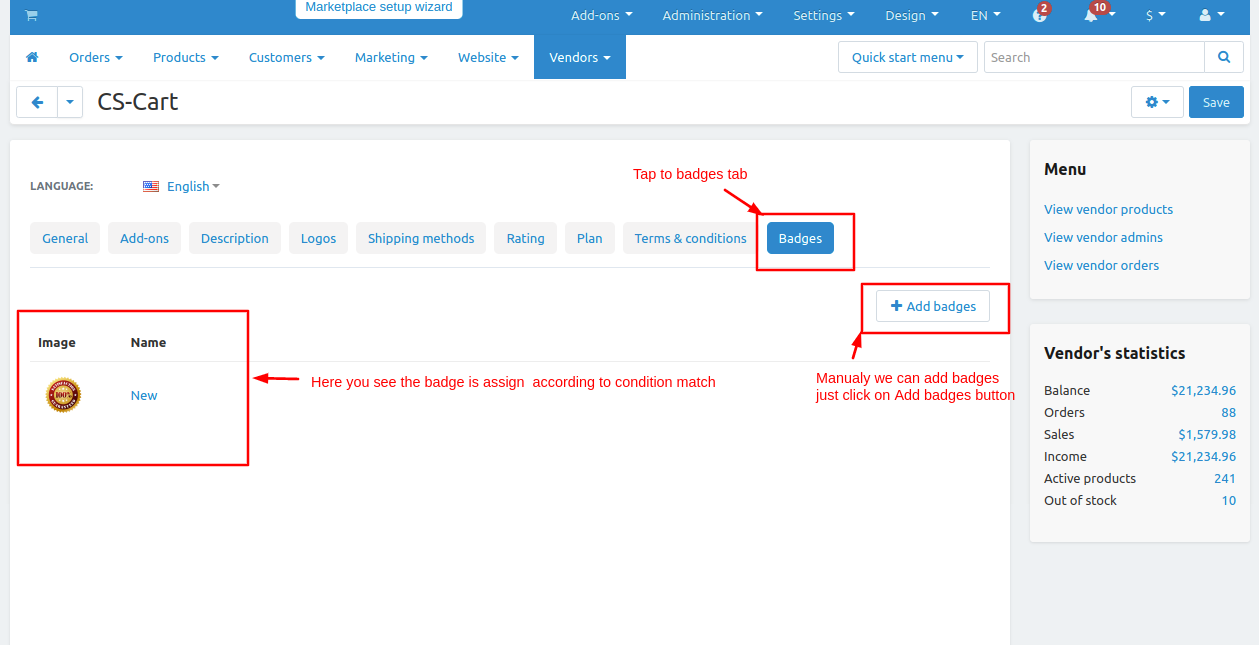
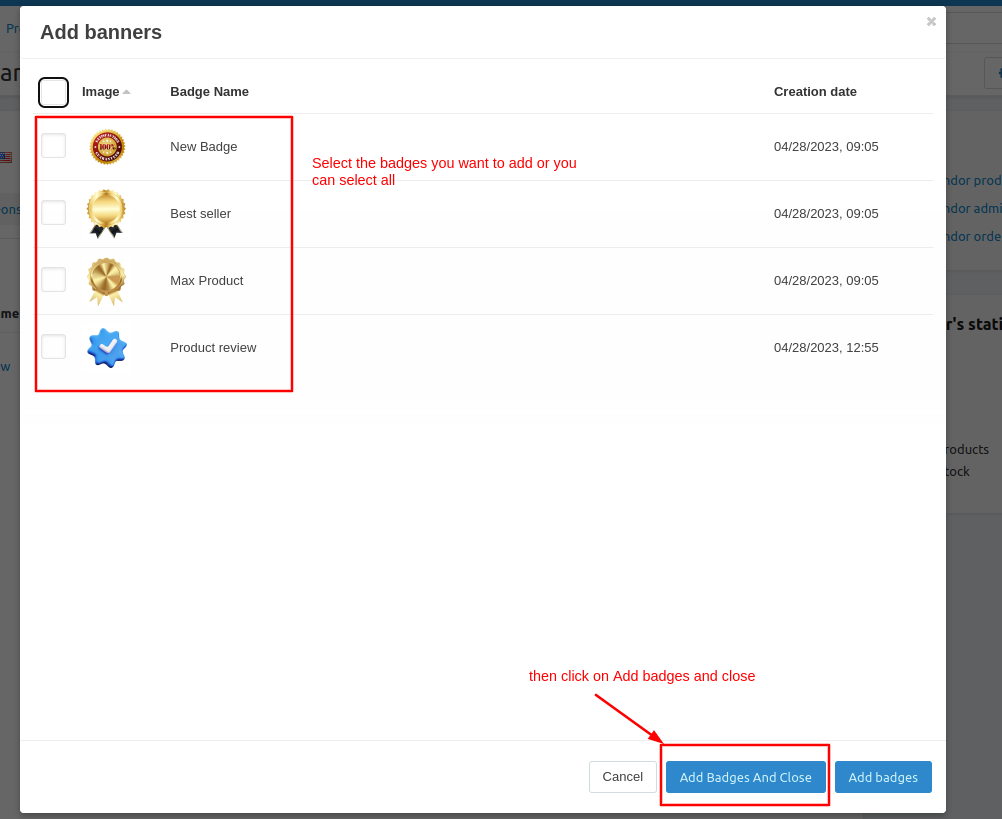
- From here you can manually add the badges for the vendor by just clicking on >> Add Badges button.
- Here you see the badges select the badge you want to add and then click on >> Add badge and close button.
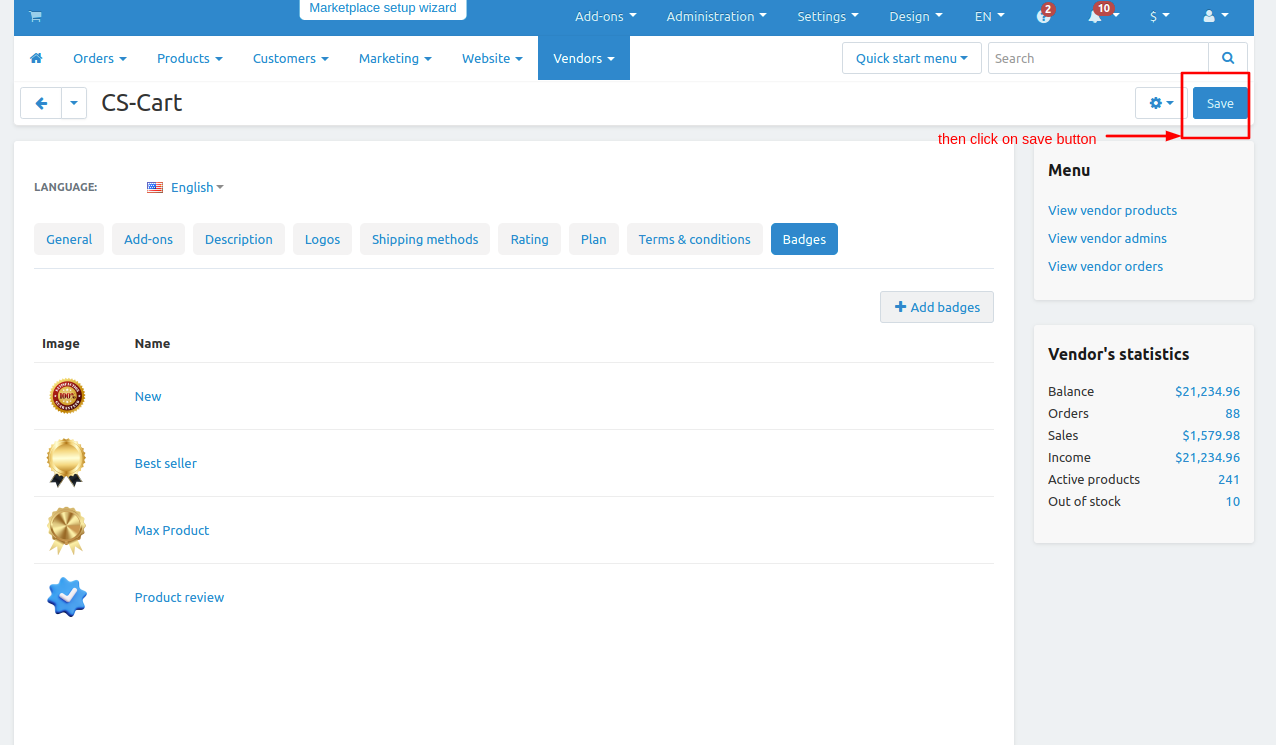
- Here you see the badges are added.
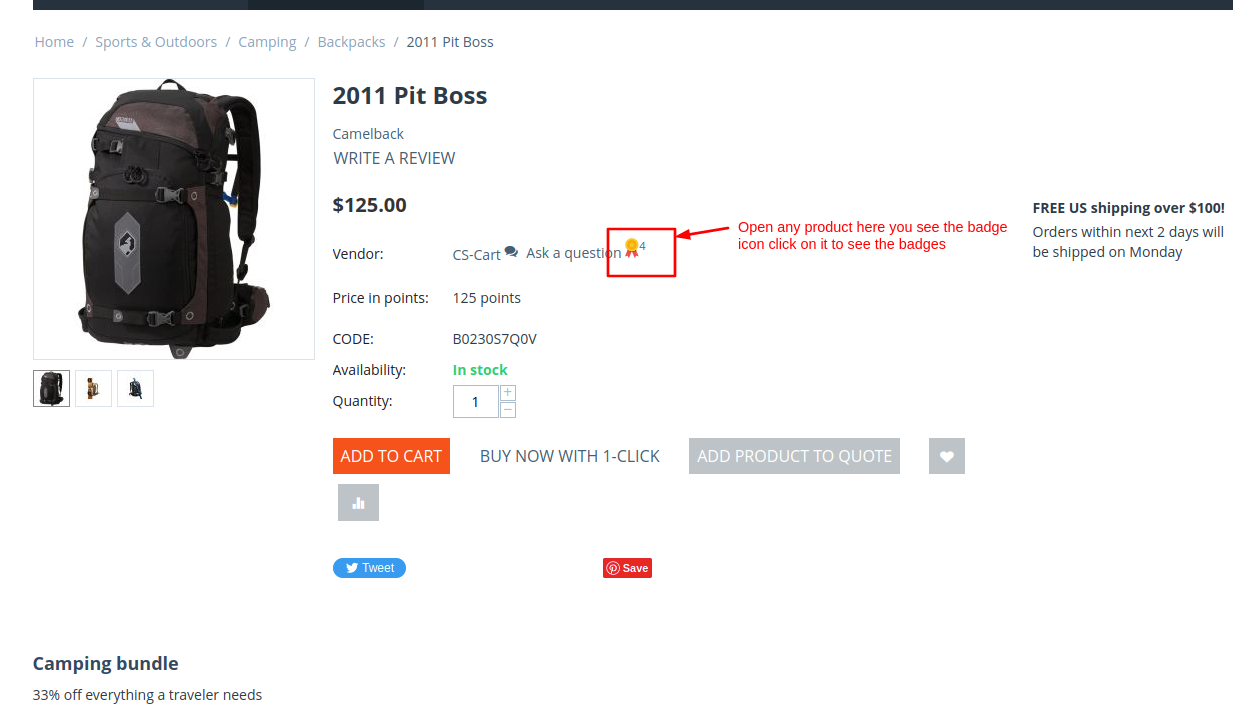
Now let's see the badges are on storefronts.
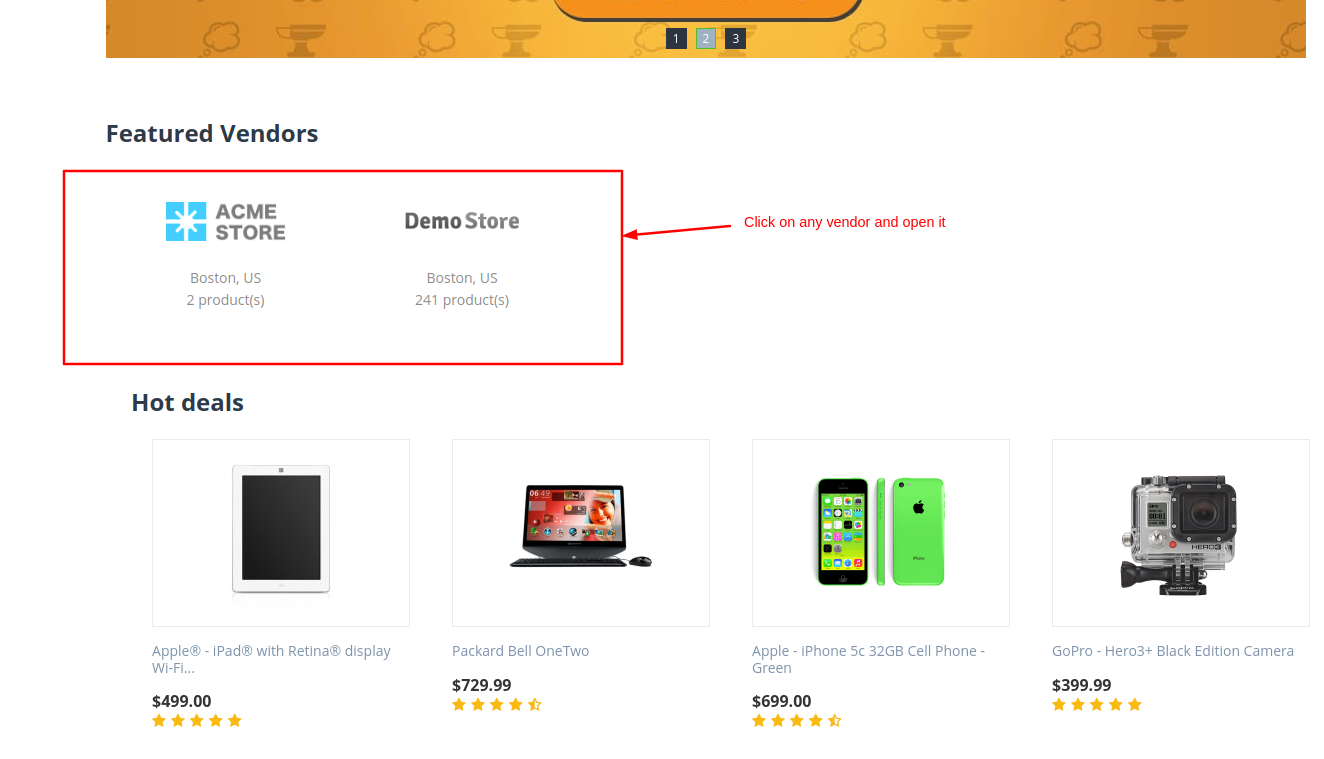
open the storefront choose the vendor and open it.
- Here you see the badges are assigned to that vendor because the conditions are matches this vendor or the admin manually adds the badges to this vendor.
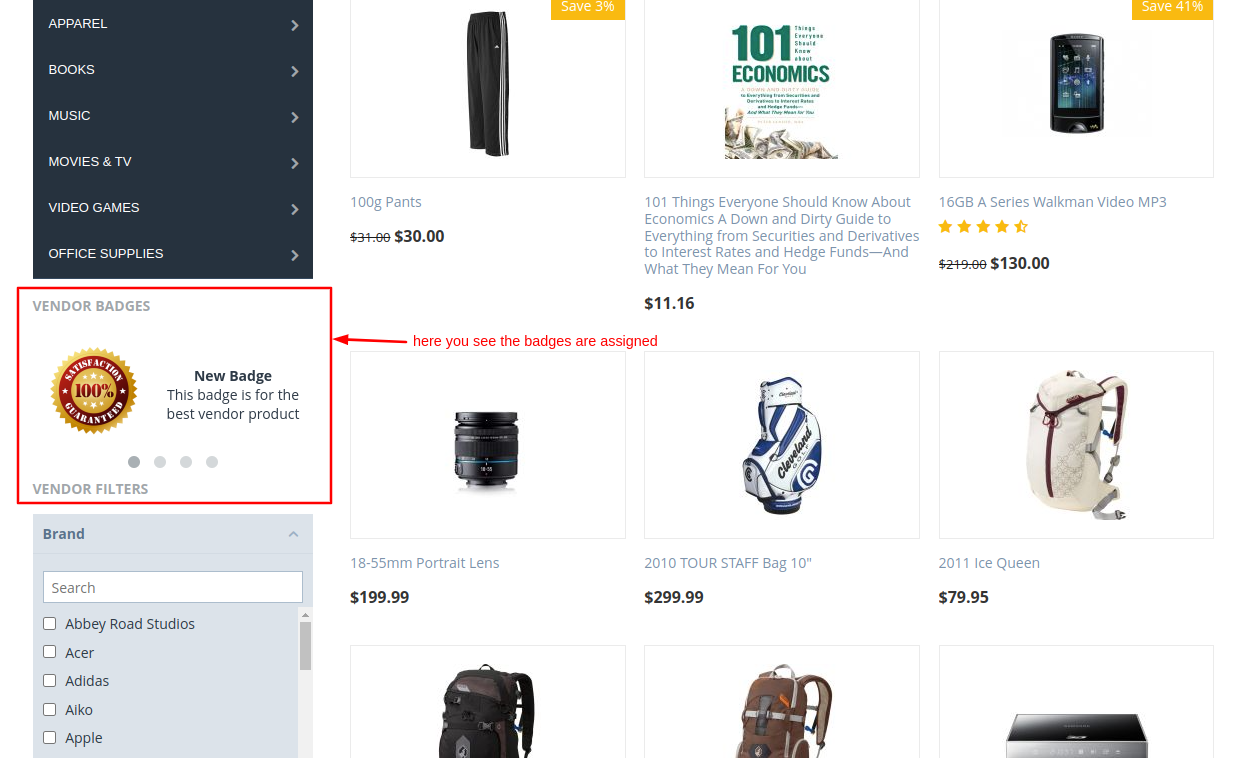
- Now open any product.
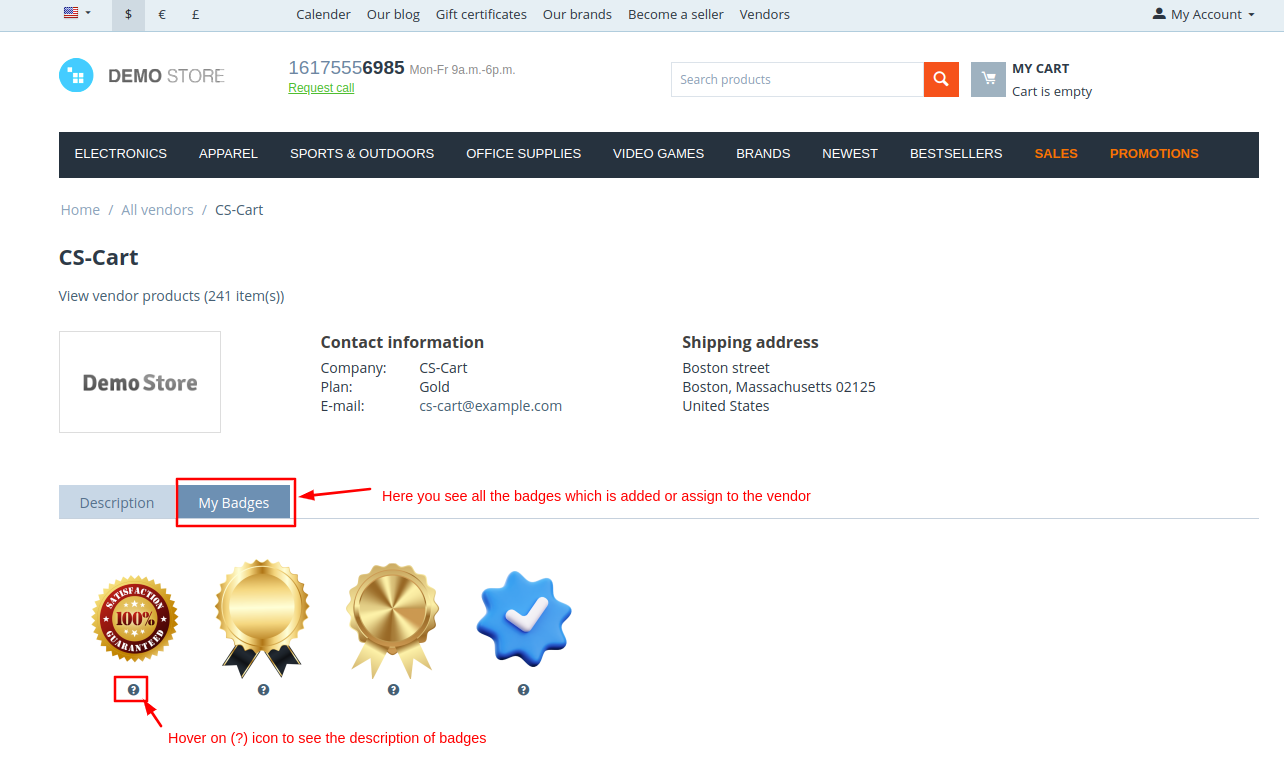
- Click on >> badge icon and here you see that the vendor has 4 badges assigned.
- Here you see the badges which are assigned to the vendor.
- If the user wants to see the badge description hover on (?) to see the description.